
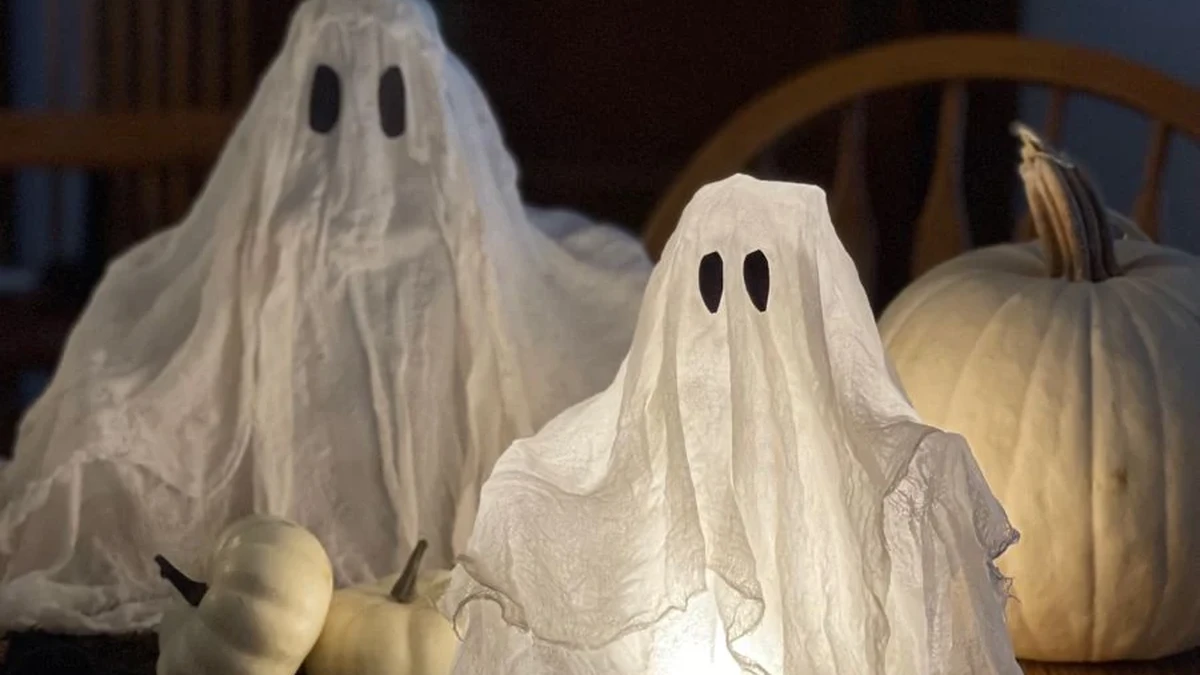
24 Cute Ghost Decor Ideas for a Friendly Halloween
Halloween does not have to be scary to be good. Some of the best decorated homes in October skip the gore completely and lean into ghosts that smile back at you. That is where cute ghost decor ideas earn their place. A sheet ghost glowing on the porch, a row of tiny clay ghosts on the mantel, or a pumpkin painted with a friendly ghost face all say Halloween without frightening the neighborhood kids or the dog. This list gathers 24 cute ghost decor ideas from real homes, porches, and tables, each built around ghosts that stay on the sweet side of spooky. You will find glowing ghosts, handmade ghosts, ghost garlands, ghost tablescapes, and porch setups, plus crafts you can finish in one evening. Every idea works with pieces you already own, like white sheets, pumpkins, candles, and string lights. Scroll through, pick the ghosts that match your style, and let your home be the friendly one on the street this October.
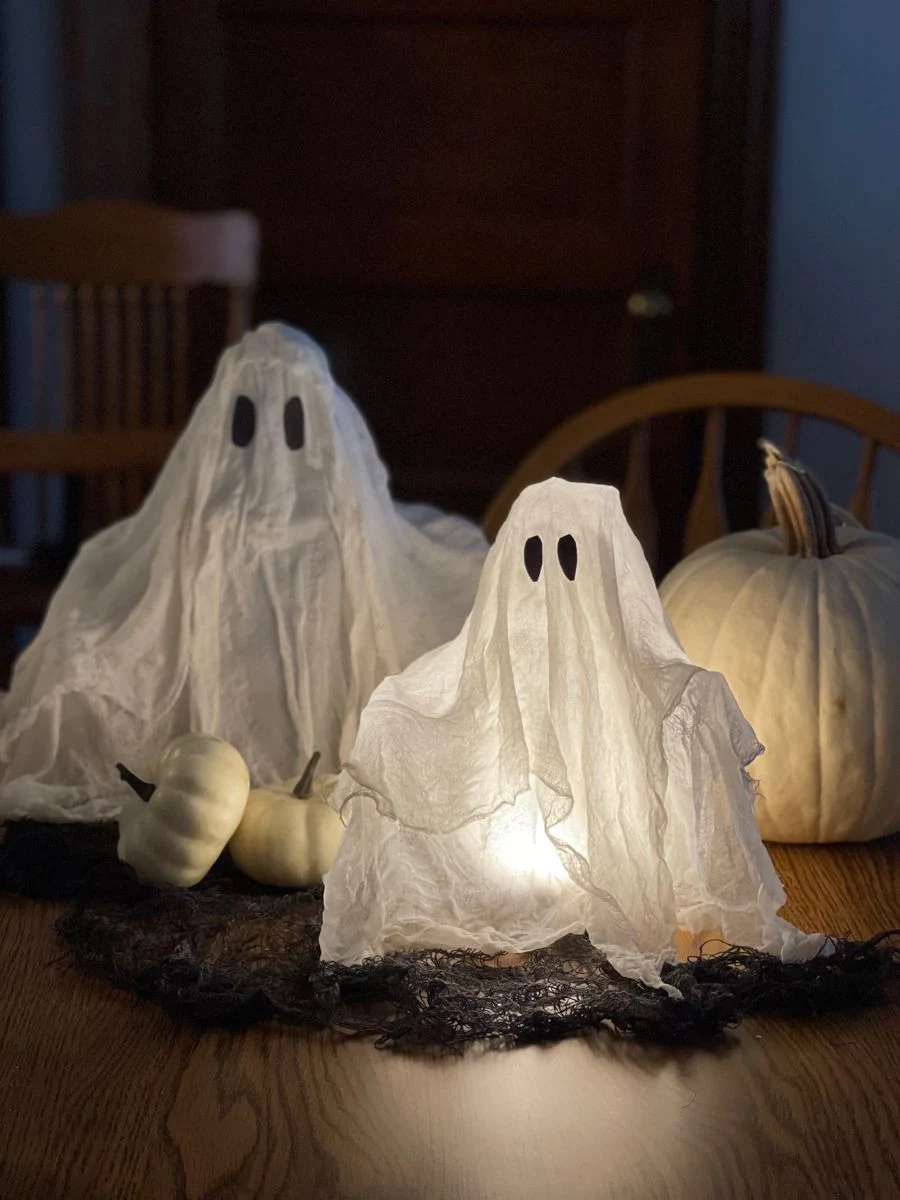
1. Drape Glowing Fairy Lights Under Mini Sheet Ghosts
Two small sheet ghosts lit from inside by fairy lights might be the friendliest Halloween vignette you can make. The warm glow shines through the white fabric and turns plain sheets into floating spirits, while white pumpkins and dark branches at the base ground the scene on a table or sideboard.
Put this one together in an evening:
- Drape white fabric over small balloon or foam heads and tie loosely at the neck
- Tuck a short strand of warm fairy lights underneath each ghost so the fabric glows
- Add black felt eyes, a must for the cute factor, and keep the mouths small or skip them
- Surround the ghosts with white pumpkins and a few bare branches for height
Set it near the entry so guests meet it first. The glow does the decorating work after dark, and the whole thing costs less than one store-bought decoration.
💡 Quick Tip
Use warm white lights, not cool white. Cool light makes fabric look blue and clinical, warm light keeps the ghosts cozy and candle-like.

2. String Smiling Ghost Lights Across the Mantel
Ghost-shaped string lights are the shortcut to a Halloween mantel. Each little ghost glows warm yellow with a smile, and a single strand draped across the wood does more than a whole box of scattered props. A carved pumpkin and lit candles beside them complete the mantel without any clutter.
Hang them well in three steps:
- Swag the strand across the mantel front, letting it dip in the middle like a garland
- Hide the plug end behind a pumpkin or a stack of books at one side
- Layer one row of small pumpkins and candles in front so the ghosts glow behind them
This is one of the easiest ideas here to store, since the lights coil back into a small box and the whole look packs flat.
🕯️ Where
Mantel, staircase railing, or across a window frame
⏱️ Time
Ten minutes to hang, zero to maintain
💡 Glow
Warm yellow, kid-friendly and pet-safe
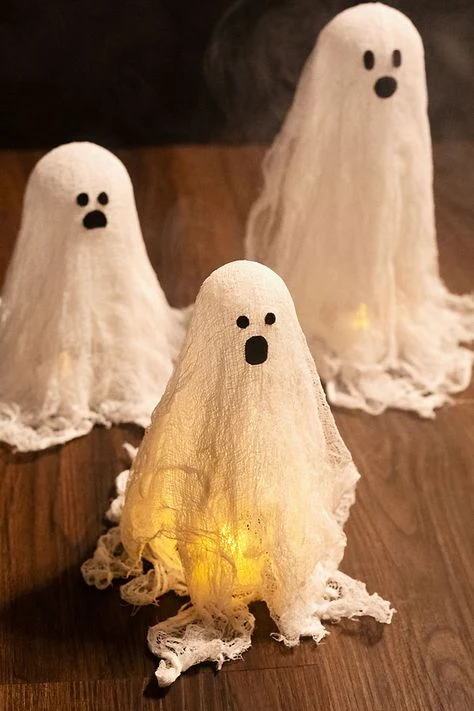
3. Craft Cheesecloth Ghosts That Glow From Within
Cheesecloth ghosts look like they drifted in from an old movie, in the best way. Stiffened white gauze holds a wispy shape, and a small light tucked inside each one makes them hover with a soft inner glow on the floor or a low table.
What makes them work:
- The stiffened cheesecloth keeps its shape, so they stand on their own without a stand
- A battery tealight inside each ghost is safe, flameless, and lasts all season
- Varying the heights, one tall ghost behind three small ones, builds a little family scene
- They read spooky from far away and sweet up close, which is the cute ghost sweet spot
Make them on a weekend afternoon and let them dry overnight. They weigh almost nothing, so storage is just a box with tissue paper.
✅ Cheesecloth ghost checklist
- White cheesecloth or gauze, two layers per ghost
- Fabric stiffener, brushed on while the cloth hangs
- Balloon or foam form to shape each ghost
- Black felt ovals for the eyes, glued last
- Battery tealights, one per ghost
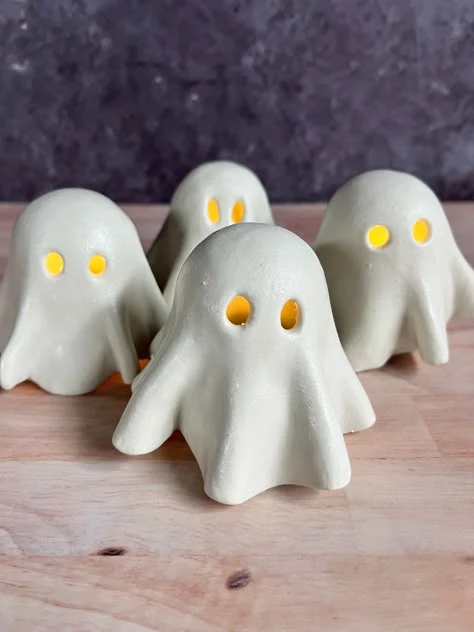
4. Set Out Ceramic Ghost Tealights With Fiery Eyes
A row of ceramic ghost tealights with glowing orange eyes turns a plain tabletop into a tiny haunted gathering. The white porcelain keeps them cute while the cut-out faces throw flickering light, and grouping five or six together reads like a ghost party in miniature.
These work best on a low surface where the glow lands at eye level, like a coffee table or a dining sideboard. A pink or blush table runner under them, like the one in this photo, softens the Halloween contrast and keeps the whole thing playful. Real tealights give the warmest flicker, but battery ones are safer if the table sits near curtains or little hands.
Style them like this:
- Cluster an odd number, five or seven, close together instead of lining them up
- Mix heights by setting a few on small books or wood slices
- Keep the background simple so the glowing faces stay the stars
Glows
vs
Unglowed
Lit tealights win every time. The same ceramic ghosts look plain by day and magical after dark, so plan this vignette for an evening corner.
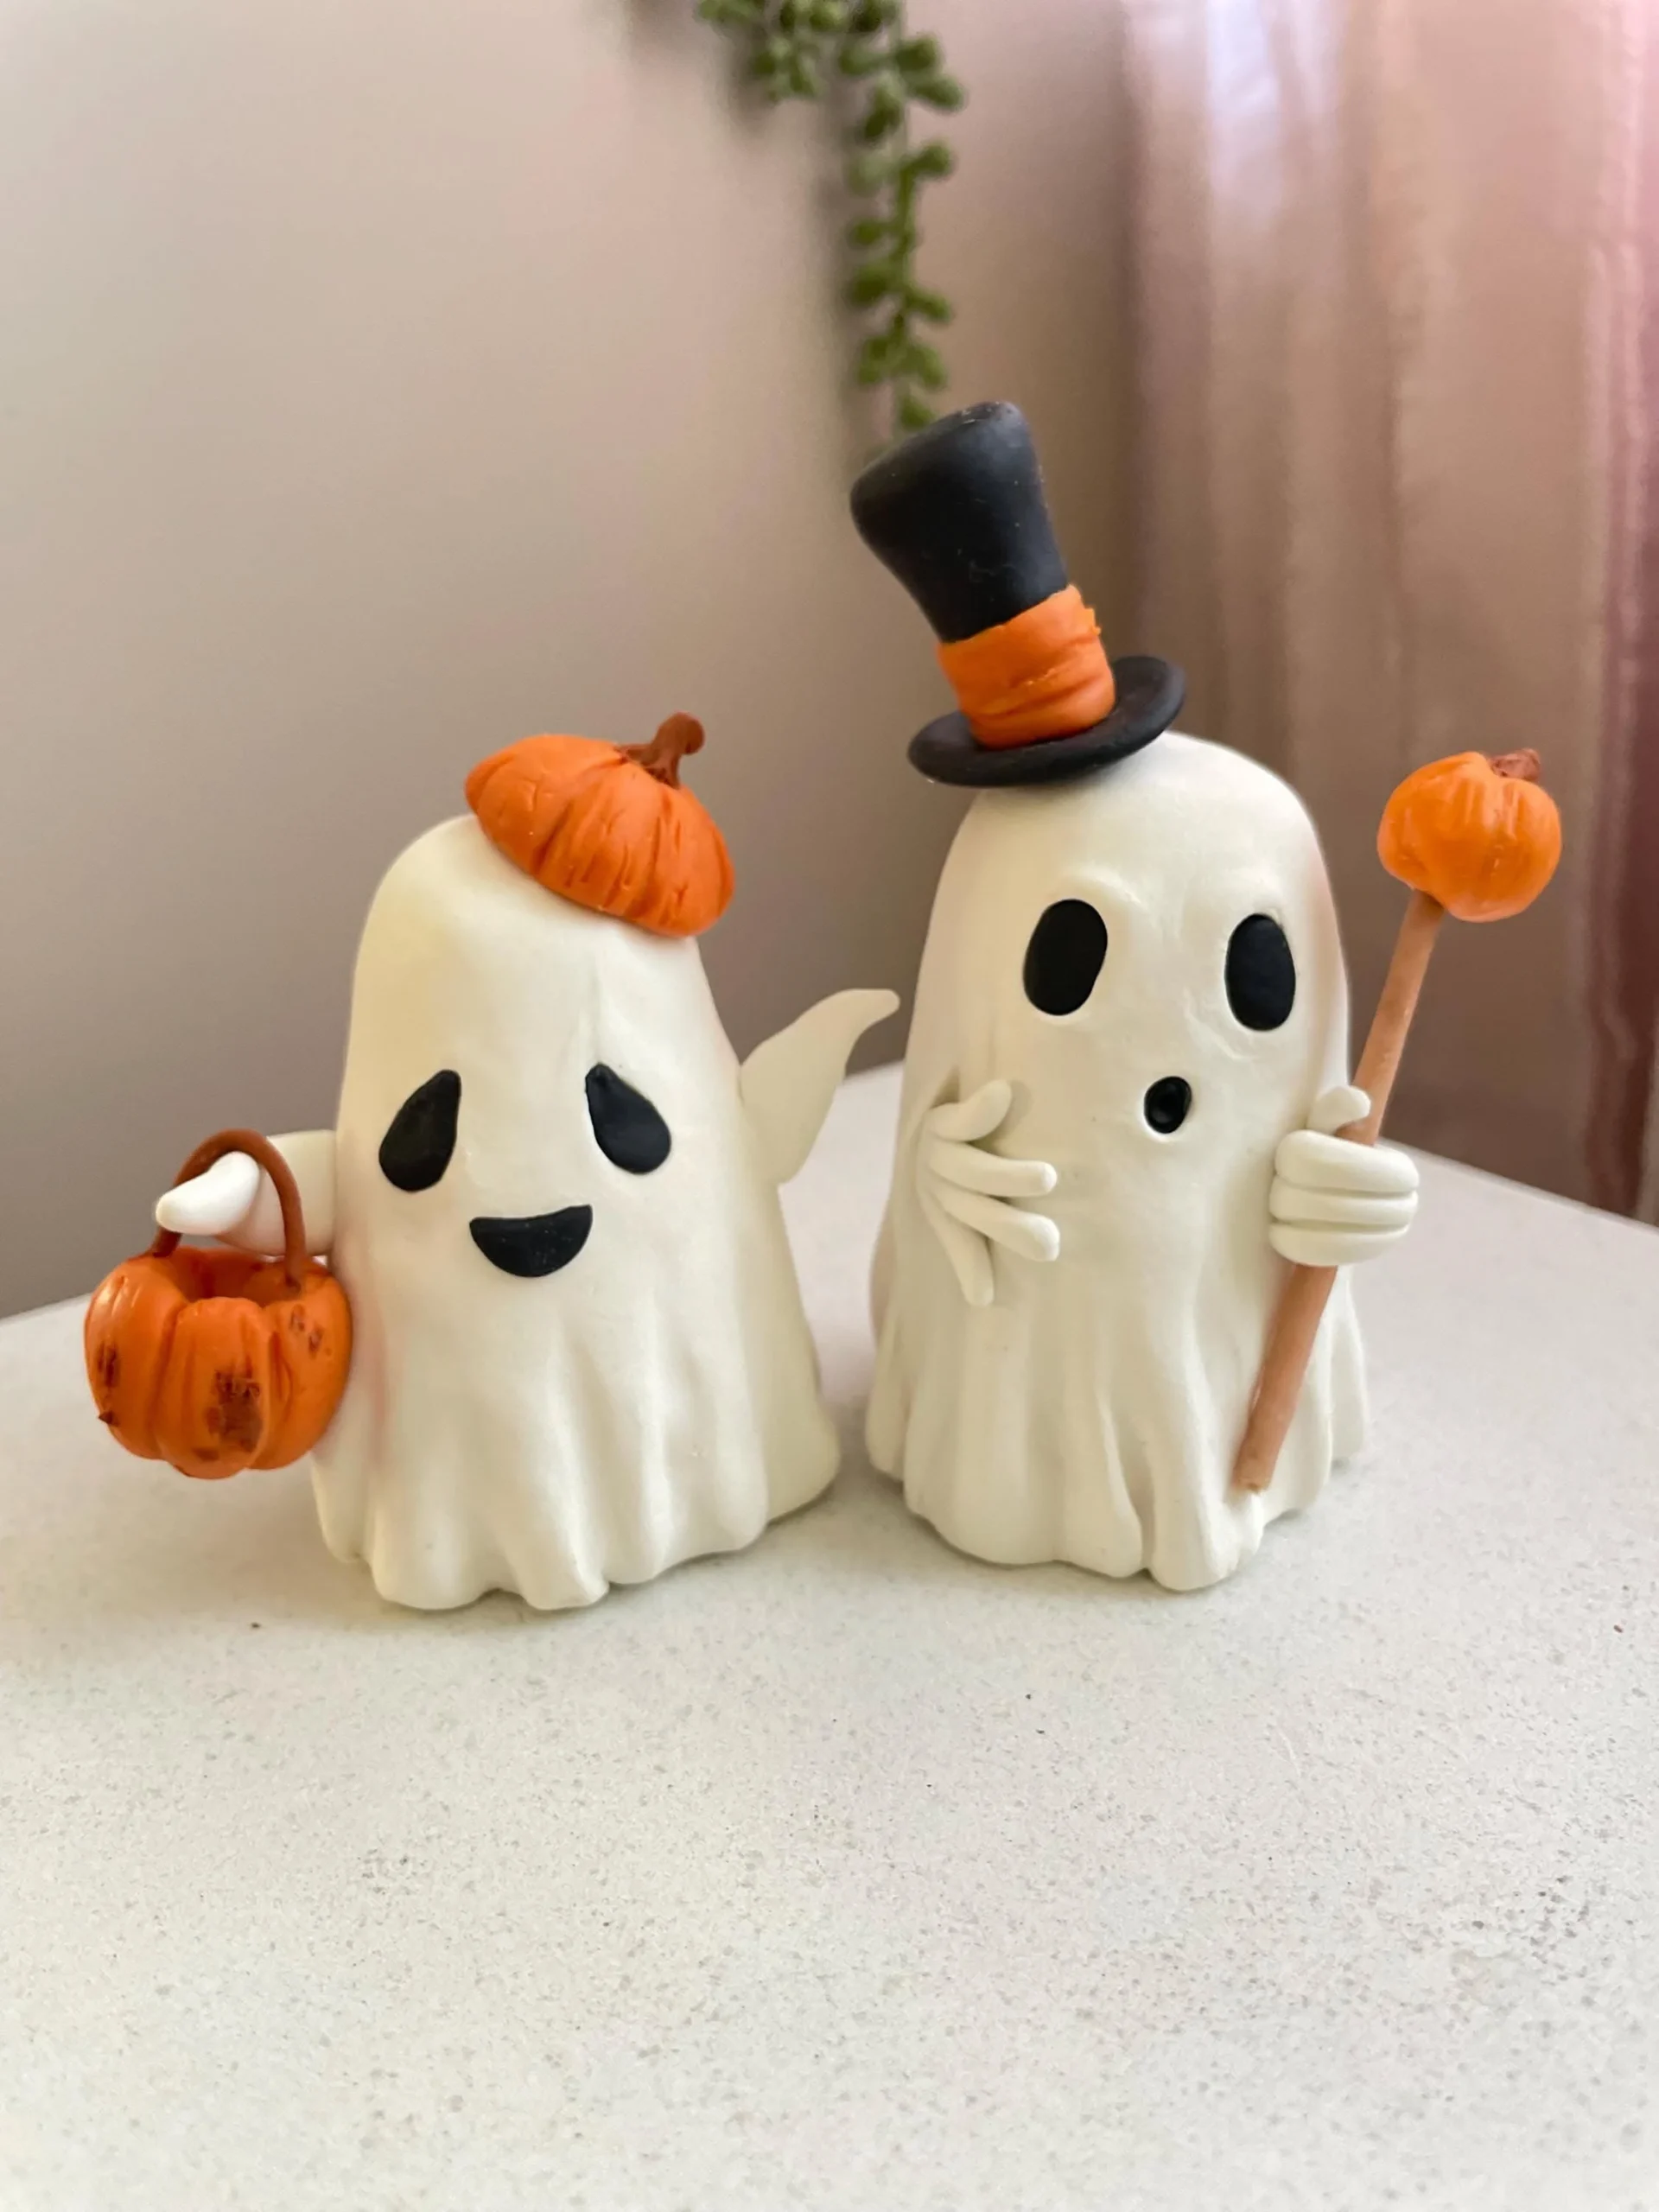
5. Pair a Top-Hat Ghost Couple on the Entry Table
Two ghost figurines dressed for a night out are pure charm. One wears a black top hat with an orange band and holds a pumpkin wand, the other carries a tiny pumpkin basket, and together they look like a couple heading to a Halloween party. A pair always reads more intentional than a single figurine alone.
Give them a proper stage:
- Place the pair on the entry console or a hallway shelf where guests pass
- Set a small pumpkin or a stack of mini pumpkins beside them for scale
- Angle them slightly toward each other, like they are mid-conversation
Dressed-up figurines like these also photograph beautifully, which is why they show up in so many Halloween posts. Keep the background calm and let the hats do the talking.
🎩 Why a pair beats a single
One figurine is a decoration. Two figurines with different accessories tell a tiny story, and stories are what guests remember and photograph.
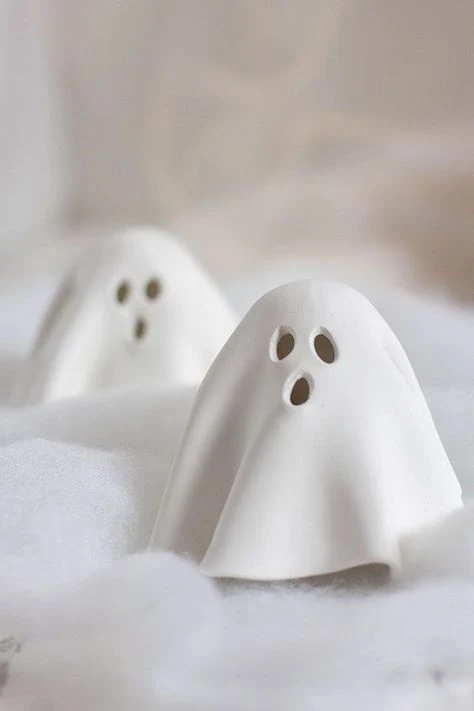
6. Shape Simple Clay Ghosts for a Minimal Look
If your home leans modern, these minimal clay ghosts are the answer. Two smooth white forms with simple black oval eyes sit on white cotton batting, and that is the entire decoration. Nothing glows, nothing moves, and somehow it is still unmistakably Halloween.
Why minimal ghosts win in calm interiors:
- The plain white clay matches Scandinavian and neutral palettes without a fight
- Simple oval eyes keep them cute instead of cartoonish
- Cotton batting underneath doubles as fake snow-like texture and hides the base
- They work from September through November without looking dated
Air-dry clay from any craft store is all you need, and the whole project takes an hour plus drying time. Make three or five for a set, since odd numbers photograph best.
⚖️ Minimal vs maximal
| Minimal ghosts | Two pieces, neutral shelf, calm |
| Maximal ghosts | Whole porch, glowing, layered props |
Both are valid. Match the ghost count to the room, not the holiday.
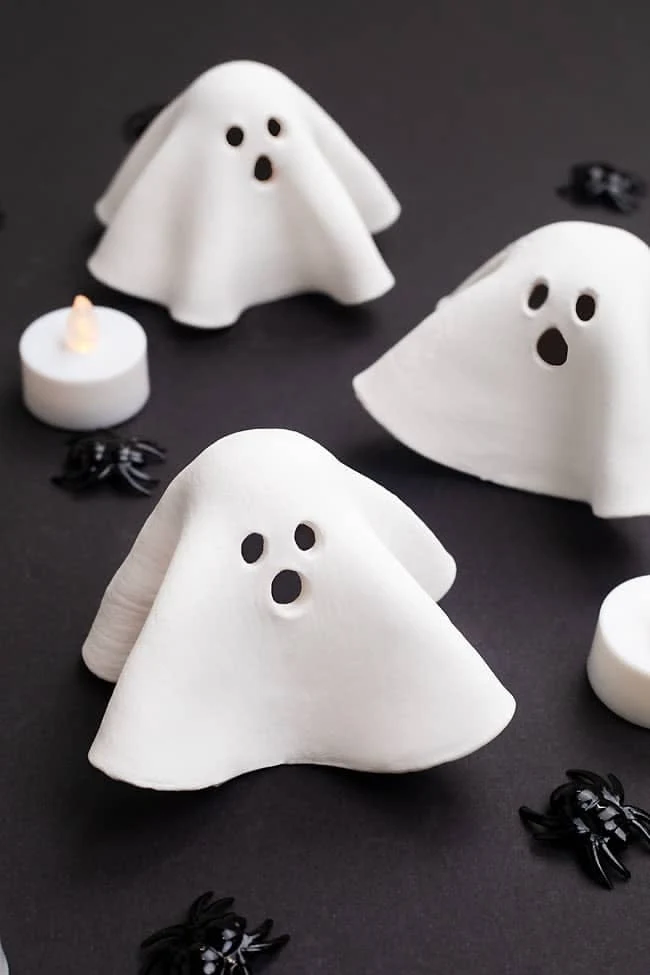
7. Gather Clay Ghosts Around One Candle
Three white clay ghosts circled around a single lit tealight look like they are sharing a secret. The candle in the middle throws soft light up under their chins, which sounds spooky but reads cozy, especially with tiny black spiders scattered nearby for a wink of mischief.
This one lives on contrast: handmade ghosts on a black surface, one warm flame in the center. Keep the ghosts close enough that their shadows touch. A trio is the magic number here, since two feels sparse and four starts to crowd the candle. If spiders are not your thing, swap them for a few dried leaves or mini pinecones and the mood stays exactly as sweet.
Assembly notes:
- Use a real tealight in glass or a flickering battery candle, either works
- Place the tallest ghost at the back so every face catches the light
- Scatter the tiny accents last, working from the candle outward
🕯️
One flame
Lights all three ghosts at once
👻
Three ghosts
A circle, never a straight line
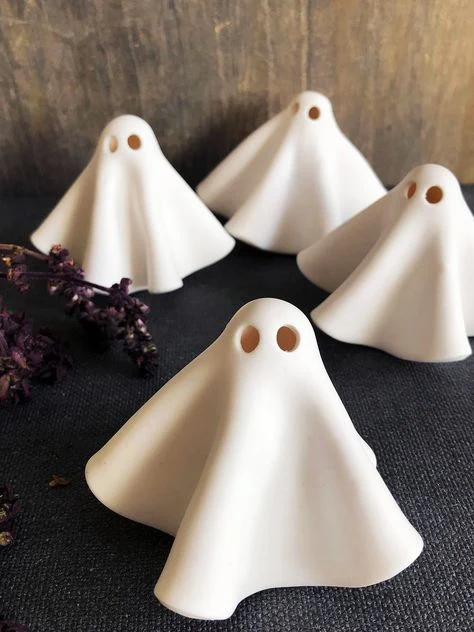
8. Group Five Tiny Clay Ghosts on Dark Fabric
Five handmade clay ghosts in different sizes, parked on a dark cloth, make a whole haunted family in one handful of clay. The white figures pop hard against the dark background, and the tiny black eyes give each one its own personality, the tall one serious, the small ones up to no good.
Make the family in an afternoon:
- Roll air-dry clay into five teardrop shapes, each a different height
- Pinch a flat base on each so they stand without tipping
- Press in tiny black bead or painted eyes once the clay firms up
- Arrange on dark fabric, tallest in back, smallest in front
Kids can make these with you, since there is no carving and no heat. Their lopsided ghosts will be the cutest ones in the group.
📏 Size the family
- The elder: tallest ghost, center back, calm eyes
- The twins: two medium ghosts, flanking the elder
- The littles: two small ghosts up front, slightly tilted
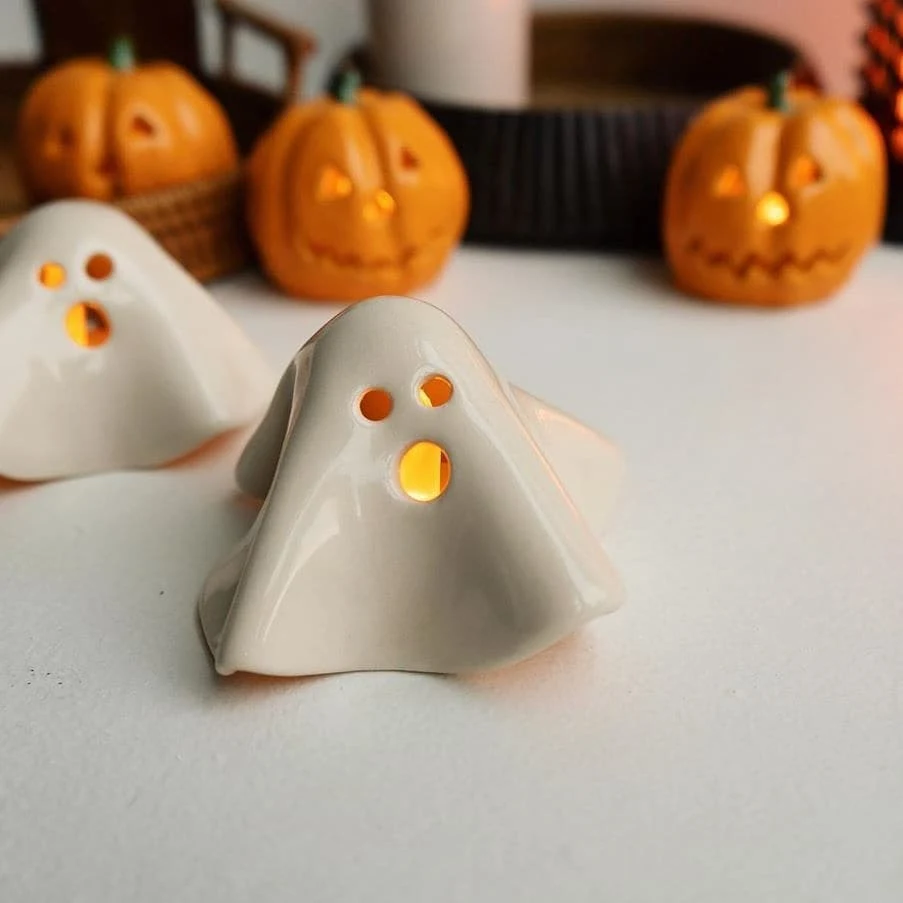
9. Light Ceramic Ghosts Beside Mini Pumpkin Lanterns
Ceramic ghosts glowing orange through cut-out eyes and mouths, backed by small carved pumpkin lights, give you two kinds of glow in one vignette. The ghosts throw patterned light, the pumpkins throw warm wash, and on a white table the whole thing looks like a miniature Halloween village.
What keeps it cute instead of creepy:
- The ghost faces are simple cut-outs, surprised ovals rather than snarls
- White and orange dominate, with no black except the shadows
- Everything is small scale, which reads playful instead of haunted-house
- The white table bounces the light around so nothing sits in darkness
This is a strong pick for a dining sideboard during October dinners. Light everything about an hour before guests arrive and let the room fill with the glow.
💡 Quick Tip
Cluster all the lights on one side of the table and leave the other side dim. One glowing corner beats a evenly lit table every time.
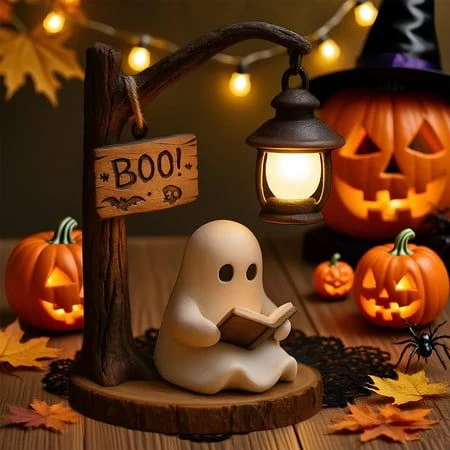
10. Style a Reading Ghost Beside a Lantern
A beige ghost figurine caught mid-chapter, book in hand beside a lit lantern, is the introvert of Halloween decor. Set on a wooden slice with a BOO sign and glowing jack-o-lanterns behind it, the scene tells a whole story: a quiet ghost settling in with a good book while the party happens elsewhere.
Vignettes like this are why stylists love figurines. The ghost gives you a character, the lantern gives you light, the wood slice gives you a stage, and the background pumpkins give you depth, four layers in about ten inches of shelf. Place it on a bookshelf and the joke lands even harder, since the ghost is literally among the books.
Copy the layers:
- Back layer: glowing pumpkins or a BOO sign for Halloween context
- Middle layer: the figurine and lantern, the actual scene
- Front layer: wood slice or tray to frame it as one display
📚 Before
Figurine alone on a bare shelf, easy to miss
✨ After
Figurine plus lantern, slice, and glowing backdrop, a scene
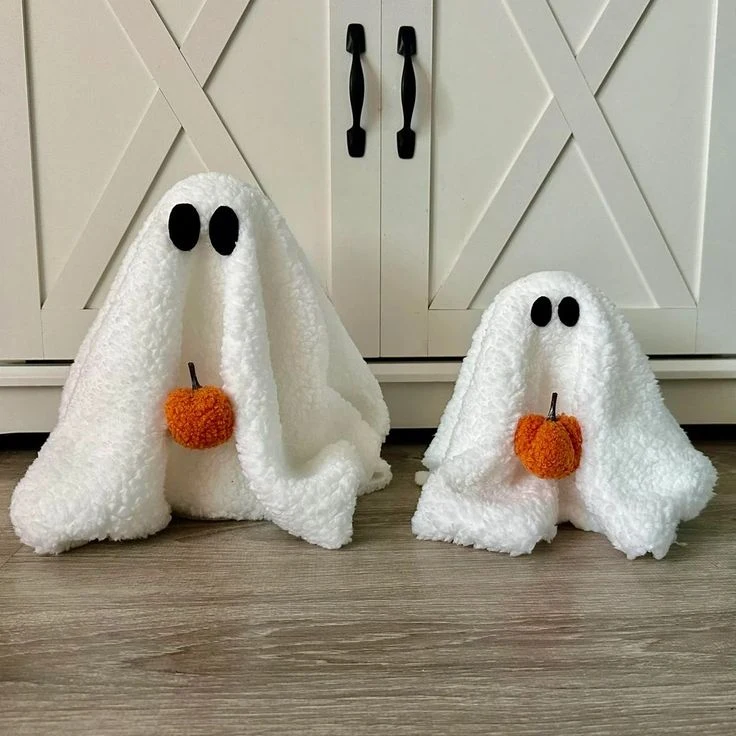
11. Sit Plush Towel Ghosts by the Front Door
Two plush white towel ghosts clutching tiny orange pumpkins, sitting on the floor by white cabinets, are basically Halloween greeters. The towel texture makes them look soft and huggable rather than haunting, which is exactly the energy you want at the door.
Set the greeting in minutes:
- Sit the ghosts flanking the door or the console, pumpkins in their laps
- Tuck a real mini pumpkin beside each one for a fresh pop of orange
- Keep the floor around them clear so they read as a deliberate pair, not clutter
Floor-level decor gets noticed by kids first, which makes this a favorite for families. The ghosts are sturdy enough to survive being hugged by a toddler.
🚪 The door rule
Decorate the floor by the door, not just the door itself. Guests look down as they step in, and floor ghosts catch that first glance.
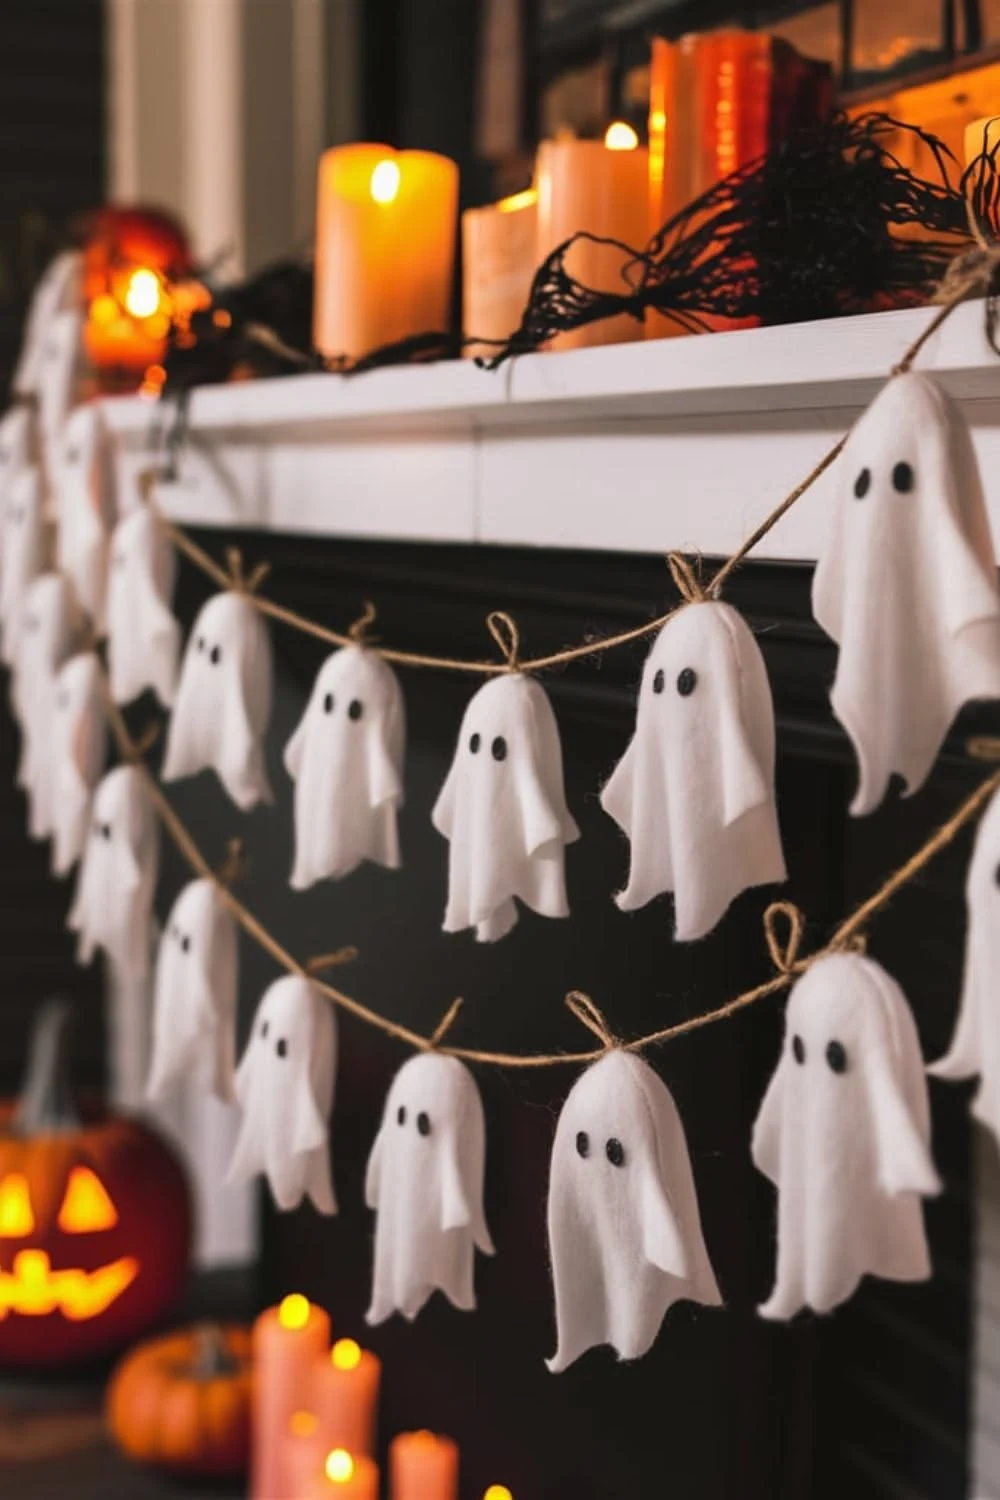
12. Clip Fabric Ghosts to a Twine Mantel Garland
A twine garland strung with small white fabric ghosts turns a mantel into a ghost parade. Each ghost hangs from a tiny clothespin, swaying gently, with glowing orange candles below to light them from underneath. The whole thing feels handmade in the best way, because it probably is.
String it up:
- Cut simple ghost shapes from white felt or fabric, no sewing needed
- Clip them to natural twine with mini wooden clothespins
- Drape the garland across the mantel with a soft dip in the center
- Set candles or battery lights on the mantel below for the under-glow
This garland also works across a window or along a staircase. Anywhere you can tie two ends of twine, the ghosts can march.
🧵 Felt vs fabric
| White felt | Stiff, holds shape, no fraying, best for beginners |
| Cotton fabric | Softer drape, frays at edges for a wispy look |

13. Frame a Pink BOO Banner With a Balloon Garland
A pink BOO letter banner wrapped in a pink, purple, and black balloon garland is Halloween with a party hat on. The balloon arch frames the letters like a photo backdrop, and the tiny ghost and bat accents tucked between balloons keep it firmly in October instead of birthday territory.
This is the statement piece of the list, so give it the statement wall: above the dessert table, behind the photo corner, or on the biggest empty wall in the party room. Balloon garlands look harder than they are, since balloon tape and a hand pump do most of the work, and the whole arch goes up in about an hour.
Build the arch:
- Hang the BOO letters first, centered on the wall at eye level
- Build the balloon garland around them, densest at the corners
- Tuck ghost and bat cutouts into the gaps last, where the eye naturally rests
🎈 Balloon garland formula
- Mix 3 sizes: 5-inch, 10-inch, and 18-inch balloons
- Stick to 3 colors max, here pink, purple, and black
- Cluster in odd groups of 3 or 5 on the tape
- Fill gaps with small ghost and bat cutouts
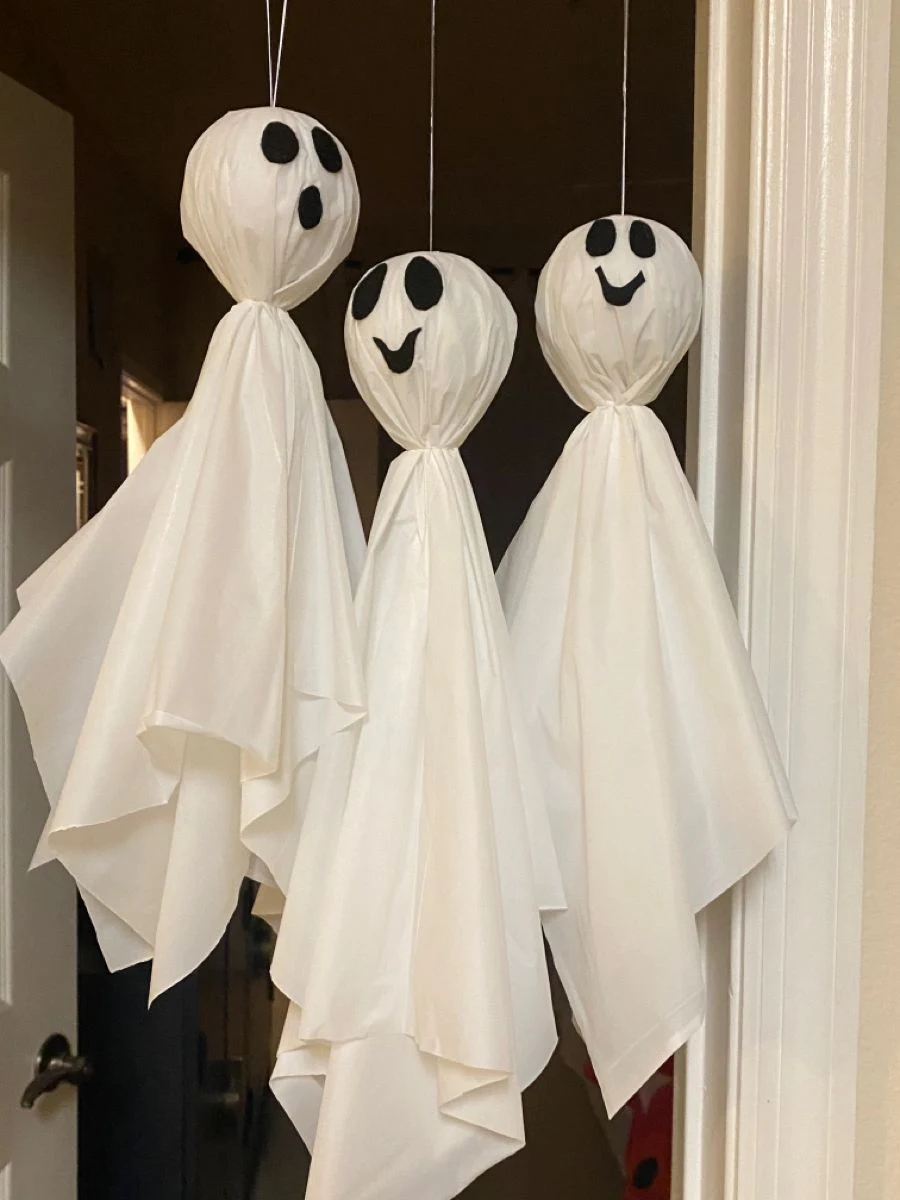
14. Hang Smiling Sheet Ghosts in a Bright Doorway
Three white sheet ghosts with smiling faces, hanging from strings in a bright doorway, are the classic Halloween craft done right. Daylight does the lighting work, the smiles do the mood work, and the gentle sway when the door opens adds a little life.
Hang them in an afternoon:
- Drape white sheets over foam balls and tie at the neck with string
- Draw smiling faces with a black marker, simple arcs for eyes and mouth
- Hang at staggered heights from the doorframe with clear fishing line
- Vary the sizes so they read as a group, not a row
A bright doorway is the ideal spot because the backlight makes the white sheets glow. Avoid dark hallways for this one, since the ghosts need light to look friendly.
😊 Smile shape
Upward arcs for eyes and mouth, nothing angular
📐 Heights
Stagger by 6 to 8 inches, tallest in the middle
🧵 String
Clear fishing line so the ghosts look floating
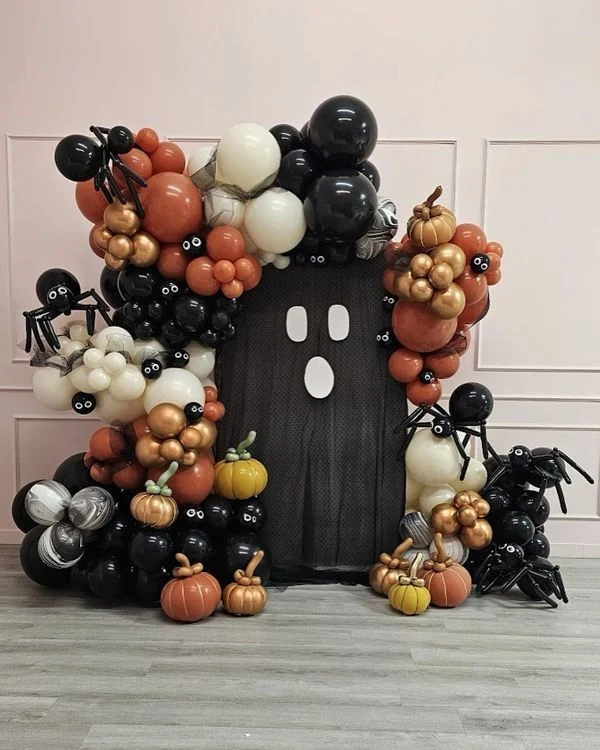
15. Frame the Door With a Balloon Arch and Ghost Face
A tall balloon arch in black, white, orange, and gold framing a black front door painted with a cute ghost face is the porch that stops foot traffic. The arch gives you height and color, the ghost face on the door gives you the character, and together they turn trick-or-treating into an event.
Why this combo works so well:
- The arch frames the door like a picture frame, drawing every eye to the entrance
- Four colors keep it festive without tipping into chaos
- The ghost face is painted on removable material, so the door itself stays safe
- Gold balloons catch the porch light and glow after dark
Build the arch the weekend before Halloween so it is fresh for the big night. One arch plus one ghost face beats ten scattered porch props.
💡 Quick Tip
Paint the ghost face on black poster board cut to fit the door, not on the door. It lifts off November 1 with zero cleanup.
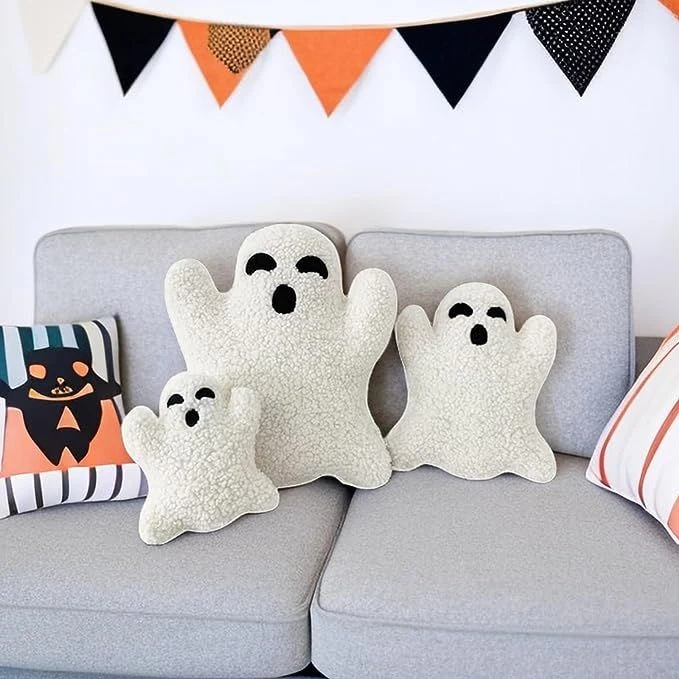
16. Pile Ghost Throw Pillows on the Couch
Three white ghost-shaped throw pillows on the couch, under a black-and-orange triangle bunting, bring Halloween into the living room without touching a single permanent thing. The pillows are the decor and the seating upgrade at once, which makes them the highest comfort-per-dollar idea on this list.
Seasonal pillow swaps are the oldest decorator trick for a reason. Store your everyday pillows for October, bring out the ghosts, and the whole room changes mood in five minutes. The bunting above adds the Halloween signal so the ghosts read as seasonal instead of random, and come November the ghosts go back in the box.
Style the pile:
- Use odd numbers, three or five ghost pillows, never two or four
- Mix ghost pillows with one solid orange or black pillow for contrast
- Keep everyday throw blankets, since cozy plus spooky is the goal
🛋️ Before
Everyday pillows, room says nothing about October
👻 After
Ghost pillows plus bunting, instant Halloween living room
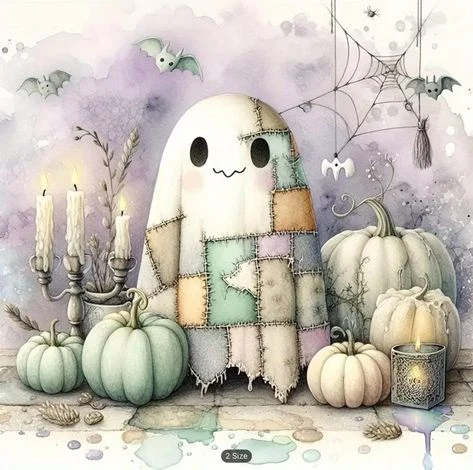
17. Hang a Patchwork Ghost Art Print
A watercolor patchwork ghost print, stitched together from pastel squares with pumpkins and candles around it, is wall art that happens to be Halloween. The patchwork style keeps it crafty and warm, and the pastel palette means it hangs happily in a bedroom or hallway, not just the party room.
Hang it like real art:
- Frame it simply, thin wood or white, so the patchwork stays the focus
- Hang at eye level in a spot you pass daily, hallways are perfect
- Pair with one small pumpkin on the console below to tie it to the season
Prints are the lowest-commitment Halloween decor there is. One frame, one nail, and the wall is dressed until you swap it for the next season.
🖼️ The print rule
One framed print per room is plenty. Halloween wall art works best as a single accent, not a gallery wall.
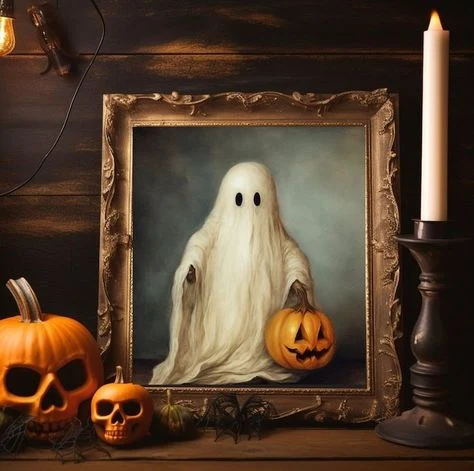
18. Frame a Ghost-and-Pumpkin Painting
A framed painting of a sheet ghost holding a jack-o-lantern, styled on a table with orange pumpkins and lit candles, brings a gallery feel to Halloween. The painting does the storytelling, the real pumpkins and candles around the frame pull it into the room, and the whole table reads as styled instead of cluttered.
Style the table around the frame:
- Prop the frame at the back, slightly raised on a book if needed
- Place real mini pumpkins in front, echoing the painted one
- Add one candle to each side for symmetry and warm light
- Keep the table surface mostly clear so the vignette breathes
Estate sales and thrift stores are full of Halloween paintings this time of year. A ten-dollar framed print styled well beats an expensive piece styled badly.
🎨 Painting vs print
| Original painting | One of a kind, texture and brushwork, thrift-store luck |
| Art print | Crisp, affordable, easy to find the exact style you want |
Either works here. What matters is the styling around the frame, not what is inside it.
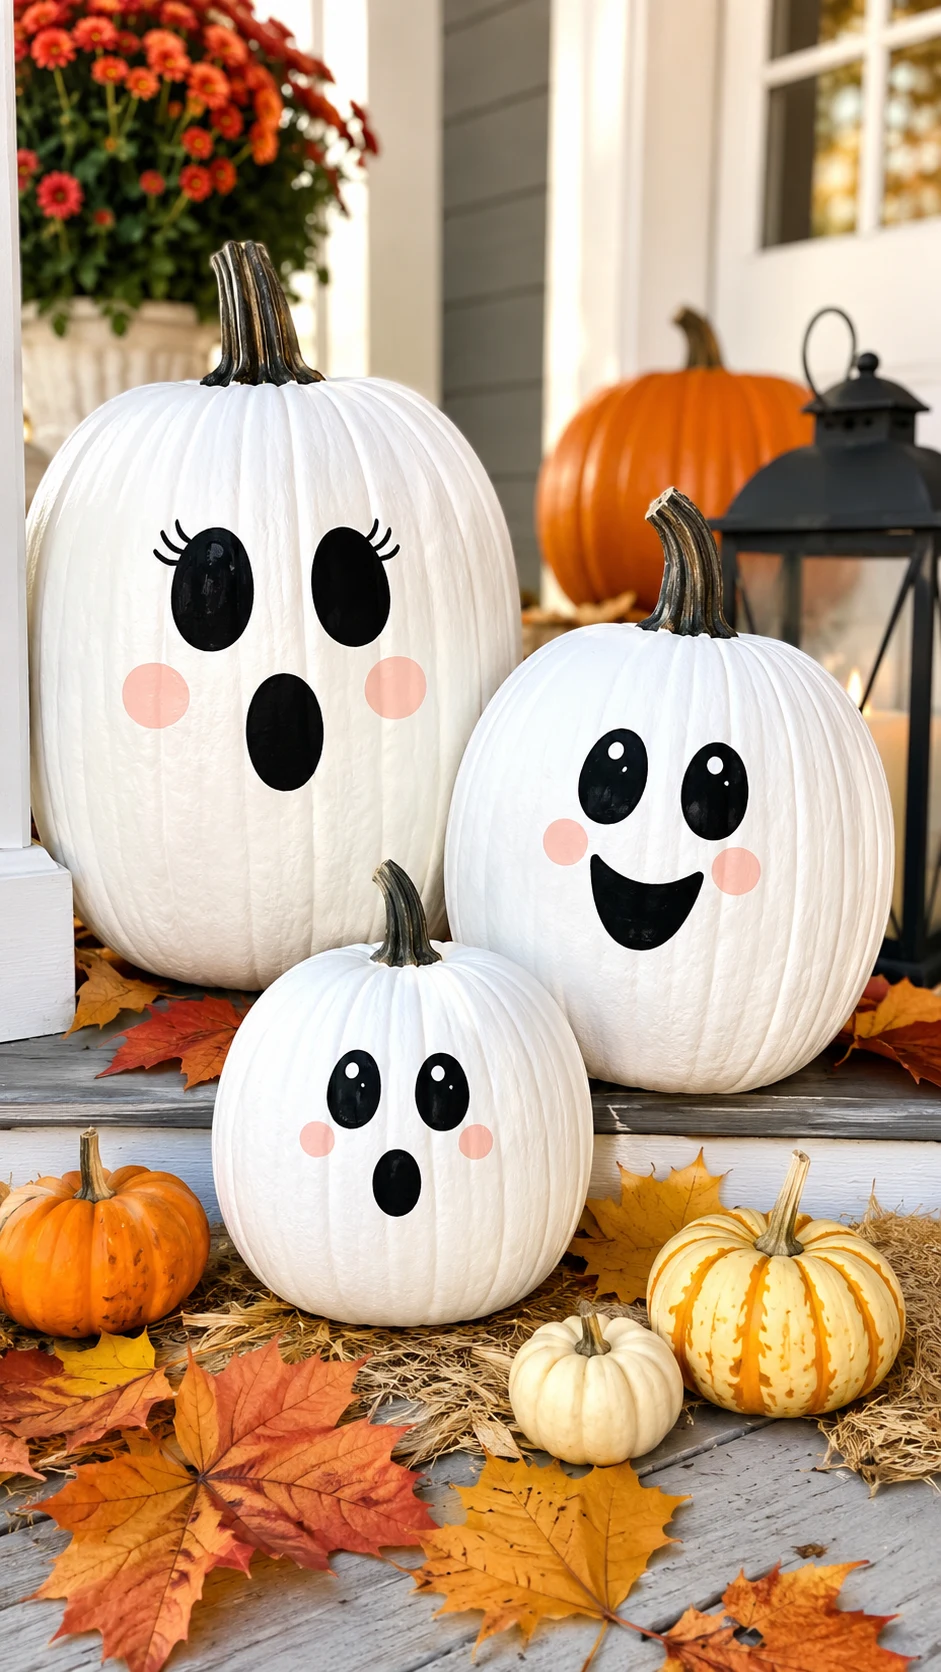
19. Paint Ghost Faces on White Pumpkins
Three white pumpkins painted with ghost faces, one with lashes, one smiling, one surprised, grouped on a porch among fall leaves, are the no-carve pumpkin idea that beats carving. No knives, no mess, no rotting by October 28, just paint and personality.
White pumpkins are the key. Their pale skin makes black painted faces pop the way orange pumpkins never quite manage, and the ghost theme gives every pumpkin a job instead of sitting there plain. Give each pumpkin a different expression, since a trio of identical faces looks stamped, while three personalities look alive.
Paint them to last:
- Wipe pumpkins clean and dry so acrylic paint grips
- Sketch faces lightly in pencil first, bold black paint second
- Seal with clear matte spray for porch weather
- Group in odd numbers with leaves tucked between them
🎃 Face ideas for the trio
- The elder: strongest ghost, center back, calm eyes
- The twins: two medium ghosts, flanking the elder
- The littles: two small ghosts up front, slightly tilted
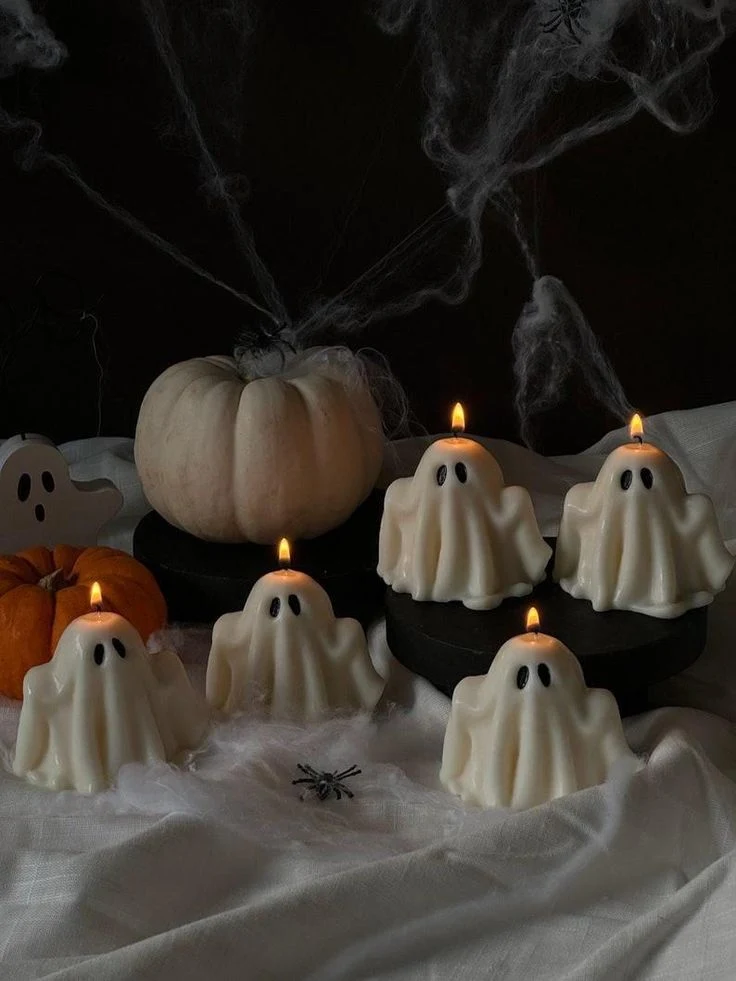
20. Burn Ghost-Shaped Candles on a Black Table
Five white ghost-shaped candles with lit wicks, lined up on a black table beside white pumpkins and spider webs, are Halloween mood lighting at its simplest. The white ghosts glow against the black surface, and as they burn down over the evenings, they get delightfully melty and haunted.
Burn them safely and beautifully:
- Set each candle on a small dish or tray, since ghost shapes drip as they melt
- Light them only when you are in the room, like any open flame
- Group with unlit white pumpkins so the display looks full by day too
- Replace the webs yearly, since dust plus webs equals a sad corner
Figural candles are decor first and light sources second. Buy them to look at, enjoy the slow melt, and accept that they will not survive the season, that is the point.
💡 Quick Tip
Burn ghost candles for one evening, then retire them to display-only. The first melt is charming, the fifth is a puddle.

21. Make a Sheet Ghost the Tablescape Centerpiece
An elegant Halloween dining table with a glowing sheet ghost as the centerpiece, tall lit candles, pumpkins, and place settings around it, proves ghosts belong at dinner parties too. The ghost rises above the table like a guest of honor, and the bat decals on the wall behind finish the scene.
Build the tablescape around the ghost:
- Center the sheet ghost first, since everything else orbits it
- Flank with tall candles for height and warm light
- Scatter small pumpkins between place settings, not in a row
- Keep plates and glasses simple so the centerpiece stays the star
This is the grown-up ghost of the list. It shows that cute does not mean childish, and a dinner party with a ghost centerpiece is one guests will talk about.
👻 Center
One glowing sheet ghost, the tallest thing on the table
🕯️ Sides
Tall candles and pumpkins at mid height
🍽️ Edges
Simple place settings, quiet so the middle shines
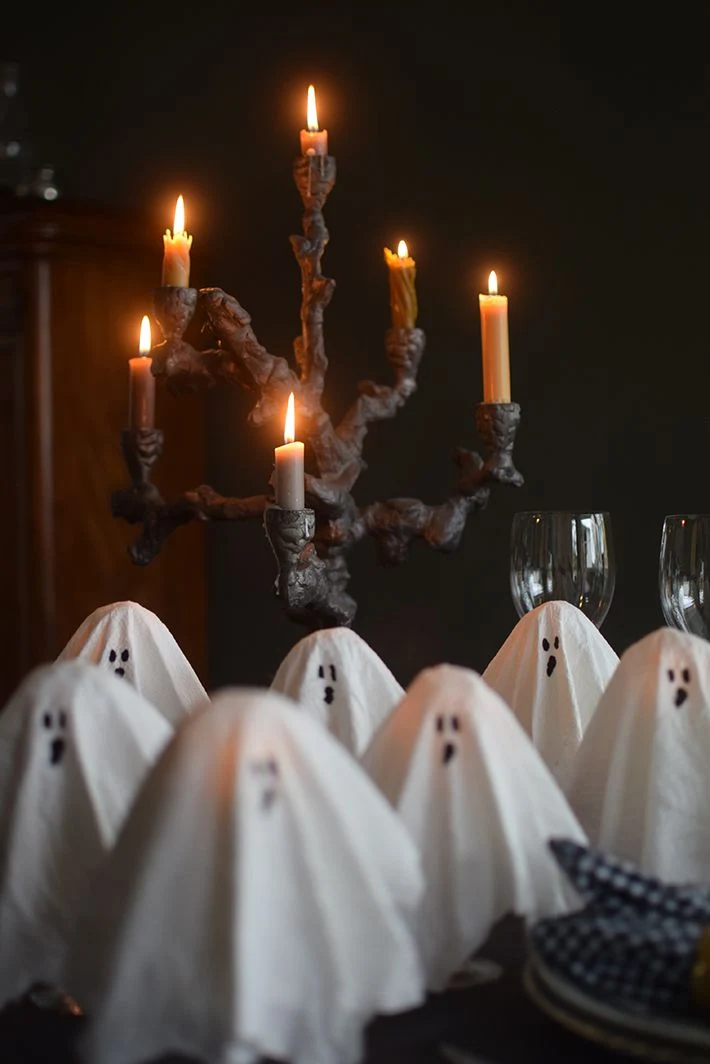
22. Dress Chairs in Sheet Ghost Covers
A dining table dressed with white sheet ghost chair covers, a branch candelabra with lit candles, pumpkins, and goblets, turns every seat into a ghost at the feast. Guests sit down and become part of the decor, which is the kind of party trick people remember.
Chair covers are just white sheets or fabric draped over chair backs with ghost faces drawn or pinned on. The branch candelabra in the middle adds the wild, woodland counterpoint to all that white, and the goblets keep it dinner-party elegant. Pull the covers off after the party and the dining room is back to normal in minutes.
Dress the chairs:
- Drape white fabric over each chair back, letting it fall evenly
- Add simple black felt eyes to each cover, same face on every chair
- Keep the centerpiece tall and narrow so faces stay visible across the table
🪑 The guest trick
Ghost chair covers work because guests wear the decor. Nobody photographs an empty chair, but everybody photographs their friends sitting in ghost chairs.
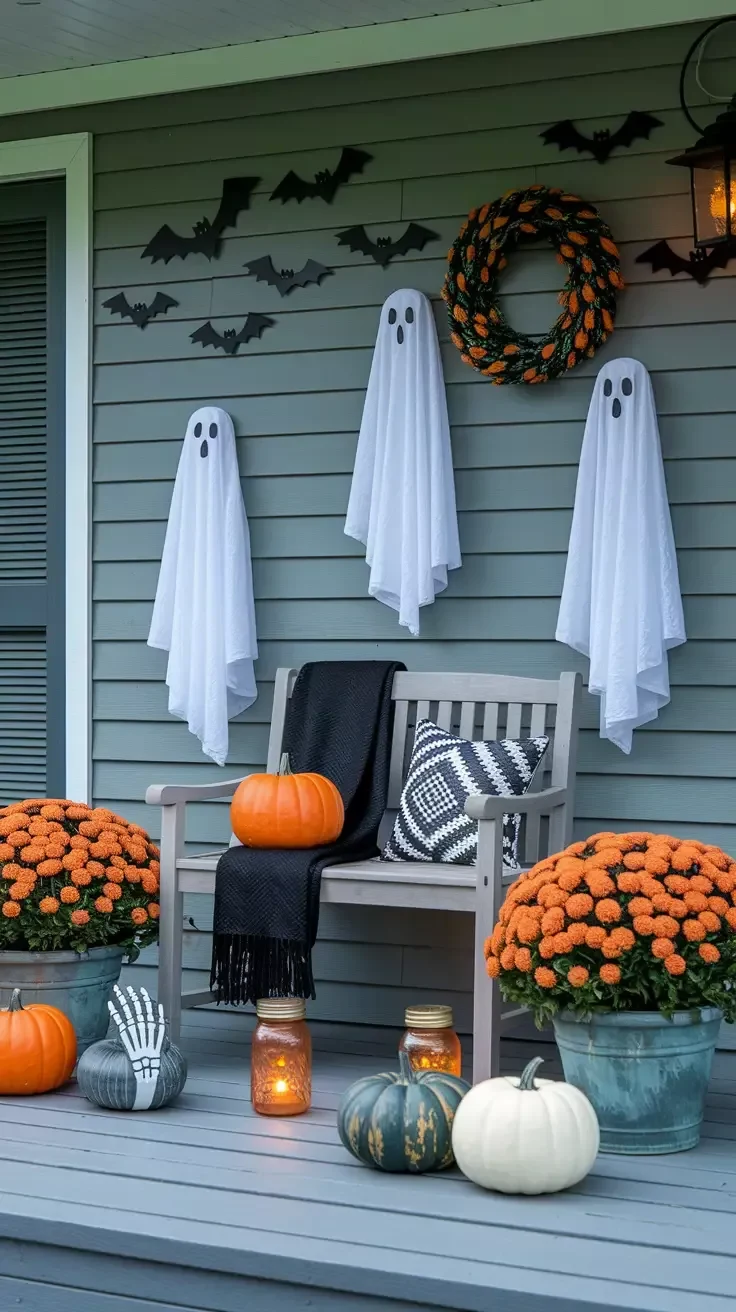
23. Hang Sheet Ghosts on the Porch Wall
A gray porch wall decorated with hanging white sheet ghosts and black bat decals, with pumpkins, mums, and lanterns arranged below, is the full porch formula in one photo. Ghosts give you height on the wall, the bats fill the gaps, and the pumpkins and mums ground everything at the floor.
Layer the porch wall:
- Hang the sheet ghosts first, spaced evenly across the wall
- Stick bat decals in the gaps between ghosts, angled like they are flying
- Arrange pumpkins, mums, and lanterns along the base in a loose row
- Step back to the street and check the balance before calling it done
The street view is the real test for porch decor. What looks sparse from the sidewalk needs one more ghost, and what looks busy from inside usually looks just right from the curb.
🏠 Porch layers, top to bottom
| Wall | Hanging sheet ghosts plus bat decals |
| Mid | Lanterns at varying heights |
| Floor | Pumpkins and mums in a loose row |
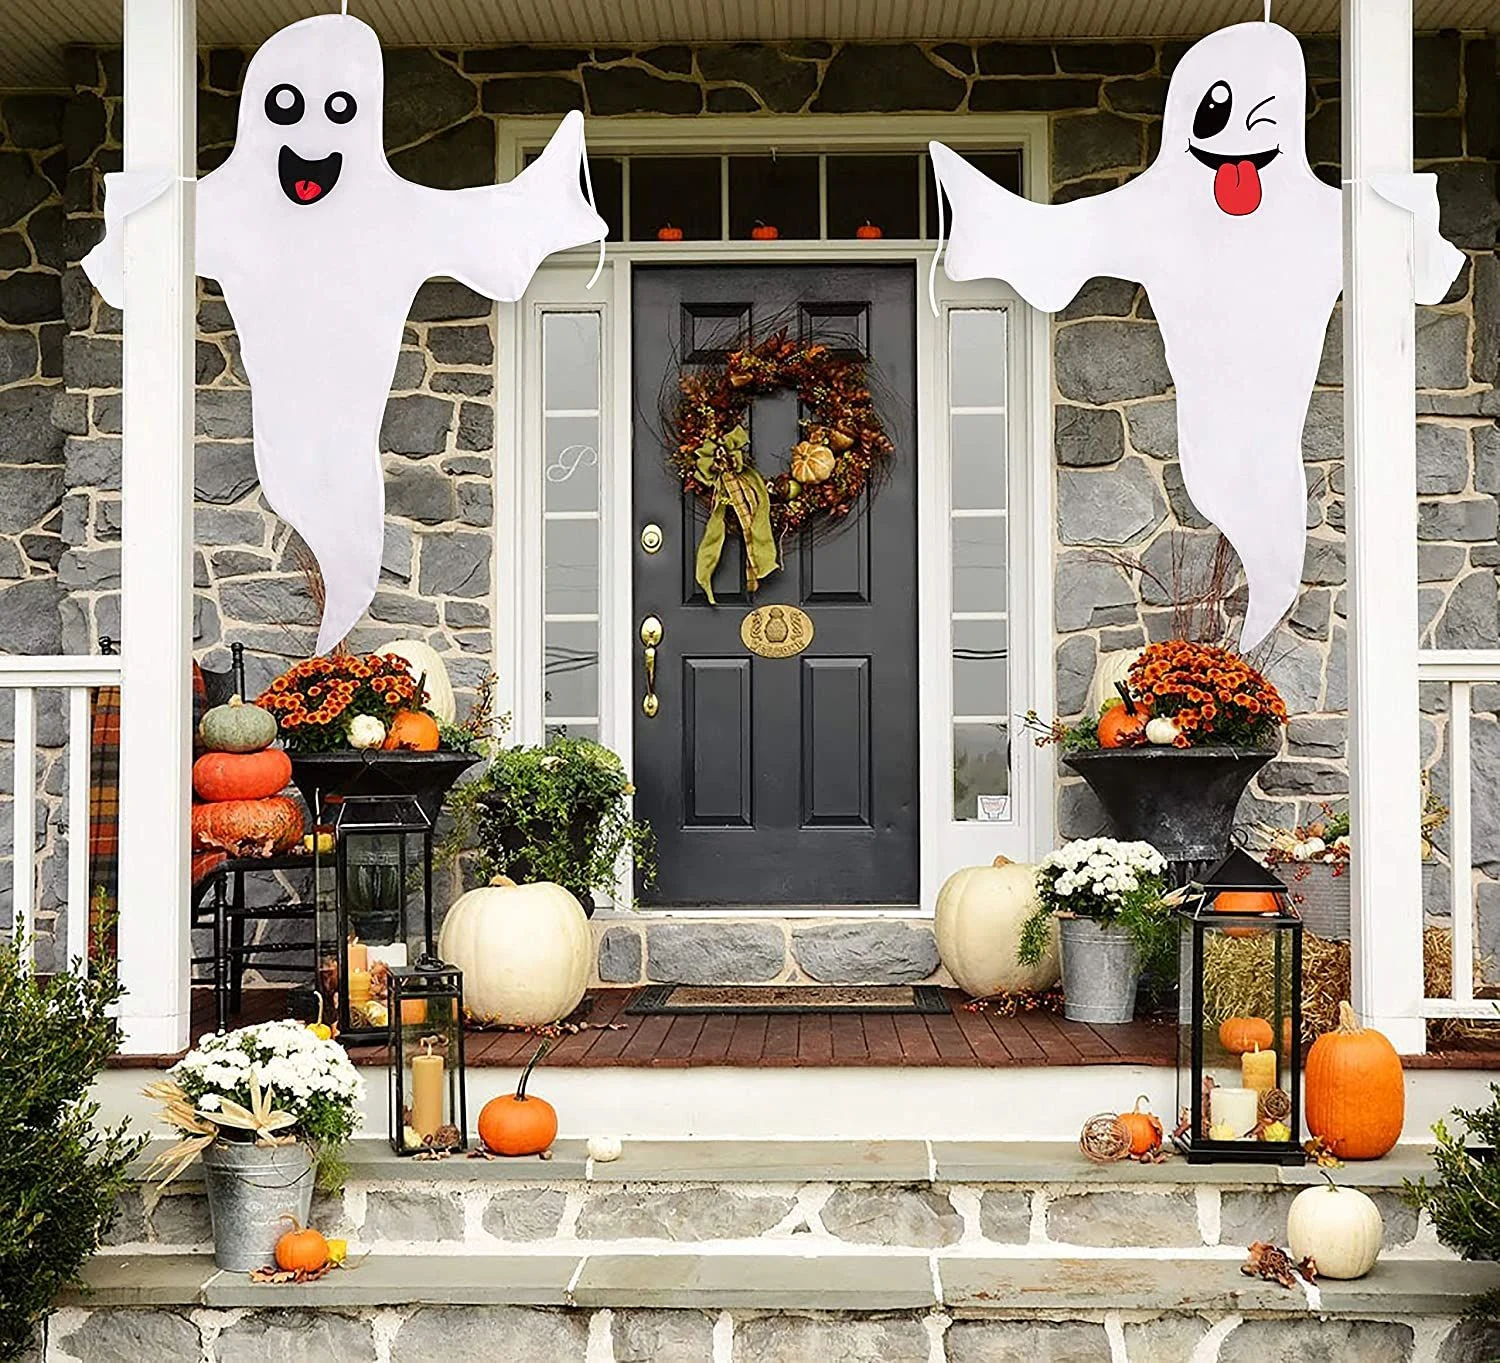
24. Flank the Front Door With Giant Ghost Cutouts
A stone front porch with two large smiling ghost cutouts flanking the front door, pumpkins and lanterns lining the steps, is the friendliest grand entrance on the block. The giant ghosts act like greeters, the smiling faces keep them welcoming, and the lanterns light the path for little trick-or-treaters.
Go big without going wrong:
- Cut ghosts from white foam board or plywood for porch-weather sturdiness
- Paint big smiling faces, visible from the street, since details get lost at distance
- Anchor the bases with sandbags or stakes so October wind does not take them
- Line the steps with lanterns to guide feet safely to the door
Big cutouts are the highest-impact hour you can spend on the porch. One afternoon of cutting and painting buys you the house everyone points at on Halloween night.
📏
Go tall
Four to five feet reads from the street
😊
Keep smiling
Big simple faces, no fine details
Final Thoughts
Cute ghosts prove that Halloween can be charming without a single jump scare. Whether you go all in with a porch full of glowing sheet ghosts or keep it small with one clay ghost on the bookshelf, the sweet spot is the same: friendly faces, warm light, and white against the oranges and blacks of the season. Start with the room you see first when you come home, since that is where one ghost makes the biggest difference. Then let the idea spread one shelf or doorway at a time. Happy haunting, the cute kind.
📌 Save this list for later
Pin it to your Halloween board on Pinterest so every ghost is waiting when the decorating boxes come out.