
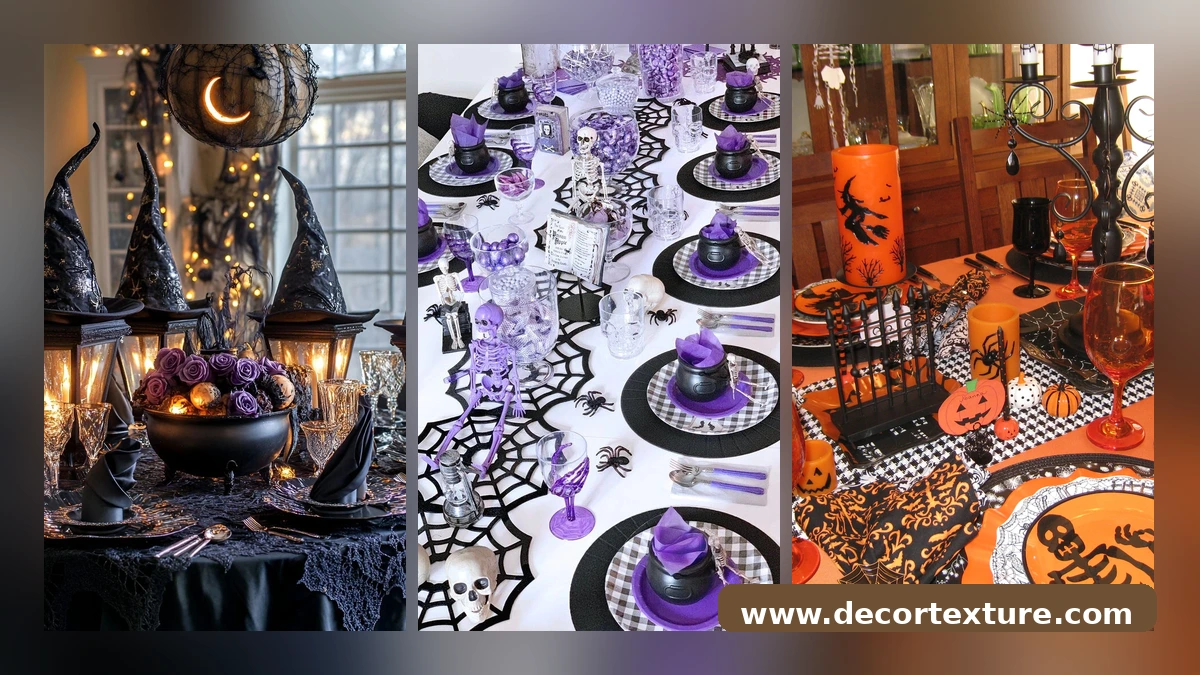
Every great Halloween party has a moment when guests stop talking and just look. More often than not, that moment happens at the dinner table. A Halloween tablescape does something no other decoration can: it gathers everyone in one place, feeds them, and keeps the spooky story going course after course. This list brings together 23 Halloween tablescape ideas built from real table settings, dining rooms, and party tables. You will find black candlestick centerpieces, pumpkin place settings, witchy runners, gothic glassware, skull-adorned chargers, and candlelit center runners that turn an ordinary dining table into the best seat in the house. Most of these looks come together with pieces from craft stores, thrift shops, and your own pantry, so you can style a showstopping table without a showstopping budget. Pick the mood, dark and gothic or playful and pumpkin-filled, set the table a day early, and let the candles do the rest when guests arrive.
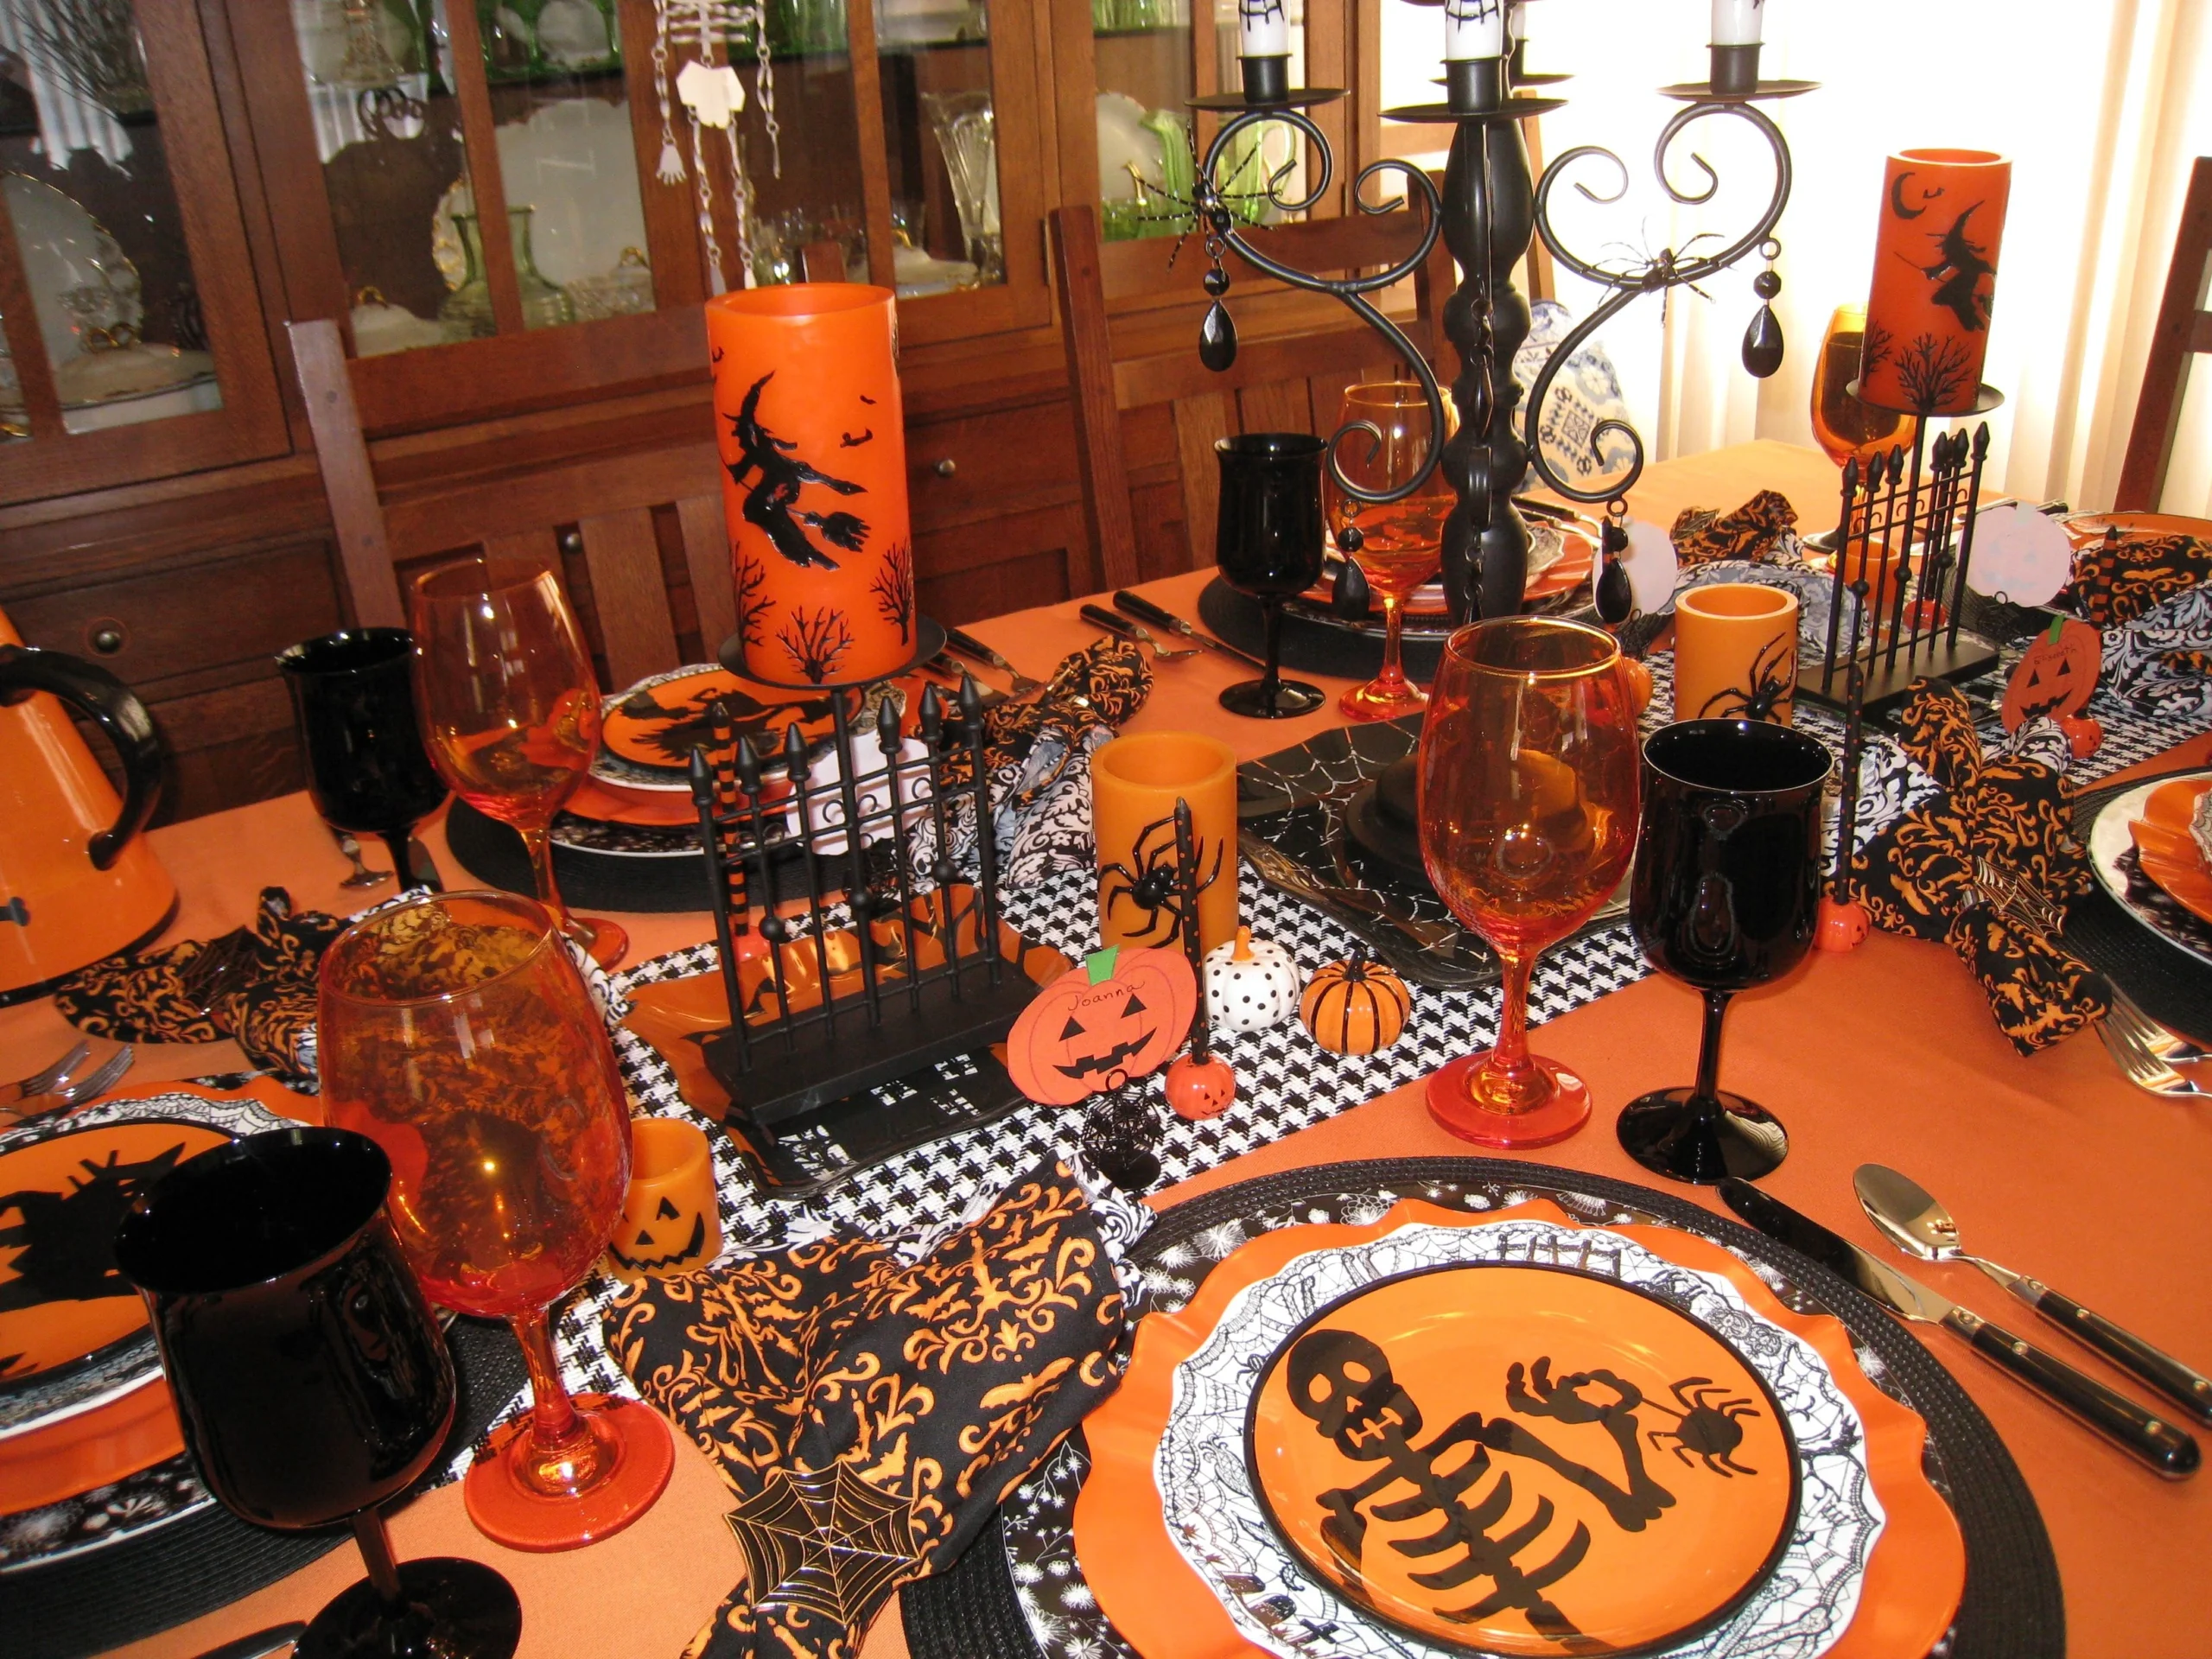
1. Set a Playful Orange-and-Black Table With Pumpkin Plates
Orange is Halloween’s happiest color, and this table wears it everywhere. Bright orange plates with pumpkin faces, amber glassware, and a pumpkin-print runner set a playful tone, while a little black fence centerpiece and spider candles keep it firmly in October. It is a table that says party before anyone sits down.
The secret here is mixing patterns that share the same two colors. The pumpkin print on the plates, the web print on the chargers, and the damask on the napkins all work because orange and black tie them together. Keep the glasses simple, amber and black, so the patterns have room to breathe.
Copy this playful formula:
- Orange pumpkin plates as the stars
- Black web-print chargers underneath
- One small fence or haunted-house centerpiece
- Spider candles in two heights
- Amber and black glasses only
🎃 Playful table checklist
- Pumpkin-face plates, one per guest
- Web-print chargers in black
- One fence or haunted-house centerpiece
- Spider candles, short and tall
- Amber and black glasses, nothing else
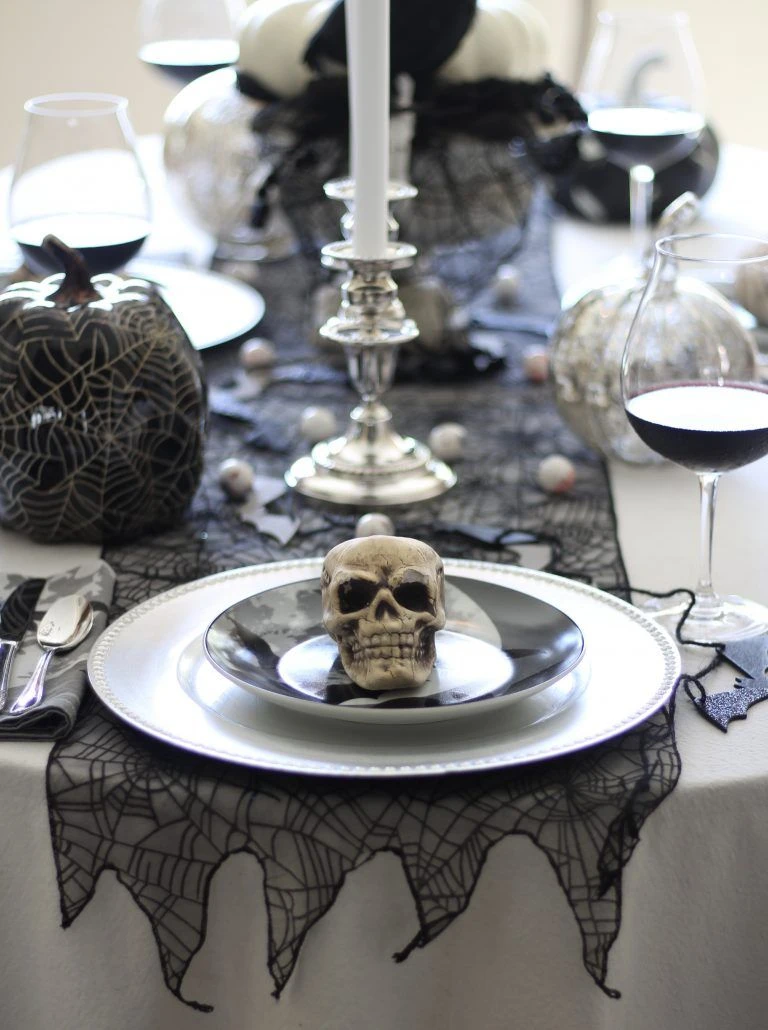
2. Crown Each Place Setting With a Small Skull
One small skull on each plate turns dinner into an event. This close-up shows the trick: a little skull resting on a black-and-silver plate, black lace spilling over the table edge, and a tall silver candlestick behind it. Guests will photograph their place before they touch it.
Keep the skulls small, about the size of a tennis ball, so they read as place markers rather than clutter. Resin skulls are cheap in October and reusable for years. Tuck one name card beside each skull and the skull becomes the place card holder.
💀 Skull
Small resin skull on each plate, doubles as a place card holder.
🕸️ Lace
Black lace runner spilling over the table edge for texture.
🕯️ Candle
One tall silver candlestick behind each setting for height.
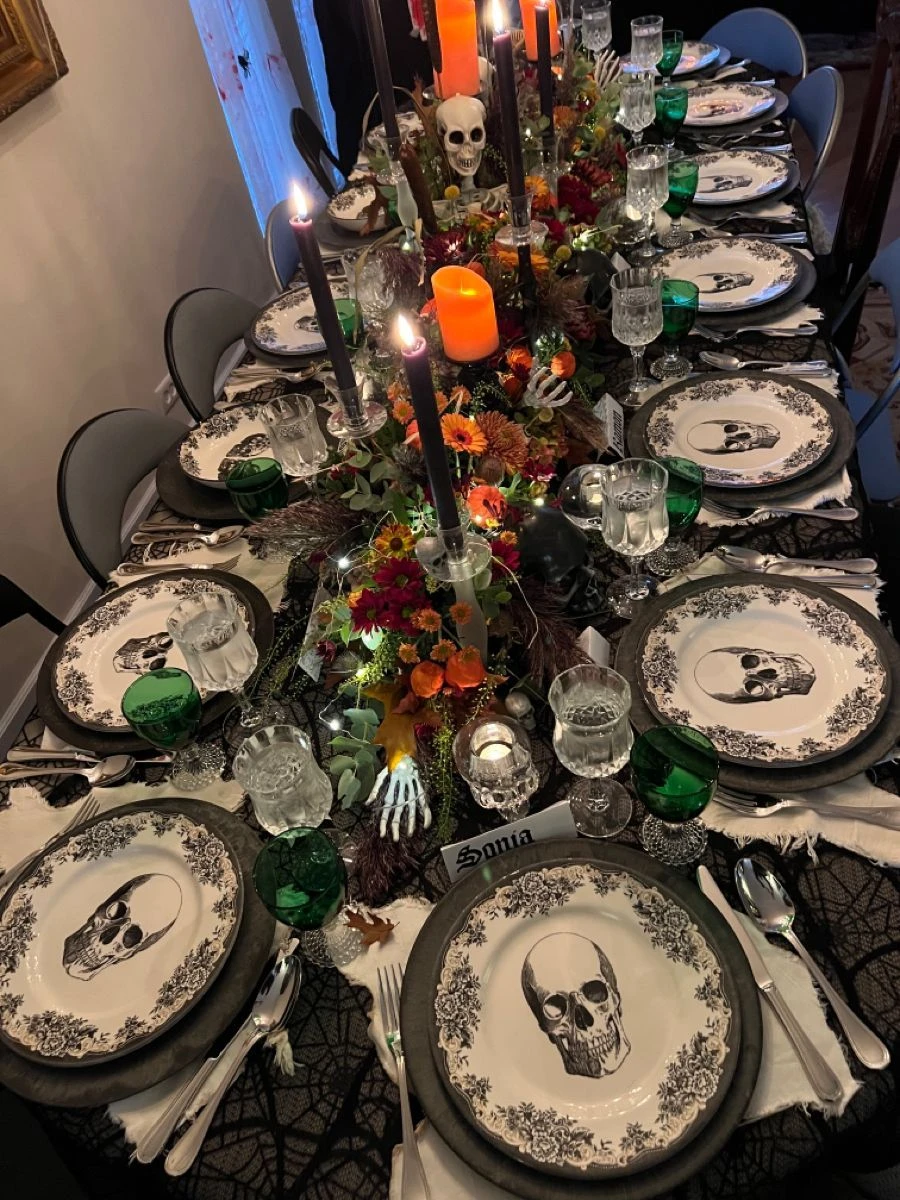
3. Stretch a Candlelit Runner Down a Long Table
Long tables want long runners, and this one runs the full length. Tall candles in orange, green, and black rise above a tangle of greenery, with small skulls and pumpkins tucked along the way. Skull-print plates at every seat repeat the theme all the way down.
Height is doing the work here. The tallest candles sit in the middle of the runner and shorter pieces go toward the ends, so the whole table feels like a skyline. Keep the center decorations narrow, a runner’s width, so plates and glasses still have plenty of room.
💡 Quick Tip
Vary candle heights along the runner, tallest in the middle. Use flameless candles for the tallest holders so nothing drips and nobody worries.
4. Layer Black Candles and Mini Pumpkins at Each Setting
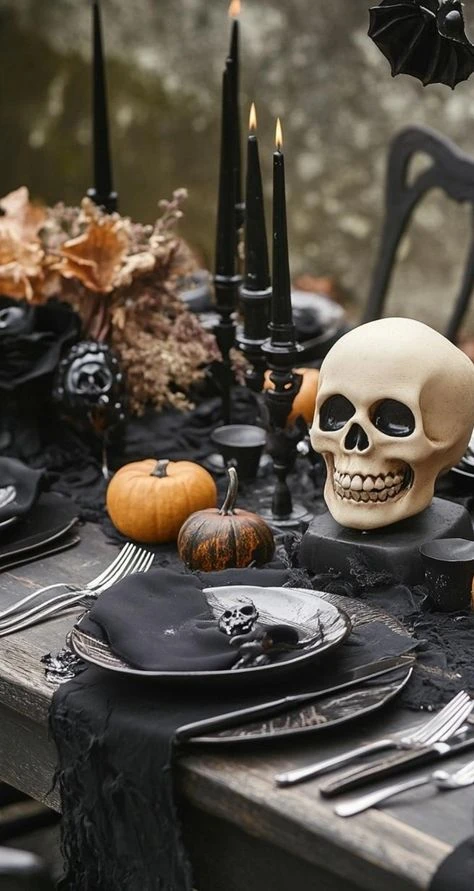
This is a tablescape you build one place at a time. Each setting gets black taper candles, a mini pumpkin, and a black plate, and a big skull anchors the middle. Close up, it looks rich and layered; pulled back, every seat looks identical, which is exactly the point.
Repetition is the designer’s trick. Buy one set of pieces and multiply it by your guest count: same black plates, same pumpkins, same candles. The skull in the center is the only piece that stands alone, and that contrast is what makes the table look styled rather than just set.
🖤 Repeat vs stand alone
| Repeat at every seat | Black plates, mini pumpkins, taper candles |
| Stand alone in the middle | One big skull as the anchor |
| Why it works | Repetition calms the table; one standout gives it a focal point |
5. Pair Skulls With Black Roses for a Gothic Centerpiece
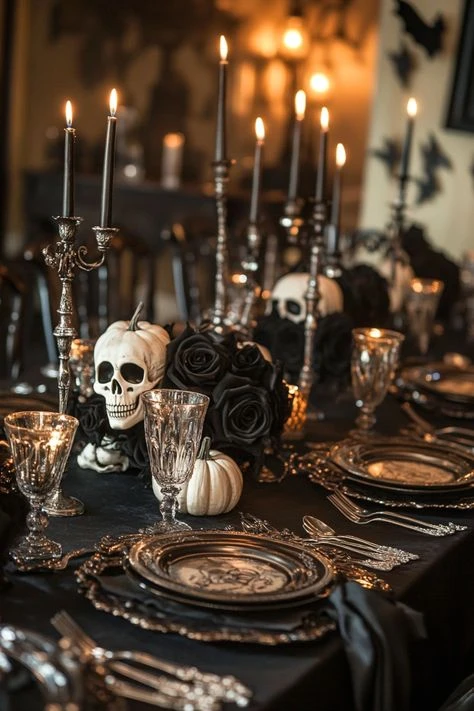
Skulls and black roses are the gothic table’s power couple. Here, a large skull sits among dark blooms and tall candles, with smaller skulls trailing down the table. The black-and-gold plates underneath add just enough shine to keep it dinner-party, not haunted house.
Real black roses are hard to find, so cheat: spray deep-red roses with black floral spray, or use black silk roses, which look convincing in candlelight. Cluster the flowers low around the skulls’ bases so the skulls stay the tallest things on the table.
🥀 Gothic pairing notes
- ▸ One large skull as the centerpiece anchor
- ▸ Black roses clustered low around its base
- ▸ Tall candles behind, shorter blooms in front
- ▸ Black-and-gold plates to keep it dinner-party
6. Run a Bold Striped Runner Under a Line of Skulls
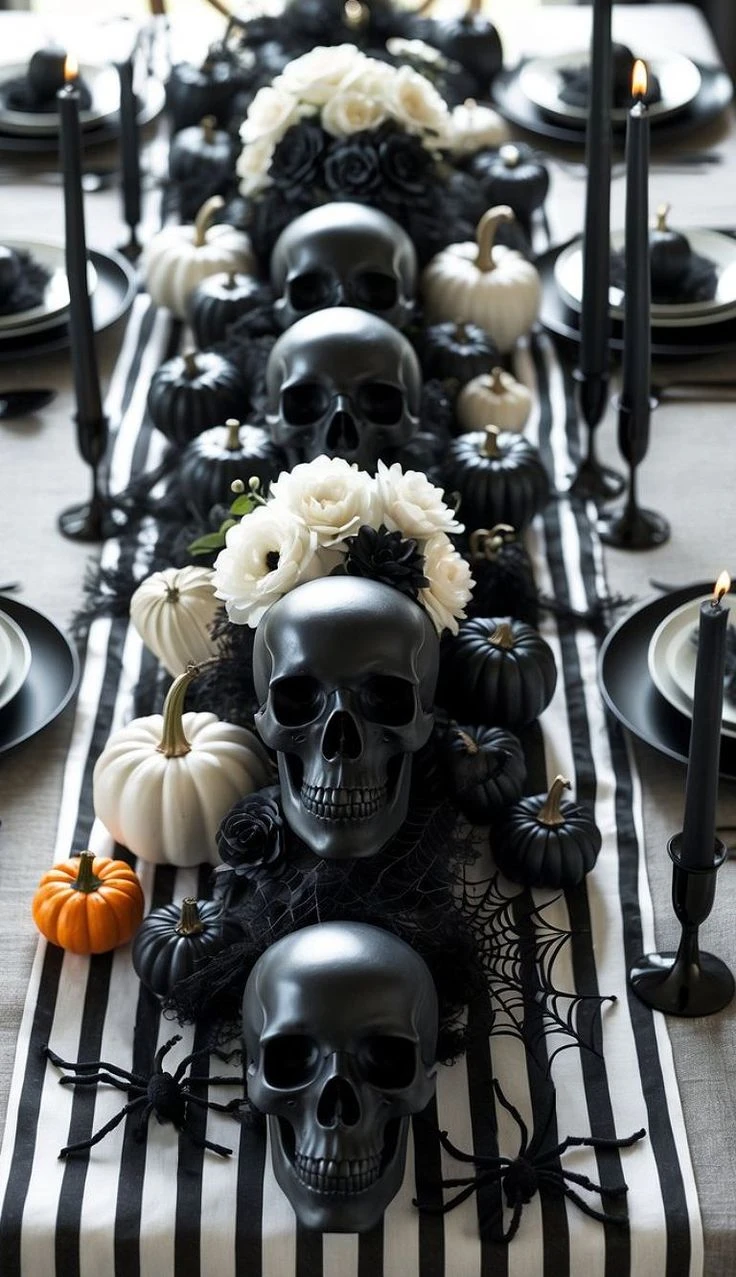
Stripes make skulls look even spookier. This table lines black and white skulls down a bold striped runner, with black taper candles rising between them and white and orange pumpkins at the ends. The high-contrast stripe turns a simple lineup into a statement.
A striped runner does three jobs: it anchors the centerpiece, it adds pattern, and it makes the table look longer. If you cannot find a striped Halloween runner, fold a black-and-white striped tablecloth lengthwise and use that instead.
Build the skull lineup in order:
💀 Skull lineup steps
- 1Lay the striped runner centered on the table
- 2Line up the skulls, biggest in the middle
- 3Add a taper candle between every other skull
- 4Tuck pumpkins at both ends to finish the line
7. Seat a Skeleton Guest at the Table
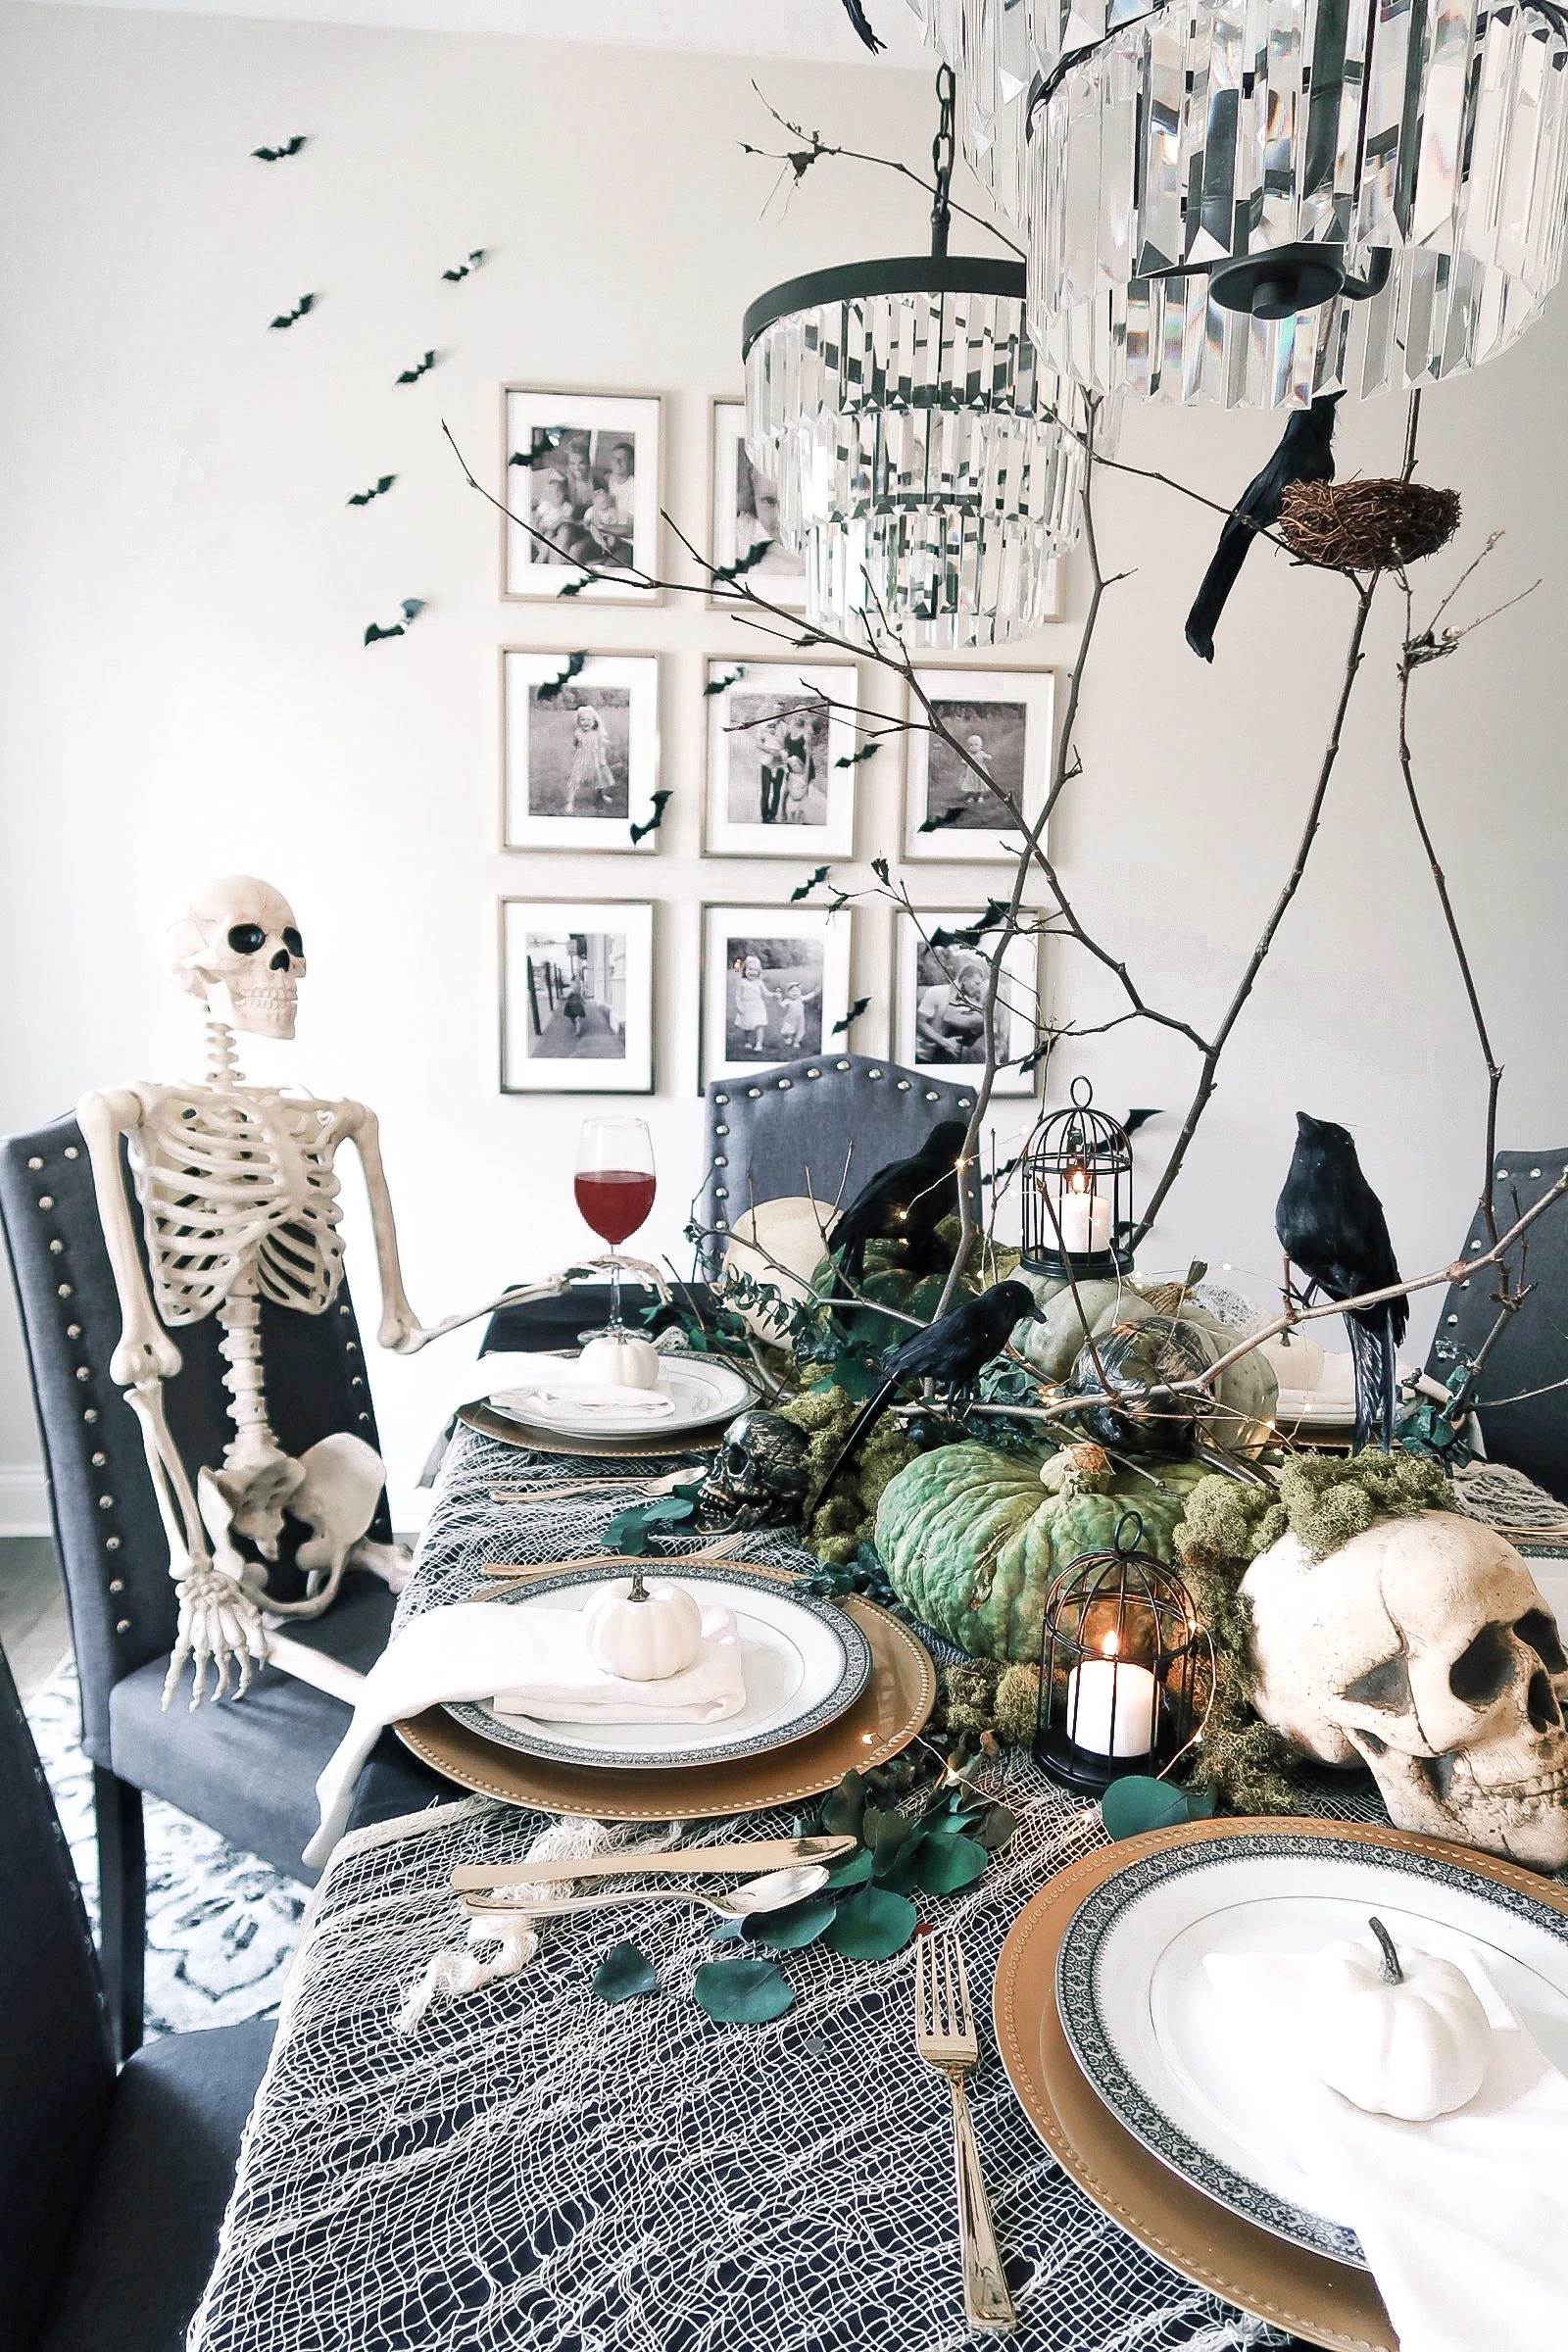
Nothing starts dinner conversation like an unexpected guest. This dining room seats a full skeleton at the table, dressed for dinner among skull centerpieces and black-and-white place settings. Kids will love it; adults will pretend they are not delighted.
Pose the skeleton like a real diner: seated, one hand near the plate, leaning in slightly. Dress it up with a bow tie, a witch hat, or a napkin on its lap for comedy. Posable skeletons from Halloween stores hold their poses well and fold flat for storage in November.
💀 WHY THIS WORKS
A skeleton guest turns the table into a scene instead of a setup. One unexpected diner gives every guest something to talk about before the food even arrives.
8. Let a Witch-Hatted Skeleton Host the Table
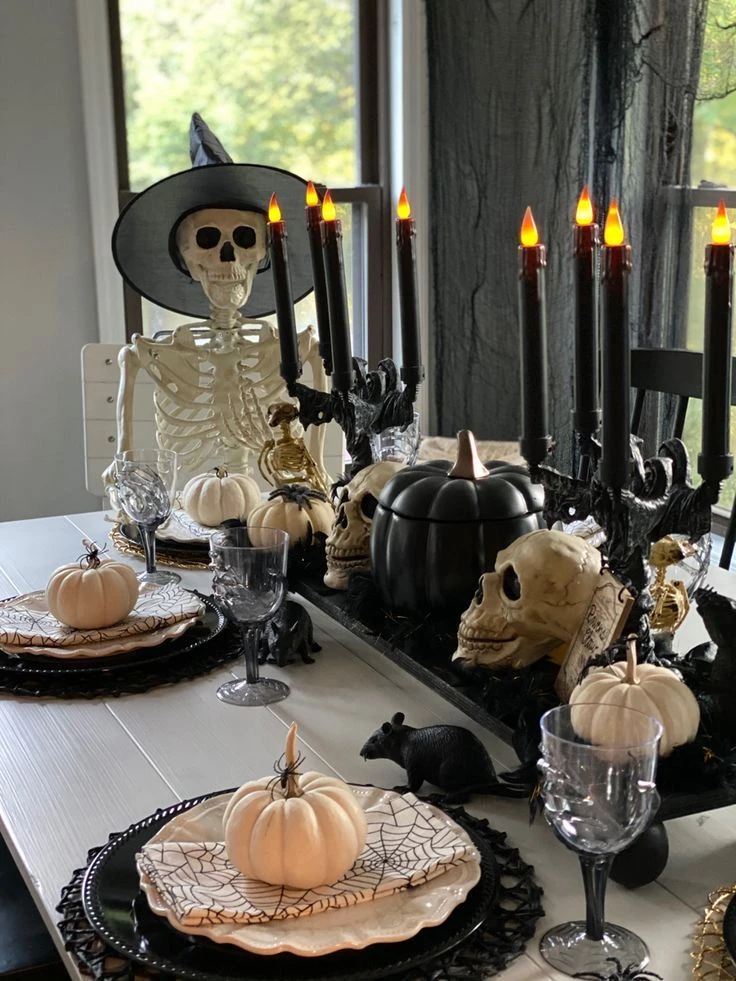
Give your skeleton a job and a hat. This one wears a tall witch hat and presides over a table of black candles, glowing pumpkins, and skull place settings. It reads as the host of the party, which takes the pressure off you.
One statement skeleton beats three small ones. Put the tallest piece, the hatted skeleton, at the head of the table or the center, then keep everything else lower so sightlines stay open. Vary the black candles in height so the table feels layered.
Host-skeleton rules:
✅ Do this
One tall hatted skeleton at the head of the table, everything else lower so guests can see each other.
❌ Skip this
Scattering small skeletons all over the table. Several little ones read as clutter; one big one reads as a host.
9. Go Glam With Black, Gold, and Spiderweb Chargers
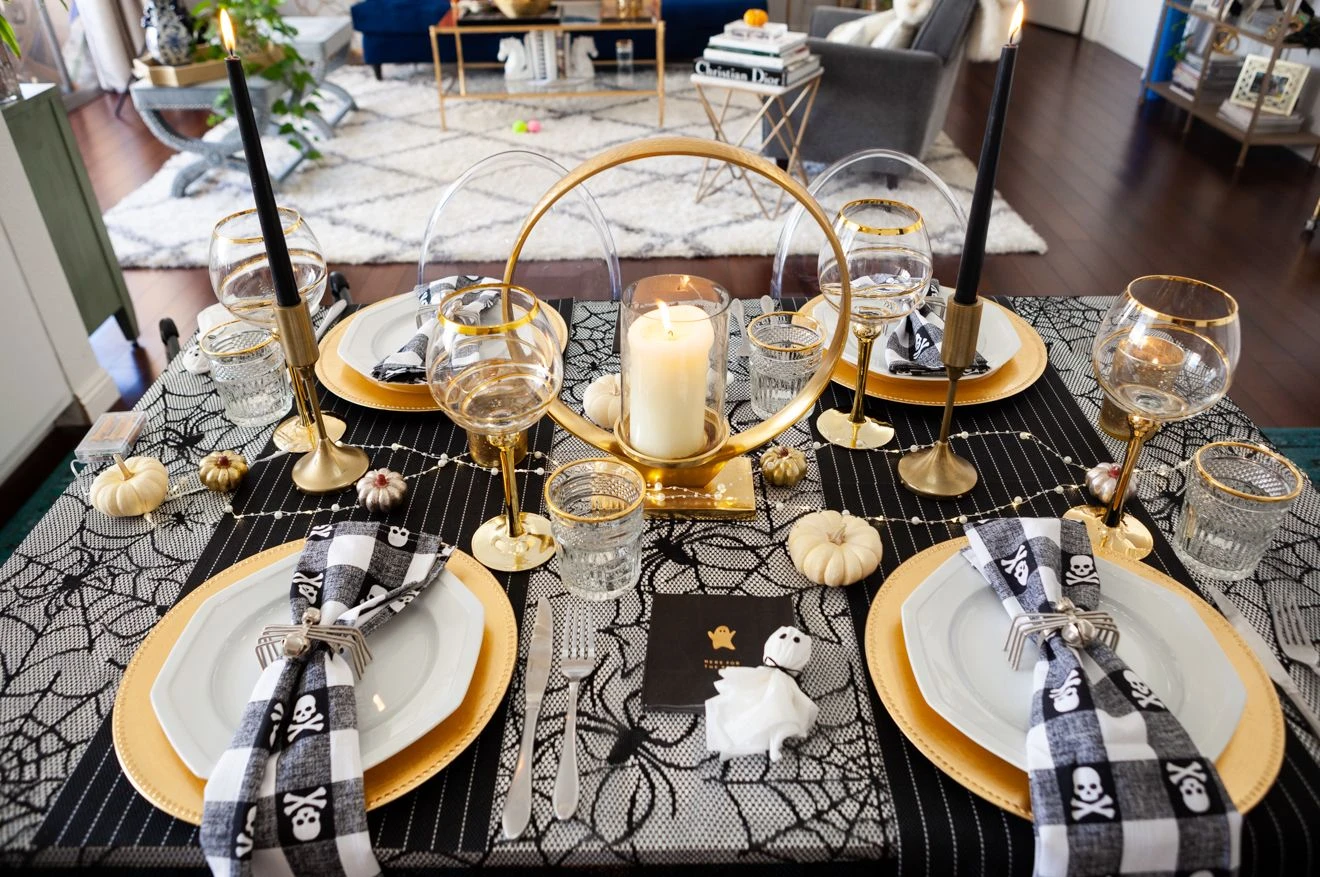
Halloween can dress up. This round table pairs black plates and spiderweb chargers with gold flatware and glowing candle rings, and the result is dinner-party glam with a spooky edge. It proves Halloween tables do not have to be all orange.
The glam formula is simple: black as the base, gold as the shine, and one spooky pattern, the webs, as the theme. Keep the candles warm and low so the gold catches the light. This look suits adult dinner parties where you want Halloween, not haunted house.
Glam table checklist:
✨ Glam table checklist
- Black plates on spiderweb chargers
- Gold flatware for the shine
- Low glowing candles so gold catches the light
- One spooky pattern only, the webs
- No orange needed for this one
10. Drape Black Gauze and Cloche Pumpkins Down the Middle
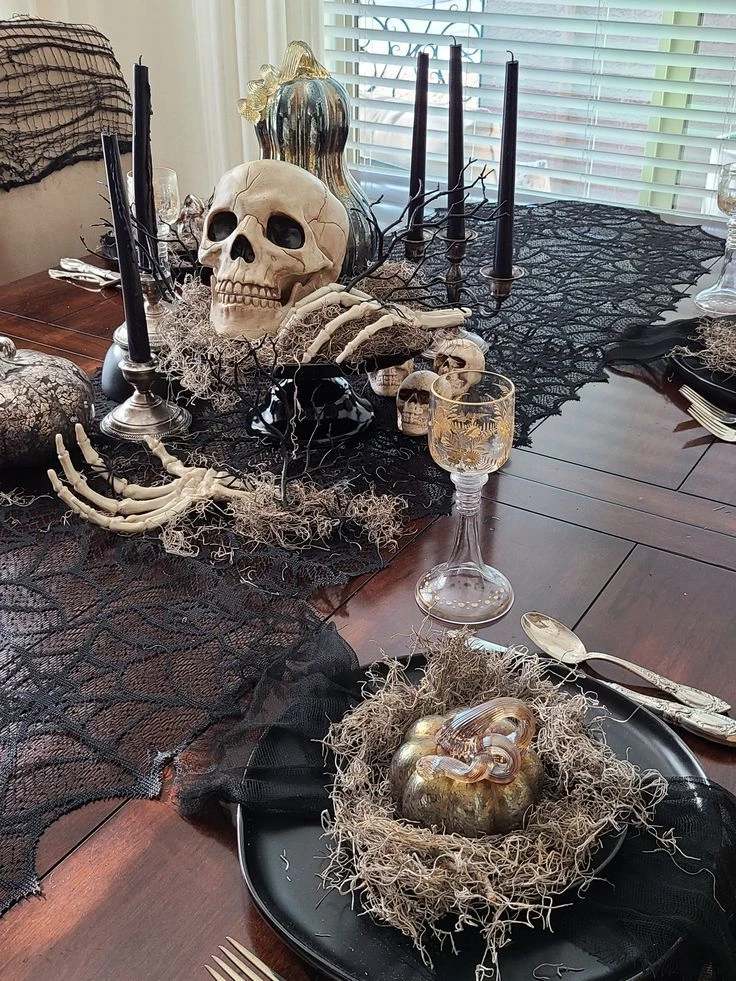
Cheesecloth is the cheapest Halloween fabric there is, and it looks like haunted luxury. This table drapes black gauze down the middle, with a skull stacked on old books at one end and a glass cloche full of mossy pumpkins at the other. Every piece feels found, not bought.
Build around two anchors: something tall at one end, the skull on books, and something glowing at the other, the cloche. The gauze connects them. Pull the fabric loose and let it puddle; stretched tight it reads craft-store, left loose it reads haunted.
💡 Quick Tip
Use battery candles inside cloches and keep gauze well away from any real flame. Drape the fabric the day before so it settles into natural folds.
11. Add a Purple Velvet Runner for a Witchy Glow
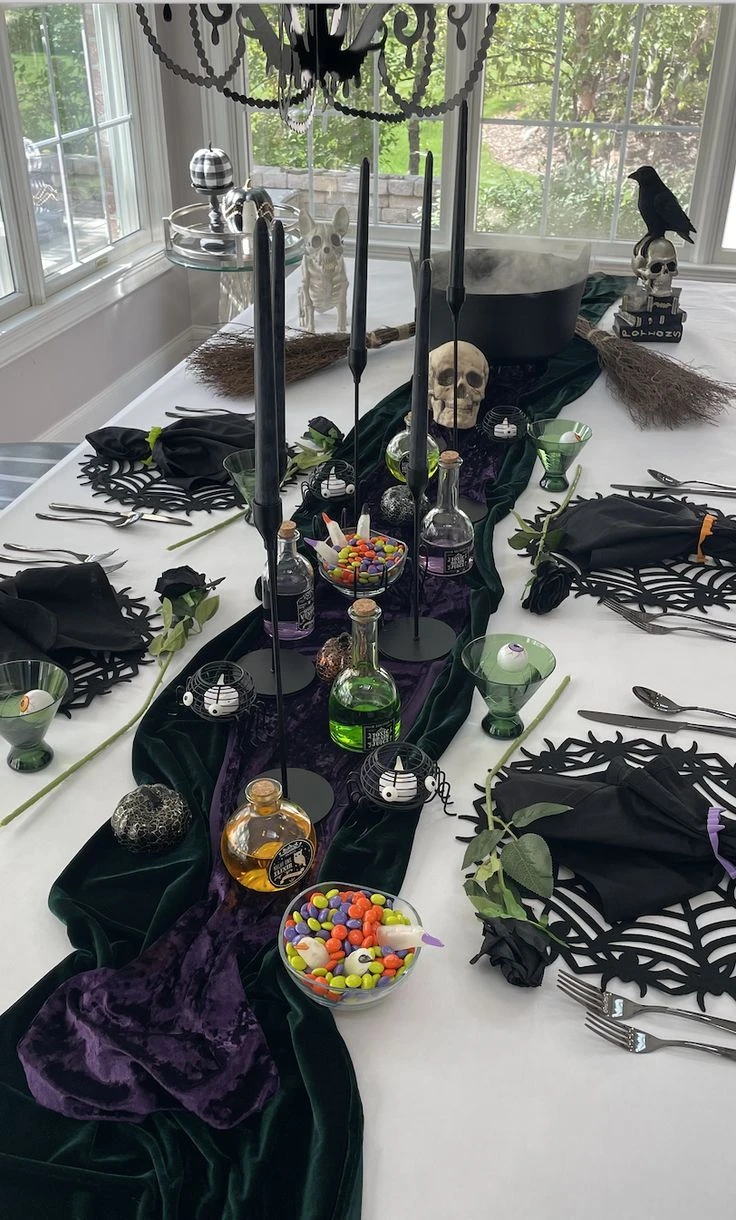
Purple is Halloween’s most underused color, and velvet makes it glow. This white table gets a deep purple runner, black plates, and jewel-toned glasses, with a crow and small pumpkins scattered along the way. It feels witchy and a little bit royal.
Velvet changes everything it touches. A velvet runner in plum or eggplant reads expensive even when it is not, and it photographs beautifully against white plates. Add one more purple accent, glasses or napkins, so the runner does not stand alone.
💜 Velvet
A plum velvet runner, the luxury base of the whole table.
💎 Jewels
Jewel-toned glasses in purple and green echo the runner.
🐦⬛ Creature
One crow figure walking the runner for the witchy story.
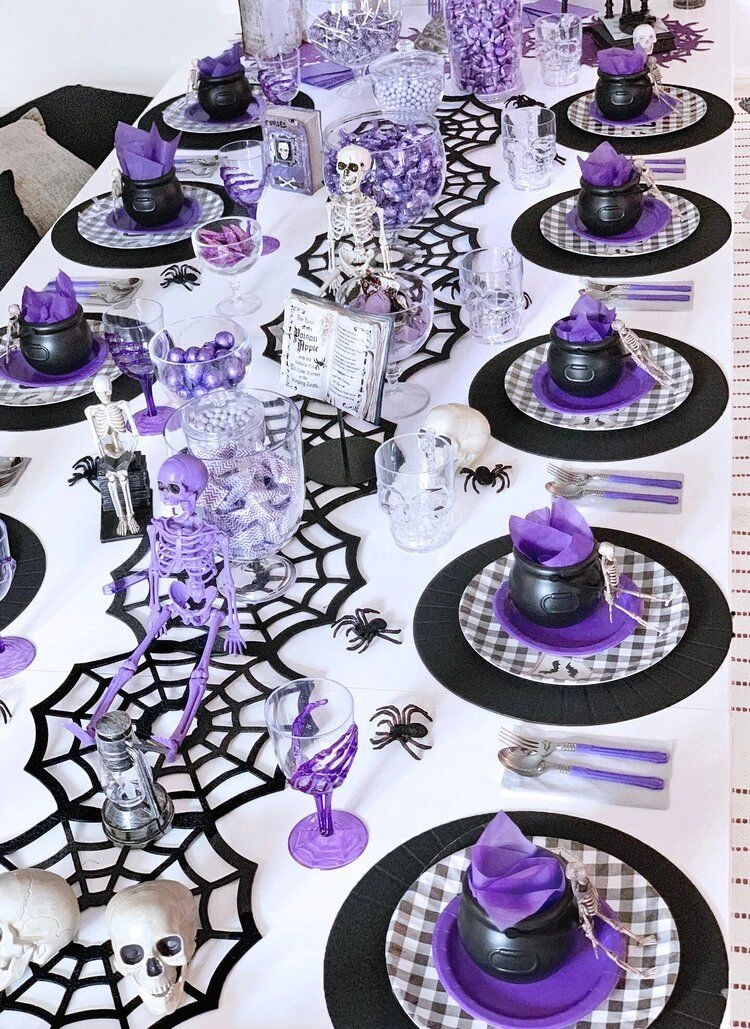
12. Top Every Plate With a Mini Witch Hat
The fastest Halloween place setting is a mini witch hat on each plate. This table sets purple cone hats on black-and-white checked chargers, with a spiderweb cloth and purple goblets underneath. Ten minutes of work, and the table looks like a party.
Mini witch hats come in packs at party stores, or make them from black cardstock cones and brims in an afternoon. Fill each hat with wrapped candy and it doubles as the party favor. Guests take their hat home, and cleanup takes care of itself.
BEFORE
Plain black plates on a white cloth. Nice table, no theme.
AFTER
One mini witch hat per plate. Instant Halloween party.
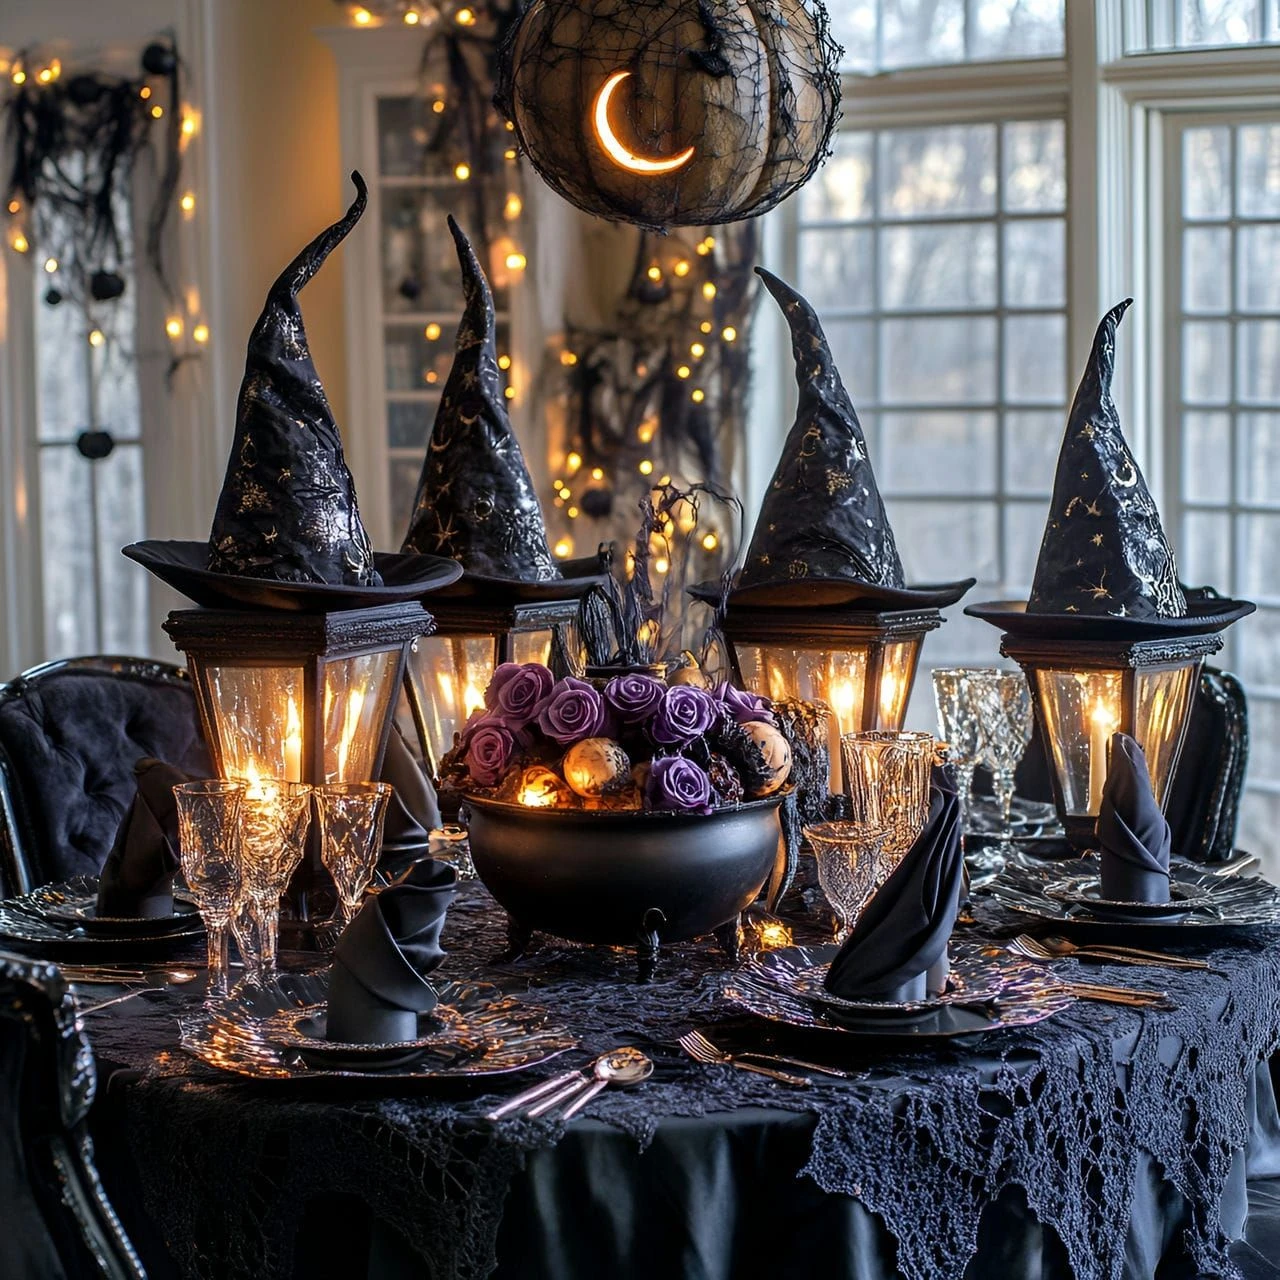
13. Light Witch-Hat Lanterns Around a Cauldron Centerpiece
Lanterns wearing witch hats are Halloween genius. Three tall lanterns glow around a black cauldron filled with purple roses and mini pumpkins, and the whole table feels like a potion class. The light does the decorating; everything else just shows up.
Group lanterns in odd numbers and vary their heights so the light feels layered. Fill the cauldron with anything dark and lush: roses, black leaves, small pumpkins. Keep the lanterns battery-powered if the table is crowded, since real flames and flowing sleeves do not mix.
Light it in four steps:
🧙 Lantern steps
- 1Set the cauldron in the center of the table
- 2Arrange three lanterns around it at different heights
- 3Fill the cauldron with roses and mini pumpkins
- 4Switch the lanterns on at dusk for the full glow
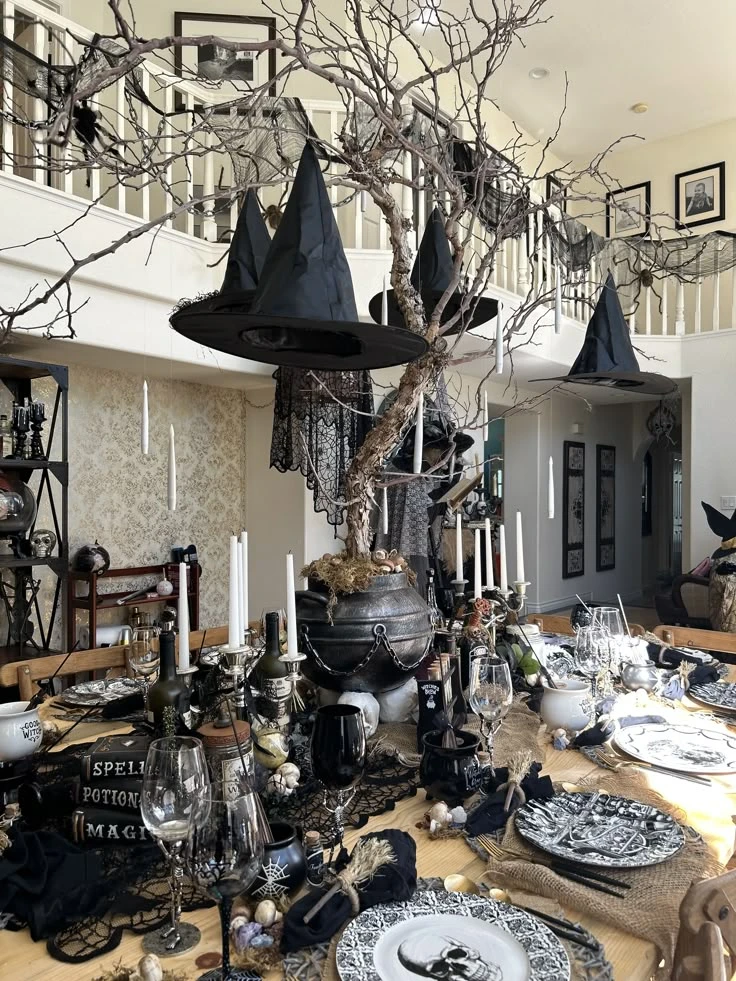
14. Hang Witch Hats Above the Table Like a Spell in Progress
The best tablescapes use the air above the table, not just the table itself. Here, witch hats hang from bare branches over a long table set with black plates and a cauldron, like the hats just flew in. It turns dinner into theater.
Hang hats at different heights with clear fishing line from a branch, a chandelier, or a tension rod. Keep them high enough that tall guests can stand comfortably. Underneath, keep the table styling simple: black plates, one cauldron, candles. The hats are the show.
🎩 WHY THIS WORKS
Hanging decor doubles the decorating space without crowding the table. Eyes travel up to the hats and back down to the plates, which makes the whole room feel styled.
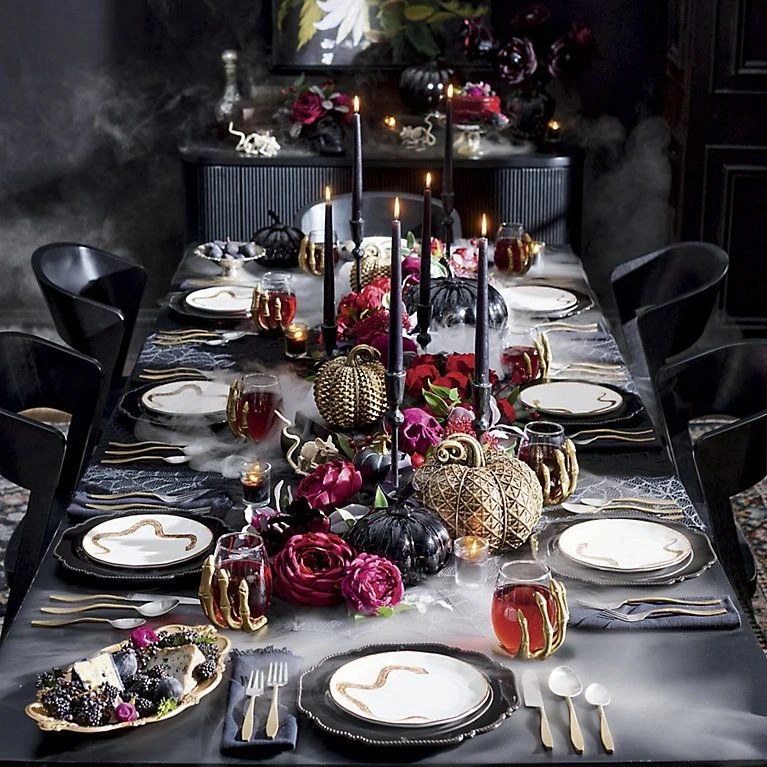
15. Style a Moody Gothic Table With Dark Blooms
This is Halloween for grown-ups. A dark table glows with deep purple and red flowers, tall black candles, and ornate black plates, and the whole scene looks like a painting. No orange, no cartoons, just drama.
Dark florals are the key. Ask a florist for the deepest reds and purples they have, or use black floral mist for the same effect. Keep everything else black or silver so the flowers stay the only color story.
🥀 Dark florals vs bright florals
| Dark florals | Deep reds and purples, black mist spray, gothic mood |
| Bright florals | Orange marigolds and white mums, cheerful harvest feel |
Pick one floral mood per table. Mixing dark and bright blooms splits the story in two.
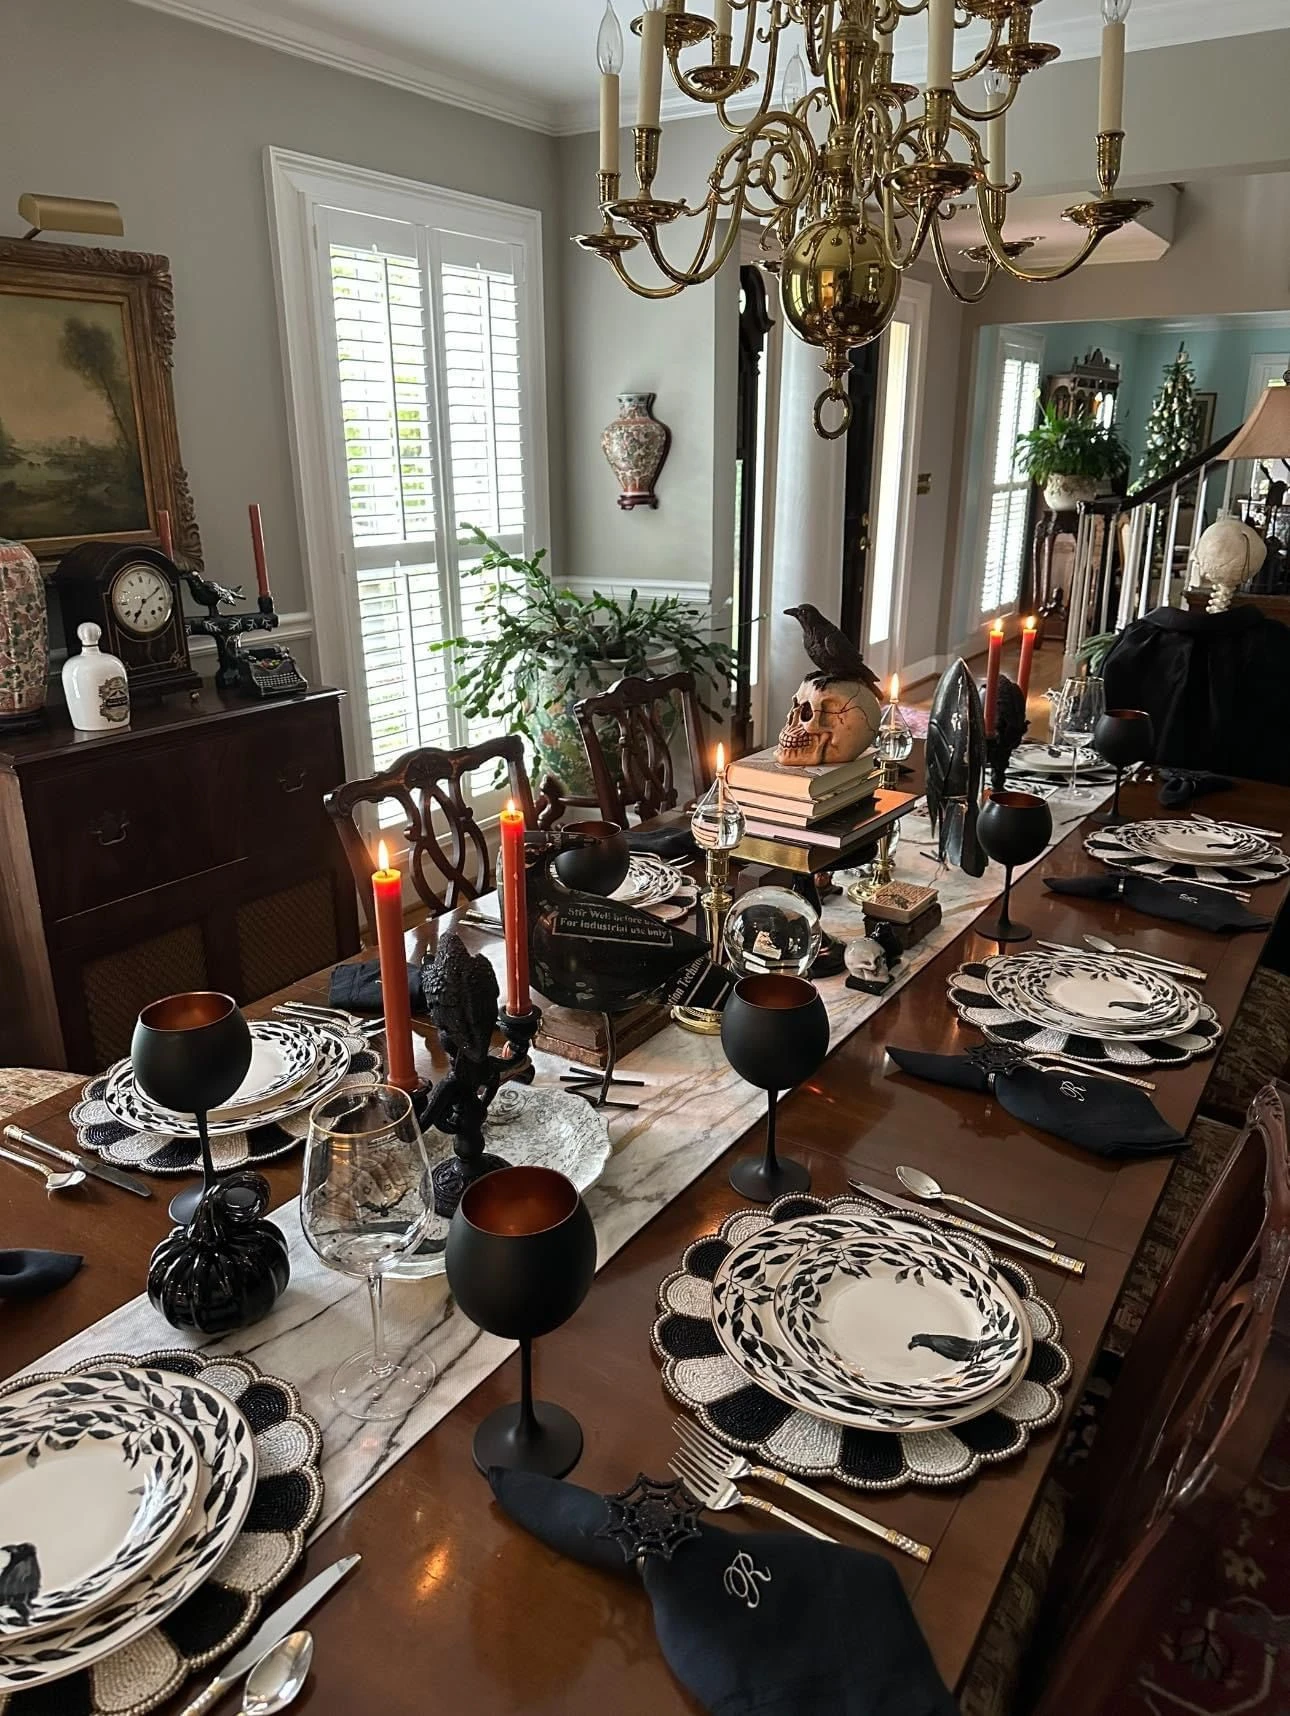
16. Build a Harvest Buffet With a Crow and Skull Topper
A Halloween buffet can be a still life. This sideboard stacks old books, tops them with a skull and a crow, and lines the table with orange candles, black goblets, and patterned plates. It is part harvest, part haunted library.
Books are the unsung hero of Halloween styling. A stack of old hardcovers adds instant height and history to any table. Crown the stack with one strong piece, a skull, a crow, a pumpkin, and let the candles and glassware fill in around it.
Stack the still life:
📚 Harvest buffet checklist
- A stack of old hardcover books for height
- One strong topper: skull, crow, or pumpkin
- Orange candles in two heights
- Black goblets for the gothic note
- Patterned plates leaning against the stack
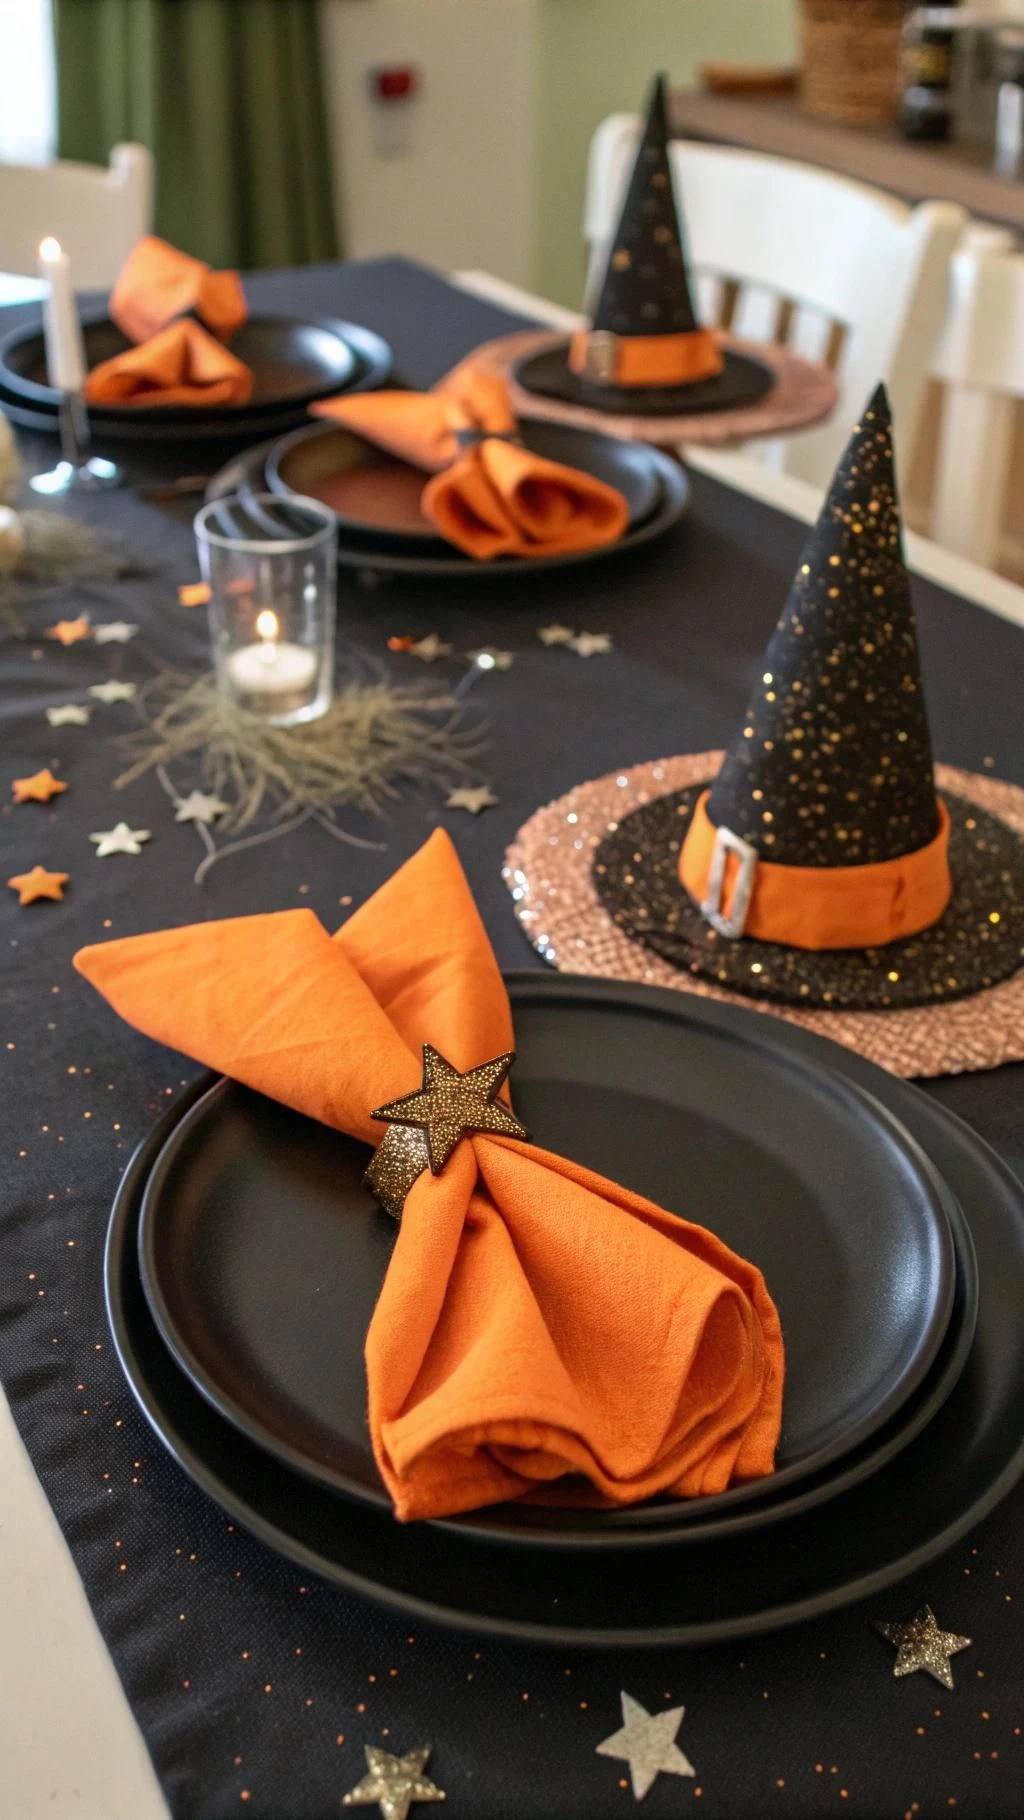
17. Fold Napkins Into Witch Hats at Each Place
Sometimes the place setting is the decoration. Here, a black plate holds a witch-hat napkin in bright orange, with a tiny witch hat decoration beside it. It is clever, it is cheap, and every guest gets their own little piece of the theme.
Fold orange or black napkins into simple cone hats, or buy witch-hat napkin rings and skip the folding. One hat per plate is enough; the table does not need more. Pair with plain black plates so the napkin hats pop.
🧡 Fold
Fold orange napkins into simple cone hats, one per plate.
💍 Ring
Or use witch-hat napkin rings and skip the folding.
🎩 Topper
Plain black plates underneath so the hats do the talking.
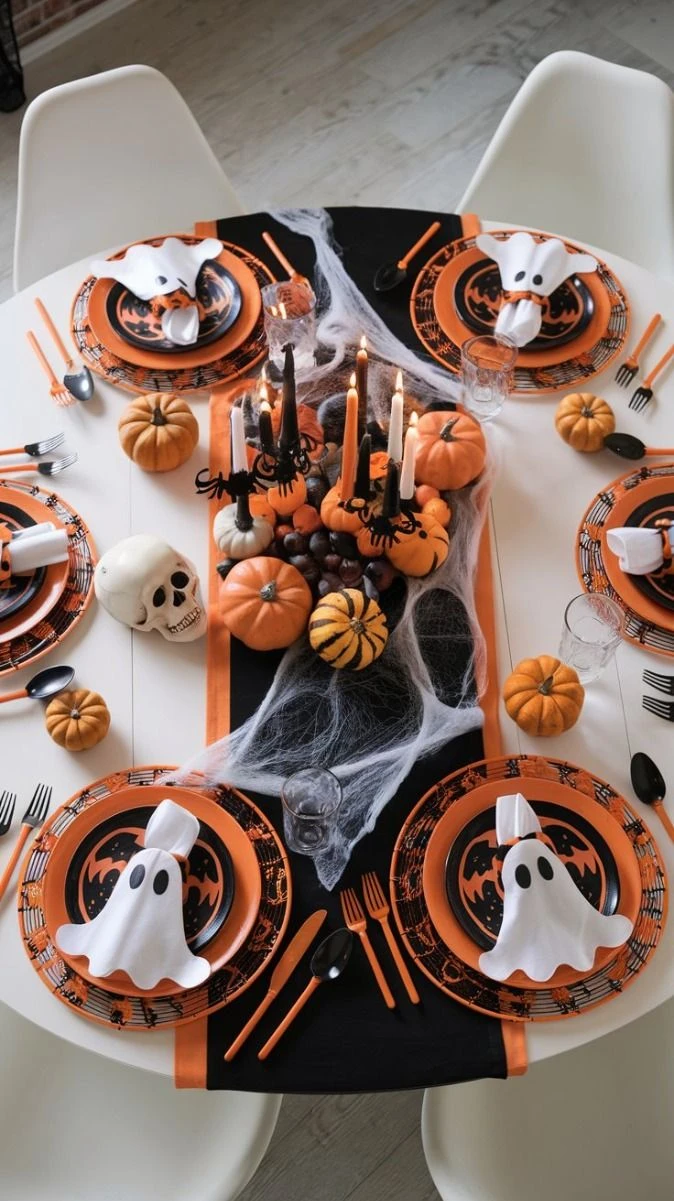
18. Serve on Friendly Ghost Plates for a Family Table
Not every Halloween table needs to scare. This family table uses smiling ghost plates, orange chargers, and a pumpkin centerpiece, and it is the kind of Halloween kids remember fondly. Friendly beats frightening when little ones are at the table.
Keep the palette bright: orange, white, and black, with nothing too dark. Let kids help set the ghost plates; a table they helped build is a table they will sit at happily. Save the skulls and gore for the grown-up party.
👻 Family table notes
- ▸ Smiling ghost plates instead of skulls
- ▸ Bright orange, white, and black palette
- ▸ Let kids help set the table
- ▸ Save the scary stuff for the adult party
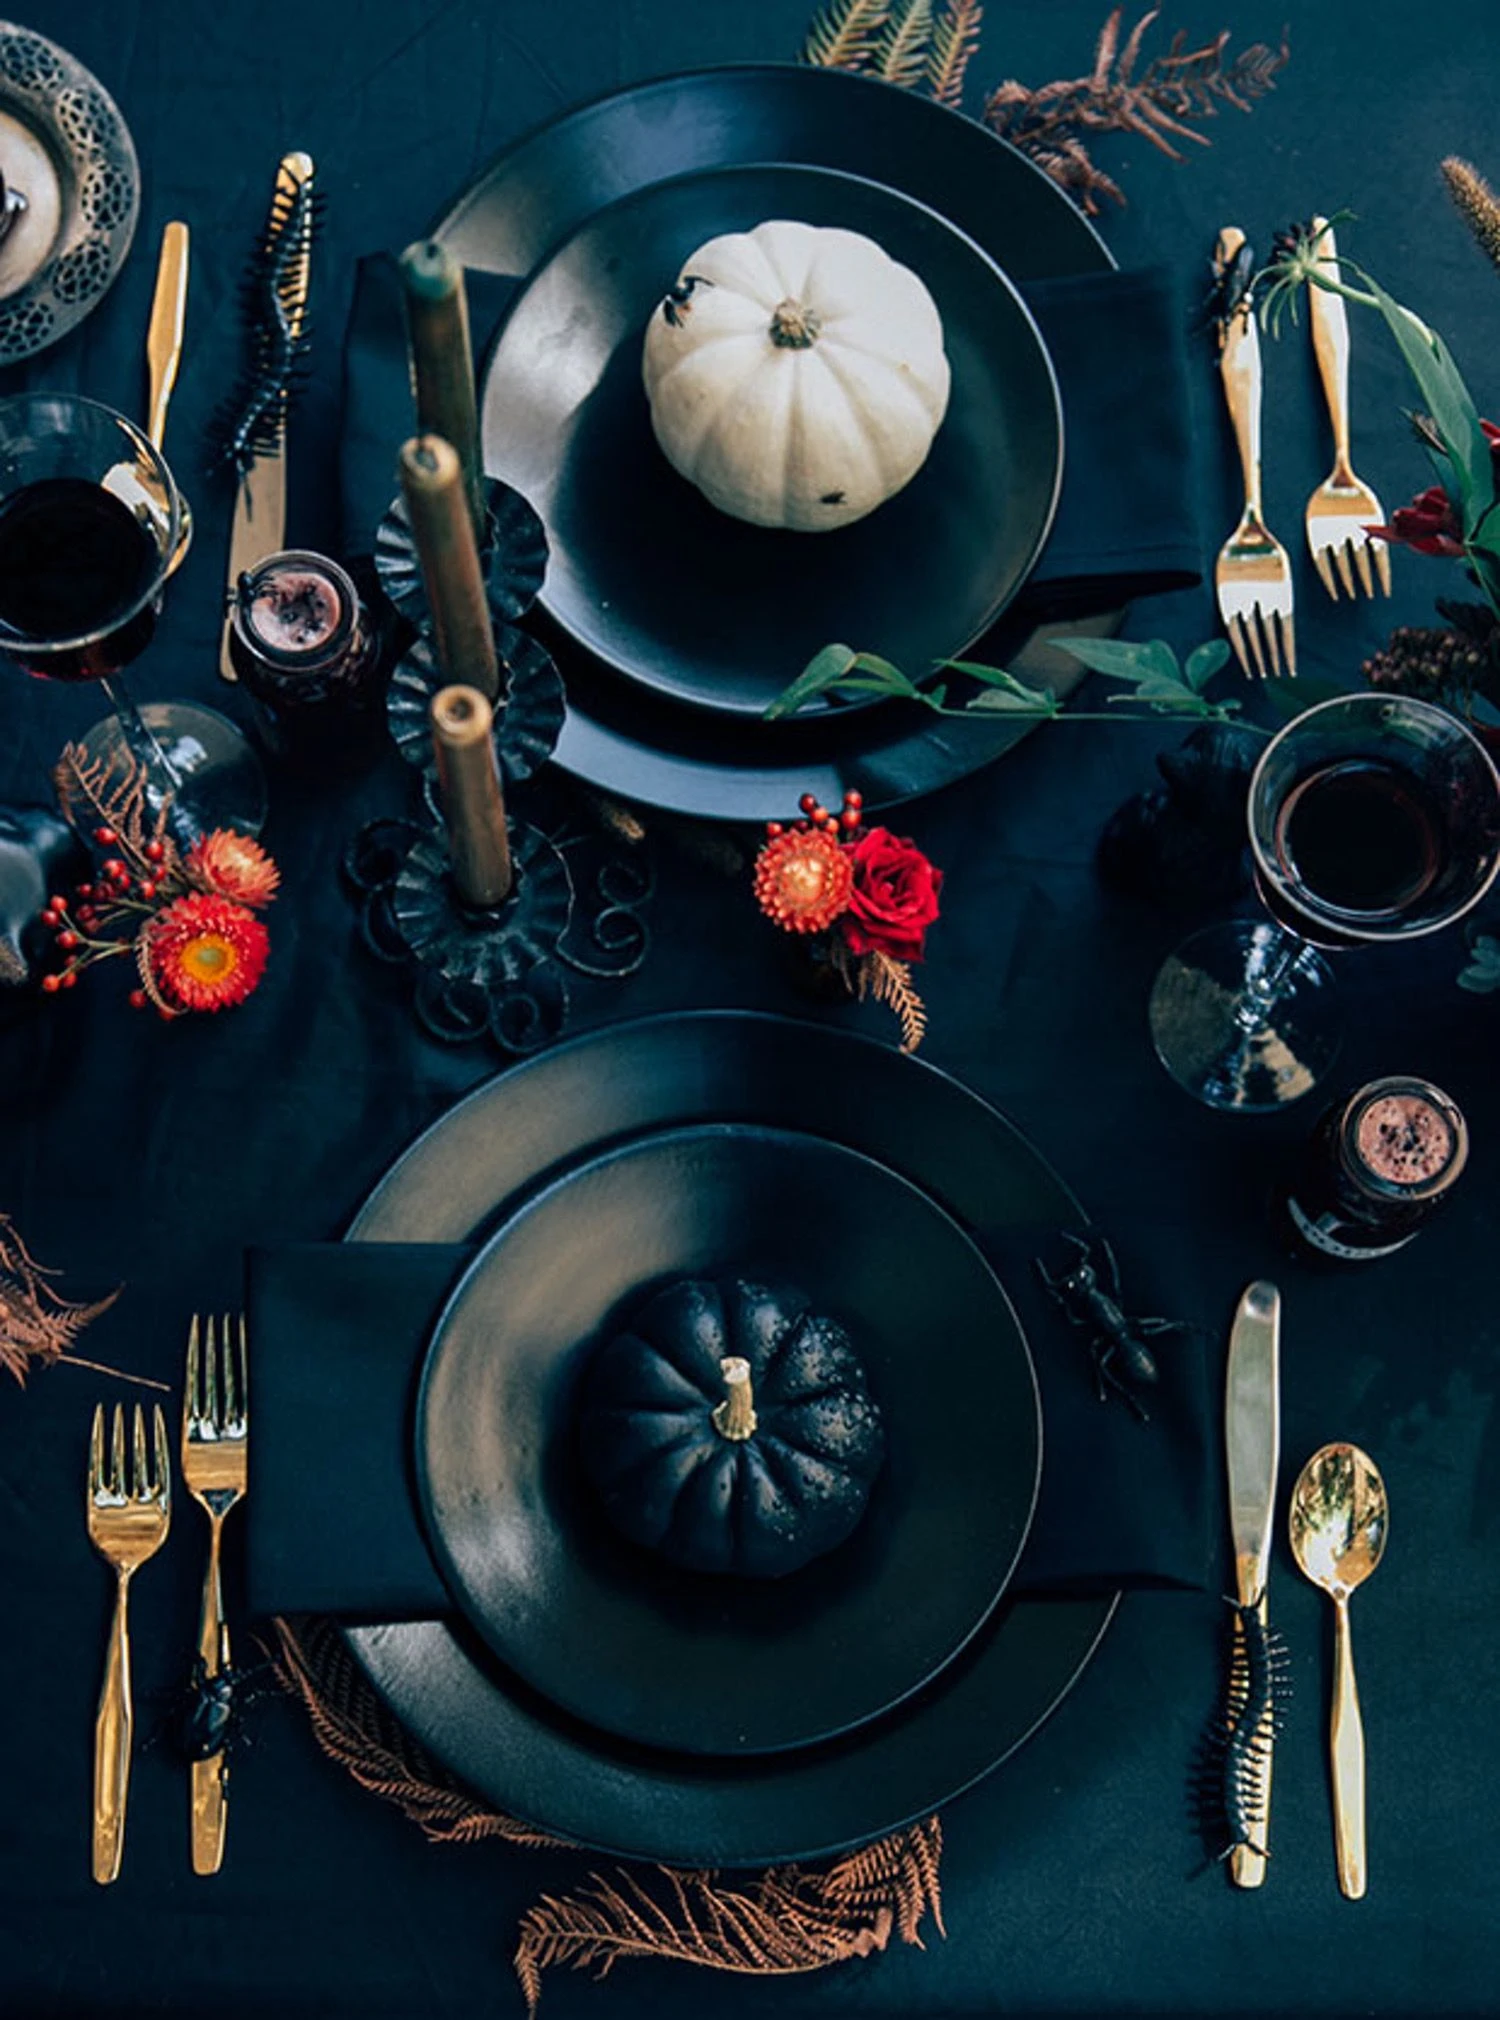
19. Keep Place Settings Dark With One Pale Pumpkin
One pale pumpkin on a dark table is a spotlight. This overhead shot shows black plates, gold flatware, and dark linens, with a single white pumpkin breaking the darkness at each place. The contrast is what makes it striking.
White and pale-green pumpkins are real, widely available in October, and last for weeks. Use one per place setting as the light note in a dark table, or cluster three as the centerpiece. They need no carving and no paint.
Dark table, light pumpkin:
✅ Do this
One white pumpkin per place setting on a dark table. The pale shape becomes the light in the scene.
❌ Skip this
Painting pumpkins black to match the table. They vanish into the dark and the contrast is lost.
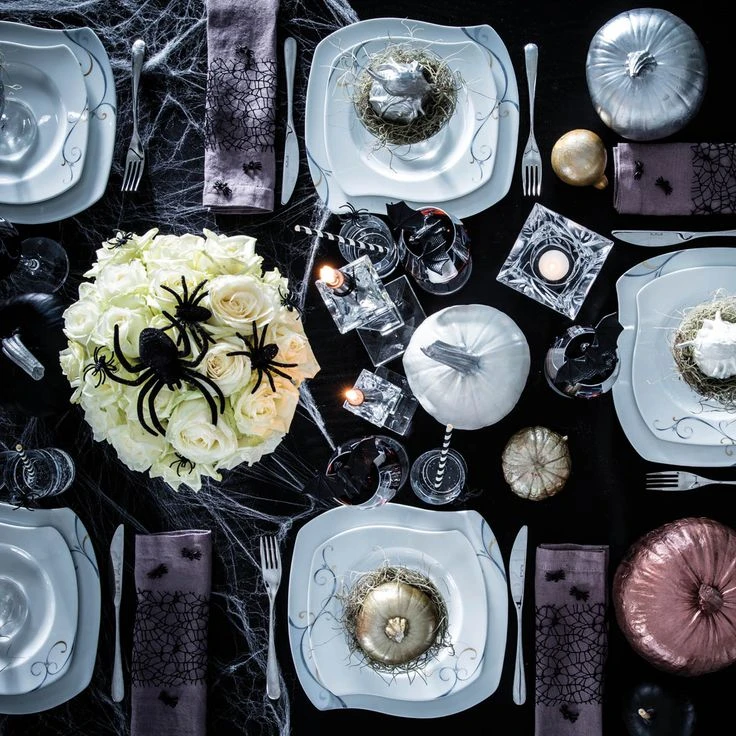
20. Center the Table on One Giant Spider
One big spider beats twenty small ones. This black table centers on a single oversized spider surrounded by smaller ones, with white plates and black chargers keeping the table itself elegant. The spider does all the scaring.
Oversized spiders from Halloween stores make instant centerpieces: set one in the middle of the table on a black charger and build the place settings around it. Keep everything else simple so the spider stays the star.
💡 Quick Tip
Anchor the big spider with museum putty so it stays put through dinner. Set it on a black charger so it reads as a centerpiece, not a pest.
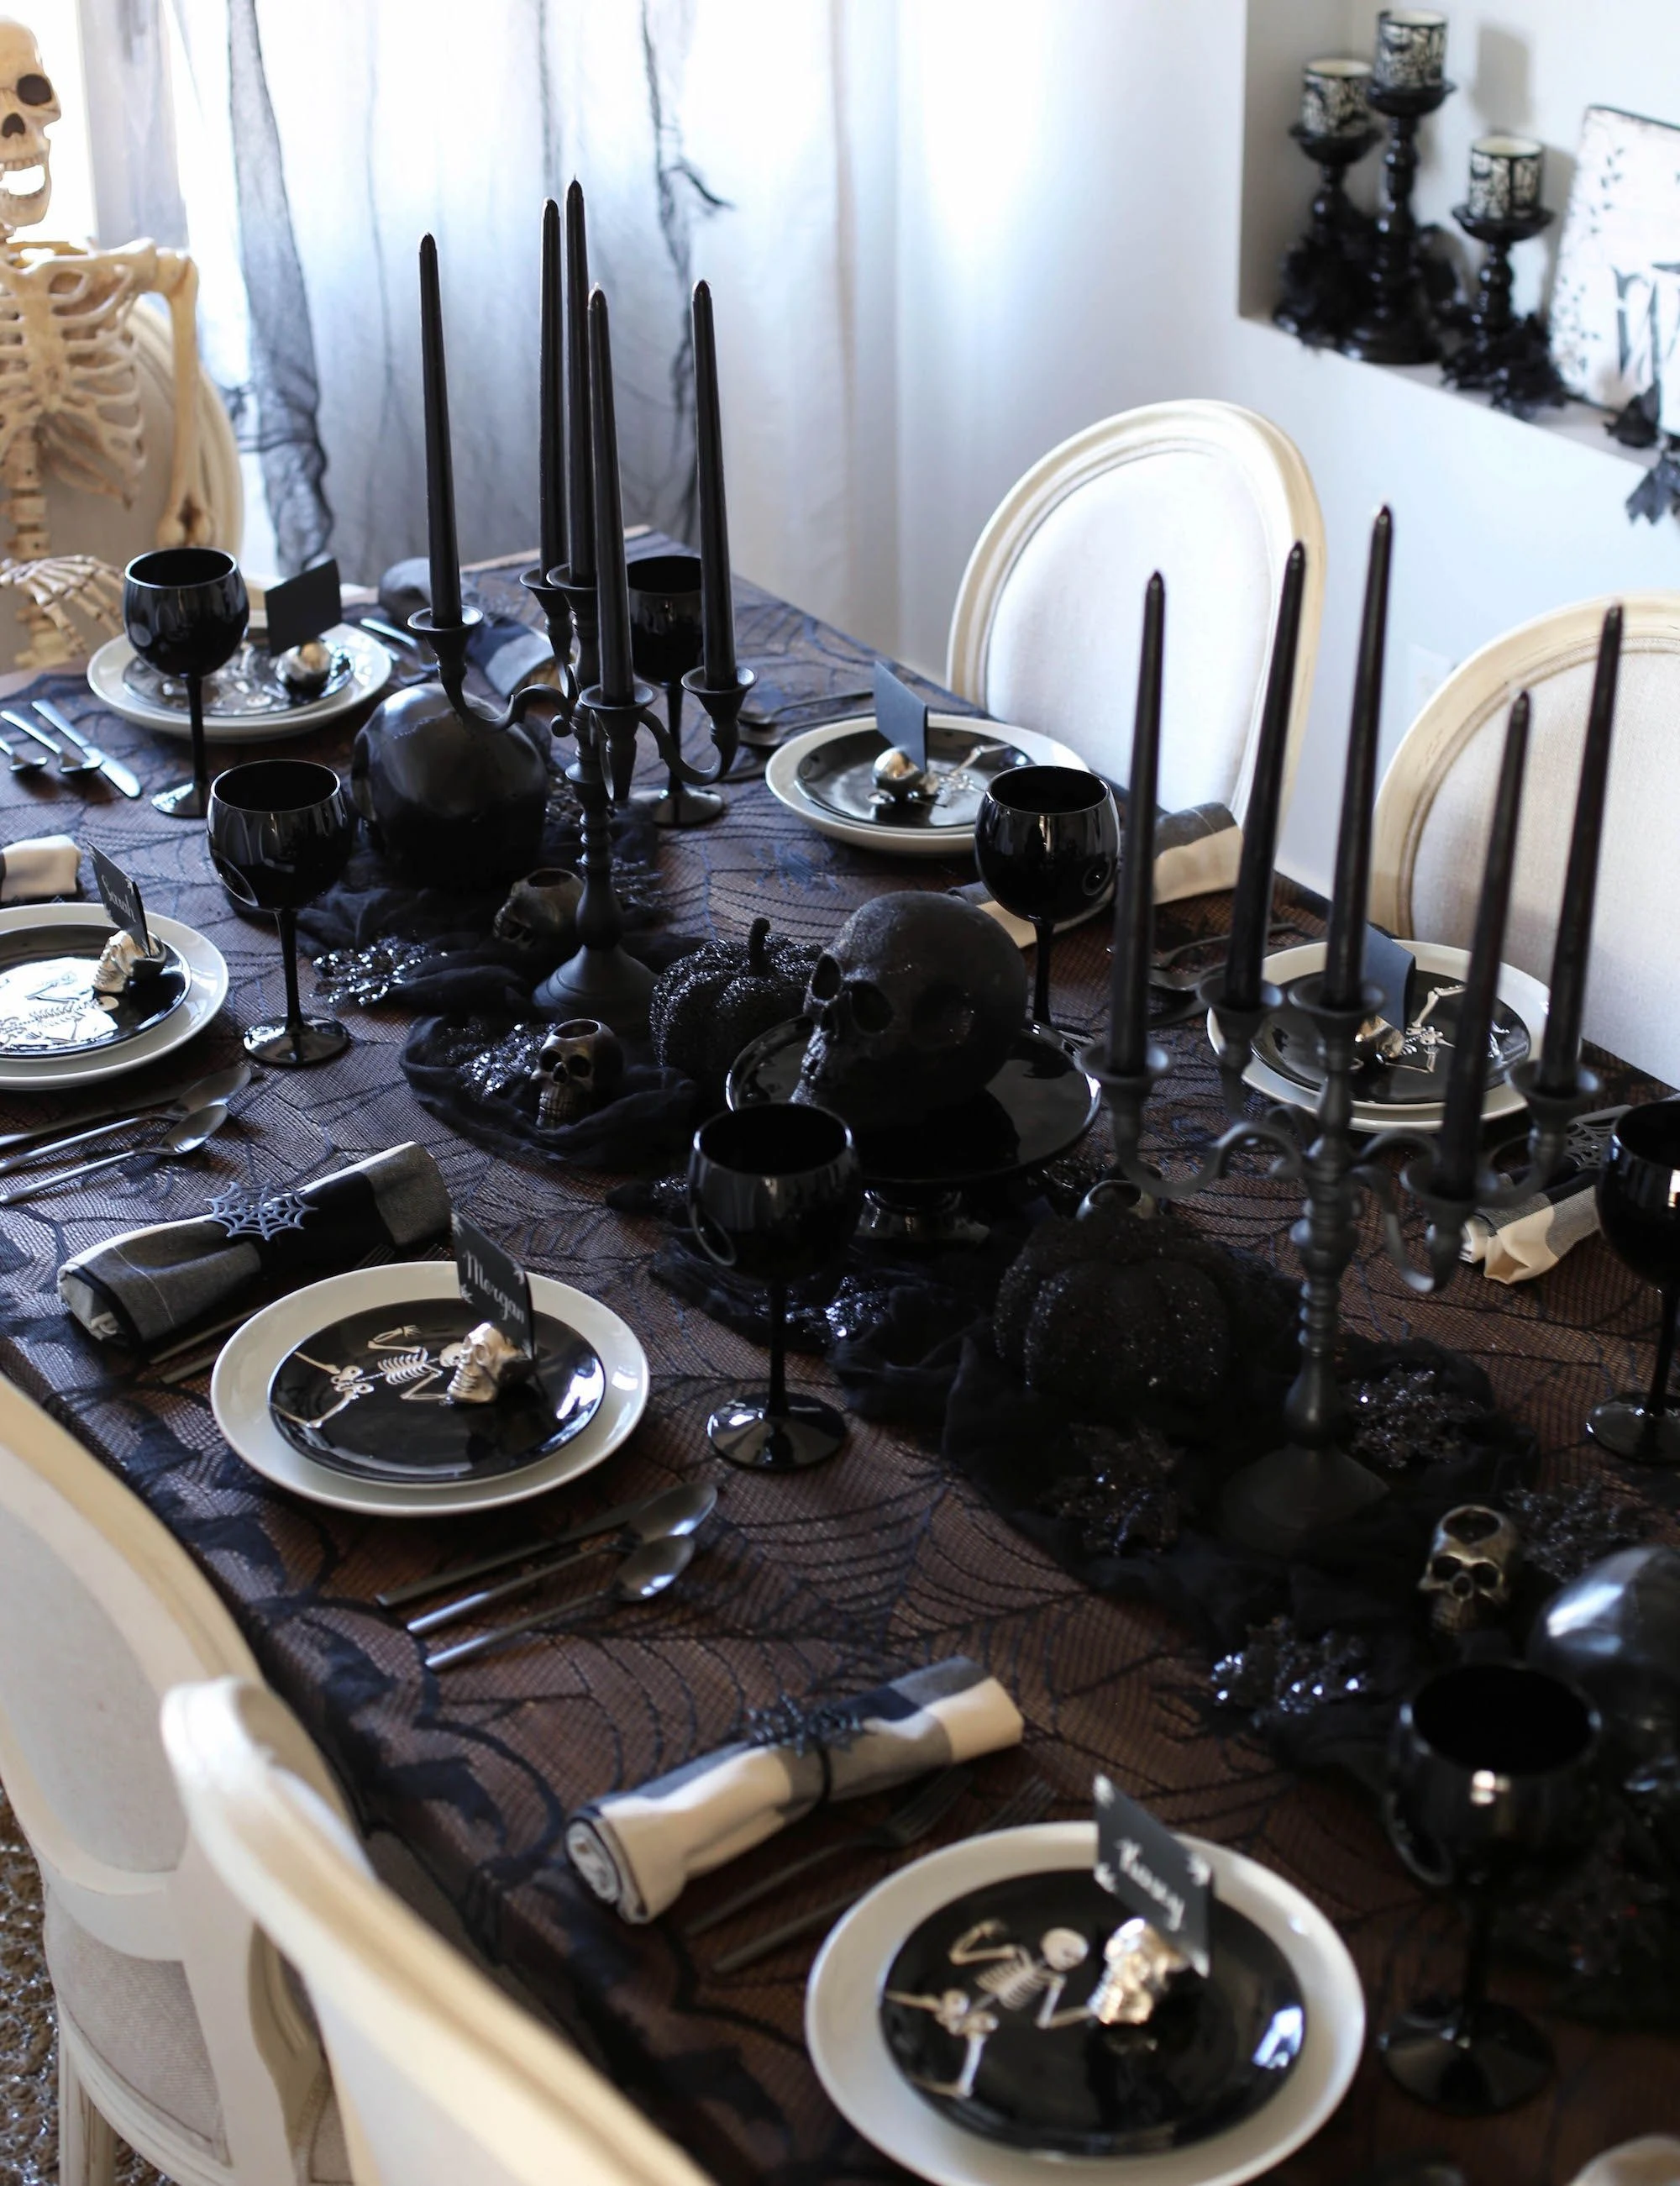
21. Line Up Tall Black Candlesticks for Instant Drama
Collect candlesticks in different heights but one finish, all black, and line them down the center. Use flameless taper candles for tall holders; real flames at that height drip wax everywhere. Light them all at once for the full effect.
Height is the cheapest drama there is. A row of tall black candlesticks marches down this dark table, with white plates and black chargers below. No flowers, no figurines, just candles, and it looks magnificent.
🕯️ Candlestick steps
- 1Gather candlesticks in one finish, all black
- 2Line them up: tallest in the middle, ends lower
- 3Add flameless tapers, never real flames up high
- 4Light them all at once for the full effect
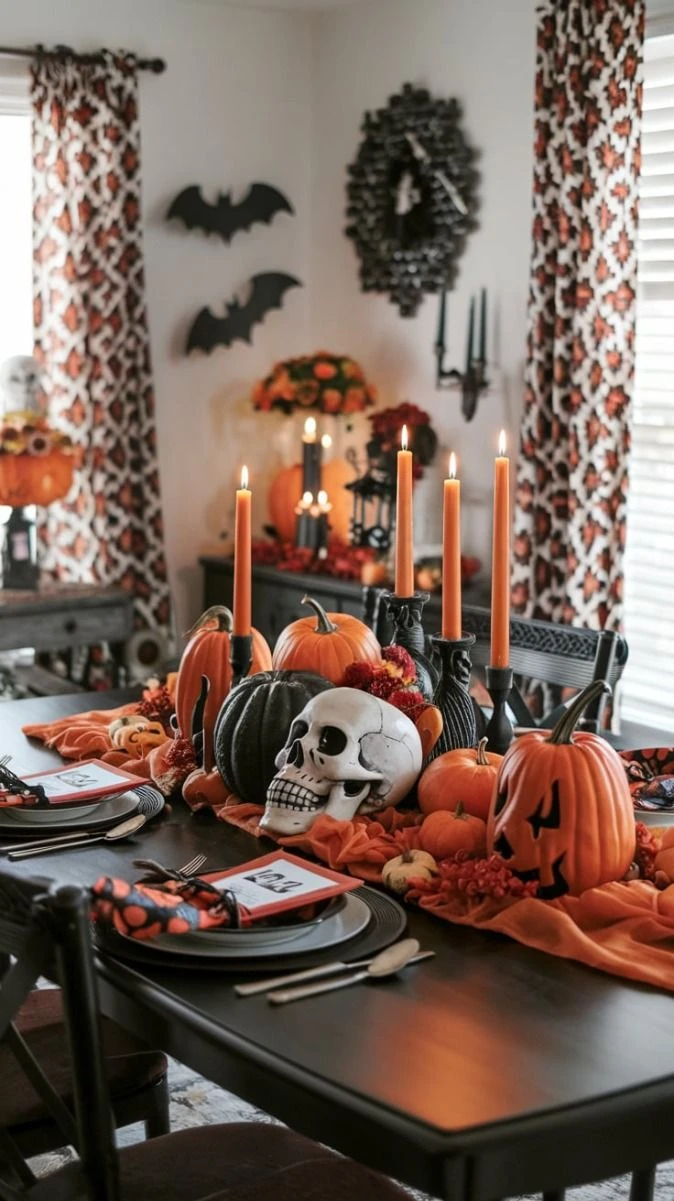
22. Pile Pumpkins High for a Classic Orange Centerpiece
Orange never goes out of style in October. This table piles pumpkins of every size down the middle, with a grinning jack-o-lantern as the centerpiece and orange candles rising behind. It is the classic Halloween table, done with confidence.
Mix real and faux pumpkins: real ones for the big shapes, faux for the odd sizes and colors you cannot find fresh. Vary the heights so the pile has peaks and valleys, and tuck candles between the pumpkins so the whole thing glows.
Sizes
Big, medium, and minis mixed for peaks and valleys
Colors
Mostly orange, with white and green for contrast
Glow
Candles tucked between pumpkins so the pile glows
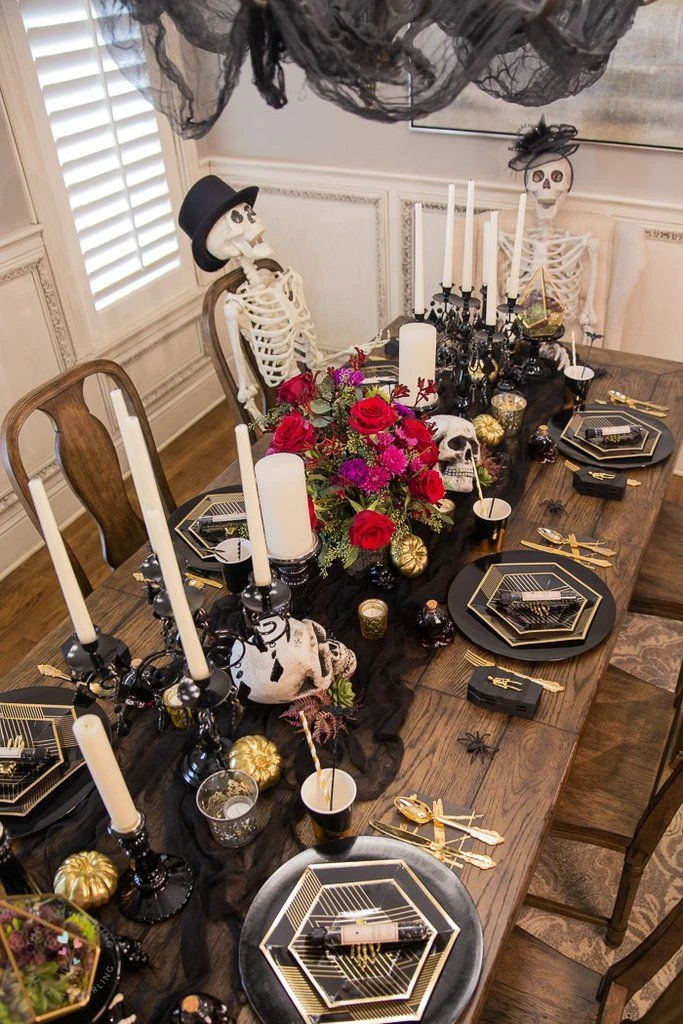
23. Keep It Monochrome: Black Plates, White Bones
Black and white is Halloween’s most elegant pairing. This table sets black plates and white napkins with a skeleton centerpiece and deep red flowers, and the limited palette makes everything look intentional. It is proof that restraint reads as luxury.
Pick two colors and commit. Black plates, white linens, and one accent, here deep red blooms, is all you need. The skeleton provides the Halloween; the palette provides the polish.
Monochrome rules:
🖤 Monochrome table checklist
- Black plates and white linens only
- One accent color, deep red blooms here
- A skeleton as the single Halloween note
- Silver or black candlelight, nothing else
Final Thoughts
A Halloween tablescape is really a dinner invitation written in candles and pumpkins. It says the food matters, the mood matters, and the people around the table matter most. Pick one strong centerpiece, layer in candles at different heights, and let every place setting tell a small piece of the story. Photograph the table before guests sit down, because a styled table never looks better than the minute before dinner. Then light every candle, take your seat, and enjoy the best-looking dinner of the season.
📌 Save this list for later
Pin it to your Halloween board on Pinterest so every tablescape idea is waiting when the party boxes come out.