
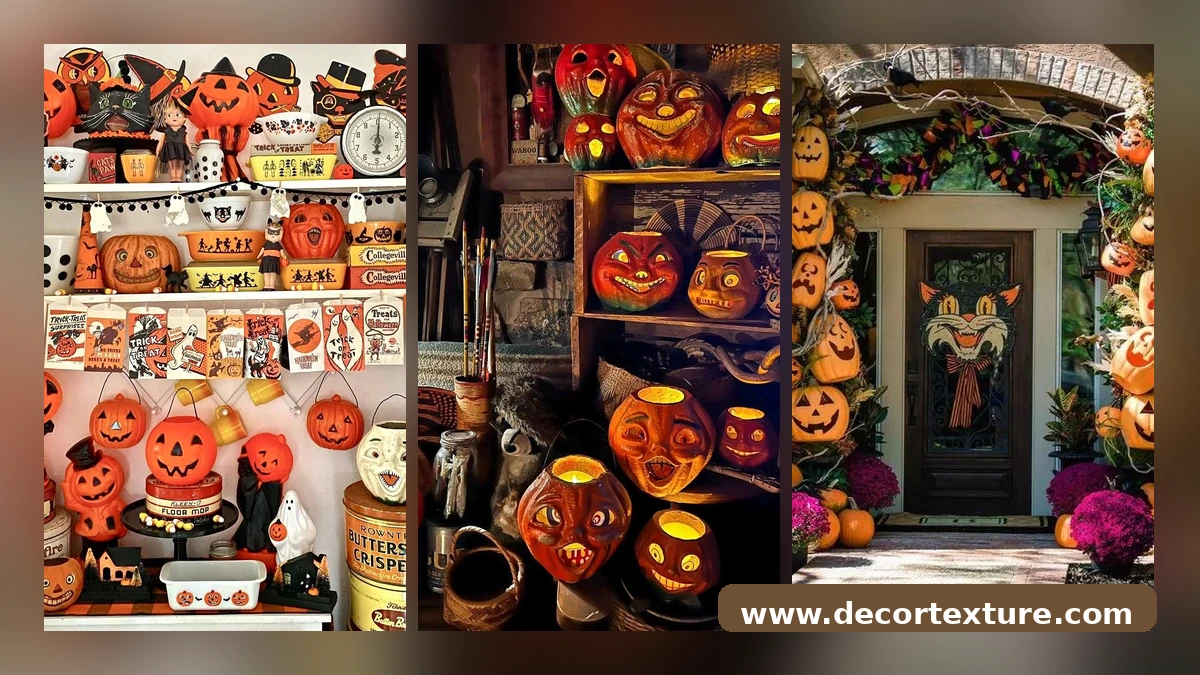
Some Octobers you remember because they felt like stepping into an old photograph. Vintage Halloween decor does exactly that. It trades plastic and neon for orange paper, black cats, grinning jack-o-lanterns, and witch figures that look like they came from your grandmother’s attic. This is the Halloween of paper die-cuts, candy buckets with painted faces, and porch displays that could have been built in 1955.This list gathers 23 vintage Halloween decor ideas pulled from real collector shelves, mantels, tables, and porches. You will find retro jack-o-lanterns, black cat figurines, vintage paper bunting, blow molds, witch-hatted mannequins, and old-school pumpkin arches, all in the warm orange and black palette that defined October decades ago. Most of these ideas mix genuine flea market finds with convincing reproductions, so you can build the look whether you collect or not. Start with the shelf or porch that greets people first, layer in one era at a time, and let this October feel like a memory worth keeping.
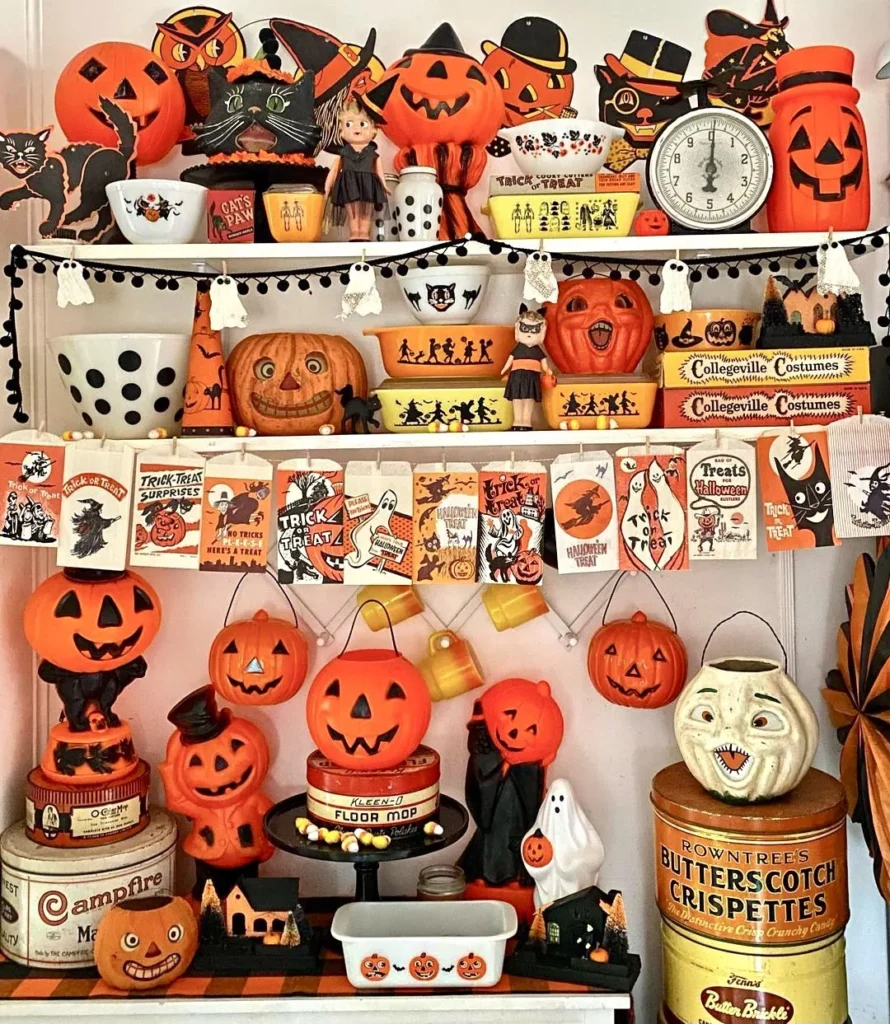
1. Fill a Hutch With a Full Vintage Halloween Collection
If you collect vintage Halloween pieces, the hutch is where they earn their keep. This one packs every shelf with orange jack-o-lantern buckets, black cat figures, painted mugs, and a small clock, then strings a paper bunting of vintage-style cards across the front. Nothing matches perfectly, and that is the whole point.
The secret is density. Vintage collections look best when pieces touch and overlap, like a general store window in October. Group by color first, orange and black carry the shelves, then tuck in one odd piece per shelf, a tin, a candle, a small framed card, to keep the eye moving.
Build the collector hutch:
- Start with the biggest buckets on the bottom shelf for weight
- Layer smaller figures in front so nothing hides behind
- String a paper bunting across the front edge for the finishing touch
- Add one non-Halloween piece per shelf, like a clock or tin, for realism
✅ Collector hutch checklist
- Biggest buckets on the bottom shelf
- Small figures layered in front
- One paper bunting across the front
- One odd piece per shelf for realism
- Orange and black as the shelf colors
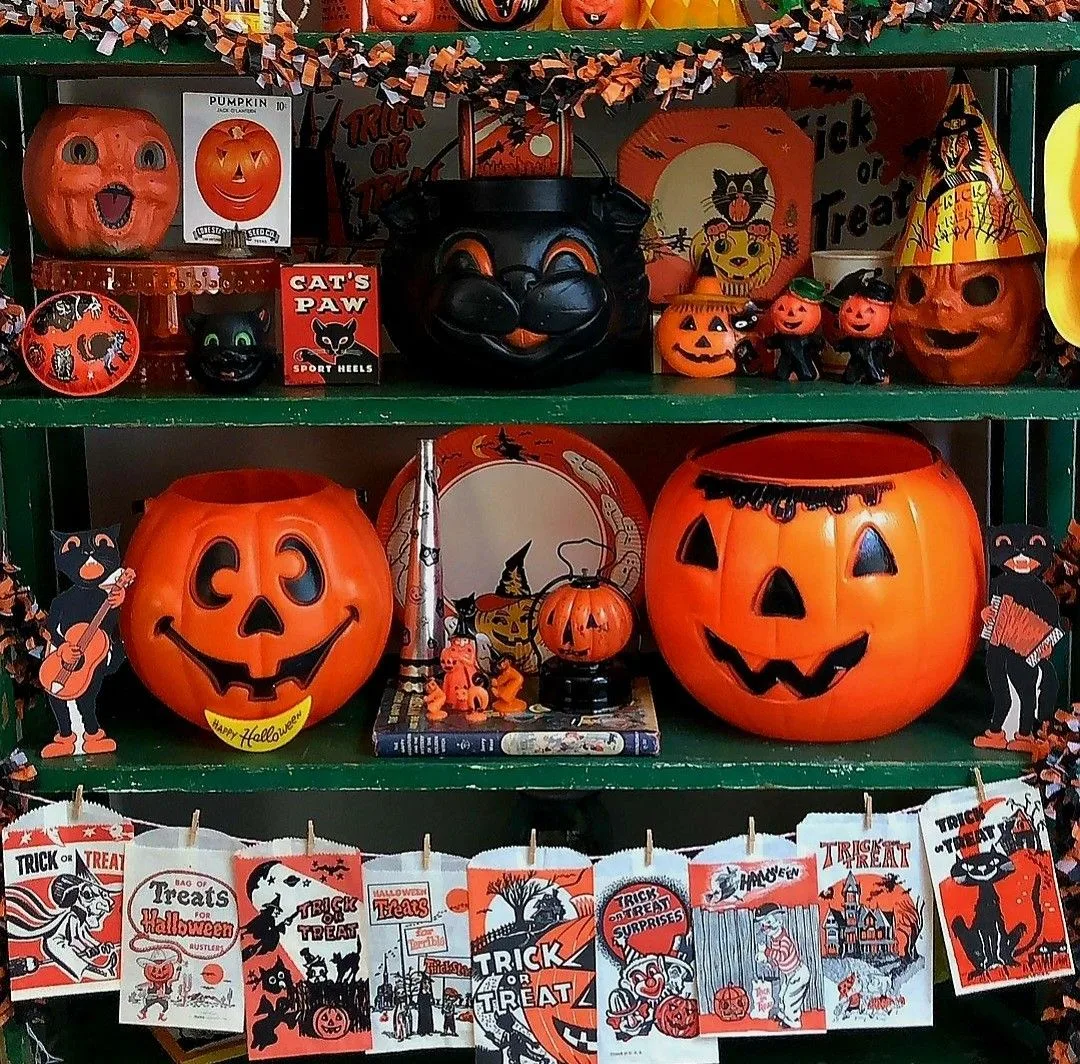
2. String a Vintage Paper Bunting Across Open Shelves
One string of paper bunting can make a whole shelf read vintage. These green shelves hold big grinning jack-o-lantern buckets and a black cat candy pail, but it is the trick-or-treat banner clipped below that sells the era. It looks like the pages of a 1960s Halloween catalog come to life.
Bunting works because it breaks the straight lines of shelving. Hang it with small wooden clips so each card hangs at a slightly different angle, which reads handmade even when the cards are reproductions. Match the cards to your shelf pieces: cats, pumpkins, witches, one motif per strand.
The buckets above do the heavy lifting for color. Two big orange faces at eye level anchor the display, and everything smaller orbits them. If your shelves are not green, any painted shelf in cream, black, or deep red gives the same old-store feel.
🎃 Anchors
Two big orange buckets at eye level. They carry the color for the whole shelf.
🐈⬛ Accents
One black cat pail and small figures orbiting the big faces.
📜 Finish
A clipped paper bunting, hung loose so it reads handmade.
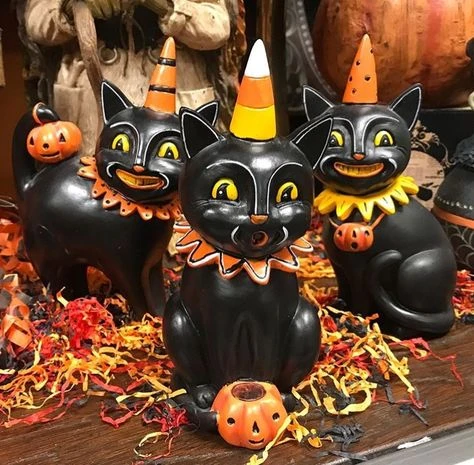
3. Perch Vintage Black Cat Figurines in Party Hats
Black cats are Halloween royalty, and the vintage ones have personality the modern copies never quite catch. These three wear candy-corn-striped party hats and sit in a pile of fall leaves with a tiny pumpkin, which makes the whole thing feel like a birthday party for October itself.
Group cats in odd numbers, three or five, and vary their poses so they look like a little gang. The hats are the trick: cone party hats in candy corn stripes turn any black cat figure into a Halloween piece, even one you already own. A scatter of real or faux leaves underneath ties it to the season.
💡 Quick Tip
No vintage cats in your stash? Candy-corn party hats on any black cat figurine give the same look in seconds. Check craft stores in September before the Halloween stock sells out.
4. Top Mannequin Heads With Tall Vintage Witch Hats
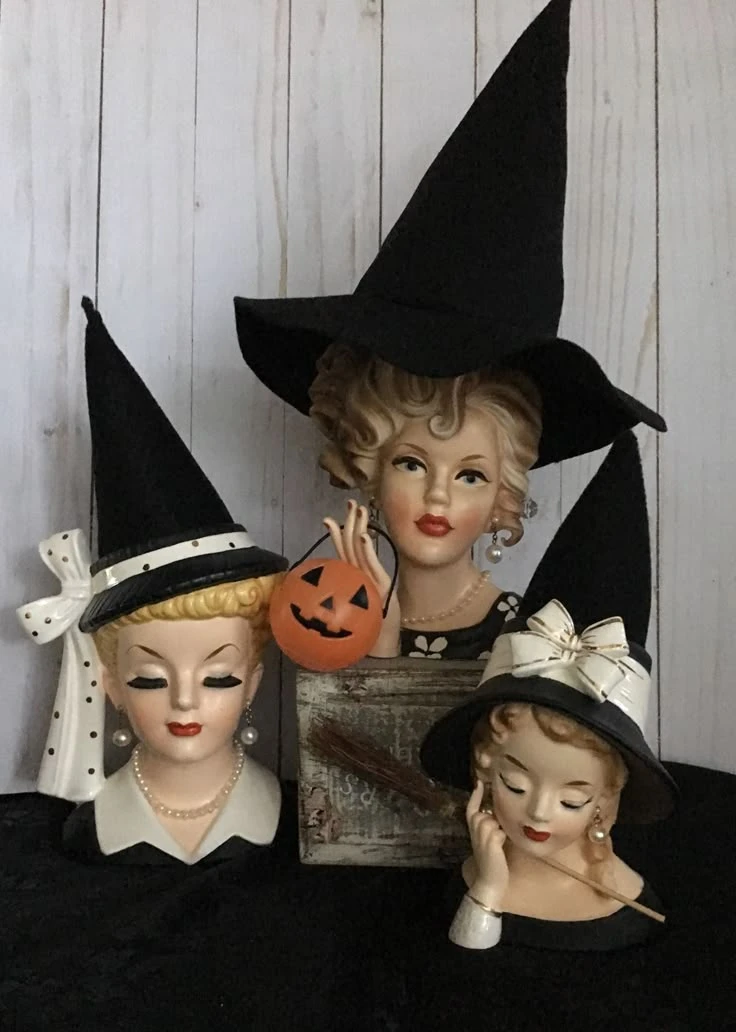
Witch hats need heads, and vintage mannequin heads give them the best ones. These three doll heads wear tall black witch hats, one plain, one with a bow, one with a buckle, and the smallest holds a tiny jack-o-lantern. It is equal parts spooky and sweet, like a window display from a 1950s department store.
The hats do all the work, so keep the heads simple. Plain cream or porcelain heads in different sizes look more vintage than anything painted. Tilt one hat slightly sideways. Perfect symmetry reads new, and a little crooked reads collected.
🎩 Hat styles that read vintage
| Tall plain cone | The classic, pairs with anything |
| Buckle hat | Storybook witch, most recognizable |
| Bow-trimmed hat | Softer look, works with doll heads |
Mix all three styles on a row of heads for a display that looks curated over years.
5. Scatter Vintage Die-Cut Decorations Like Confetti
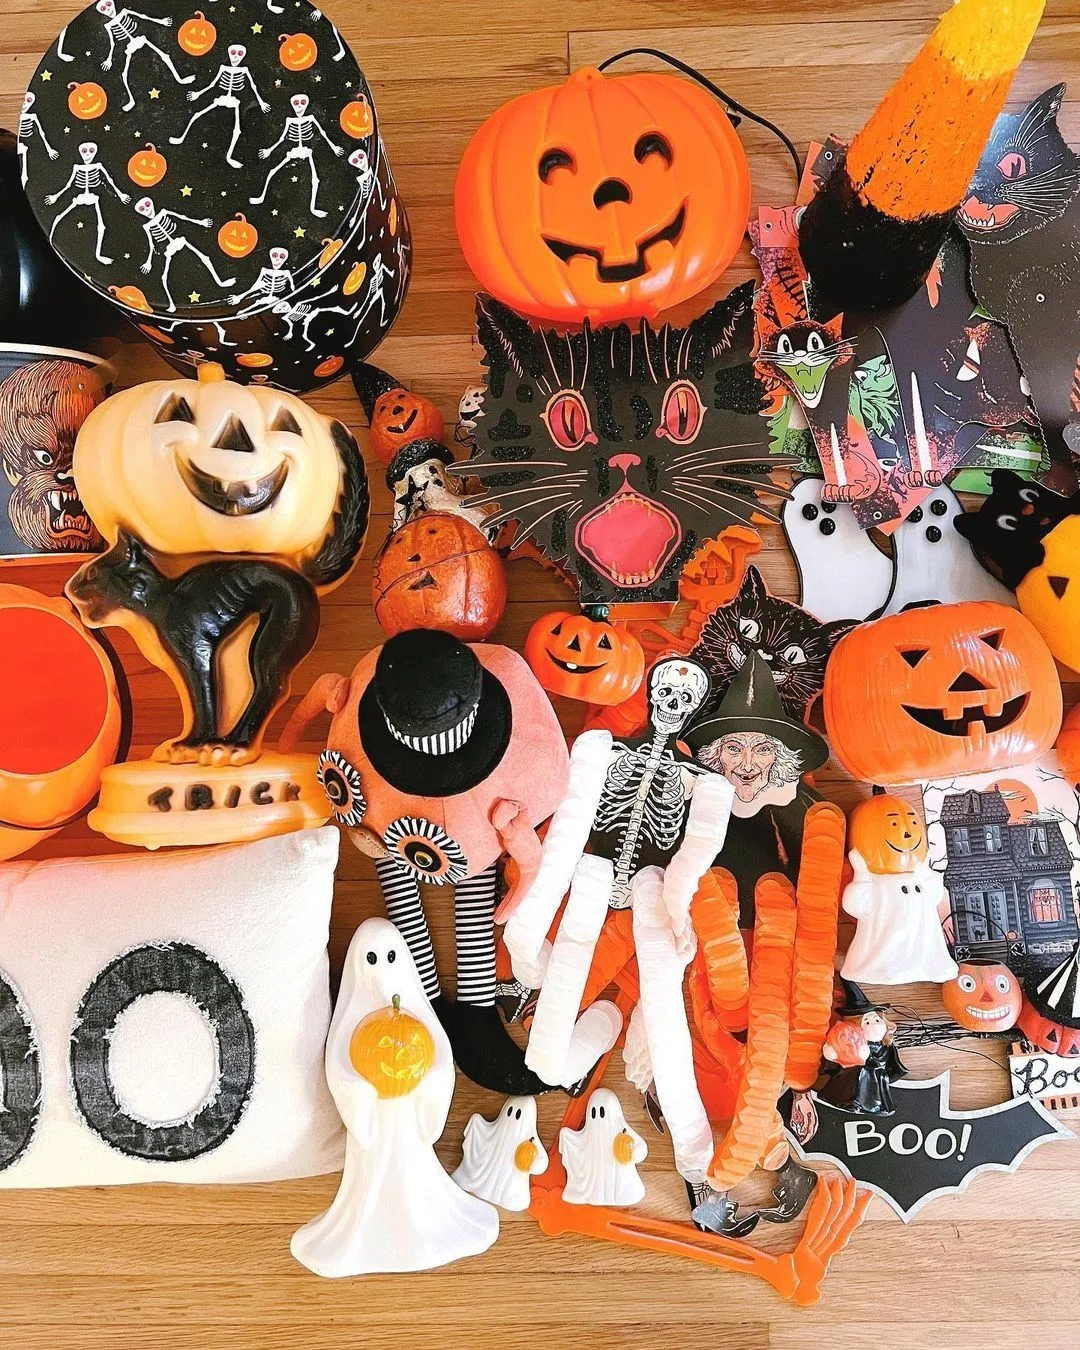
Paper die-cuts are the purest form of vintage Halloween. These flat cardboard figures, pumpkins with toothy grins, arched black cats, a friendly ghost, a rattling skeleton, were the decorations of mid-century Octobers, taped to windows and walls. Laid out together they look like a museum of Halloween joy.
Use them two ways. Frame a few favorites behind glass for a permanent collection wall, and keep a box of extras to scatter across the table as party confetti. The flat lay photo itself makes a great printable, since the shapes are bold enough to read at any size.
What to look for when buying:
✂️ Die-cut shopping notes
- ▸ Honeycomb tissue centers mean true mid-century pieces
- ▸ Orange and black ink, slightly faded, reads most authentic
- ▸ Cats, owls, and moons are the classic trio to collect first
- ▸ Reproductions are fine for taping up; save originals for frames
6. Dress the Mantel With Retro Die-Cuts and Card Garlands
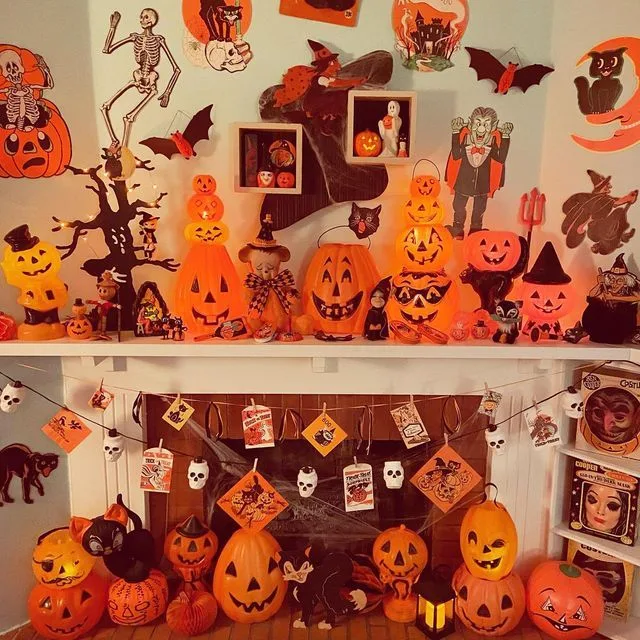
The mantel is Halloween’s main stage, and paper makes it cheap to dress like 1962. This one layers die-cut pumpkins, black cats, and witch figures across the shelf, then hangs a garland of vintage-style cards underneath. The whole thing probably cost less than one modern prop.
Paper decor needs a dark background to glow. Against a pale wall it fades away, but against a dark mantel or a black cloth backdrop every orange shape pops. Tape die-cuts at slightly different depths, some on the wall, some on the shelf edge, so the display has real dimension.
Hang the garland in three steps:
🖼️ Card garland steps
- 1Cut a length of twine wider than the mantel
- 2Clip cards with mini clothespins, alternating motifs
- 3Drape with a gentle sag, never pulled tight
- 4Layer die-cuts on the shelf above for depth
7. Curate a Pumpkin-Face Hutch, One Grin Per Shelf
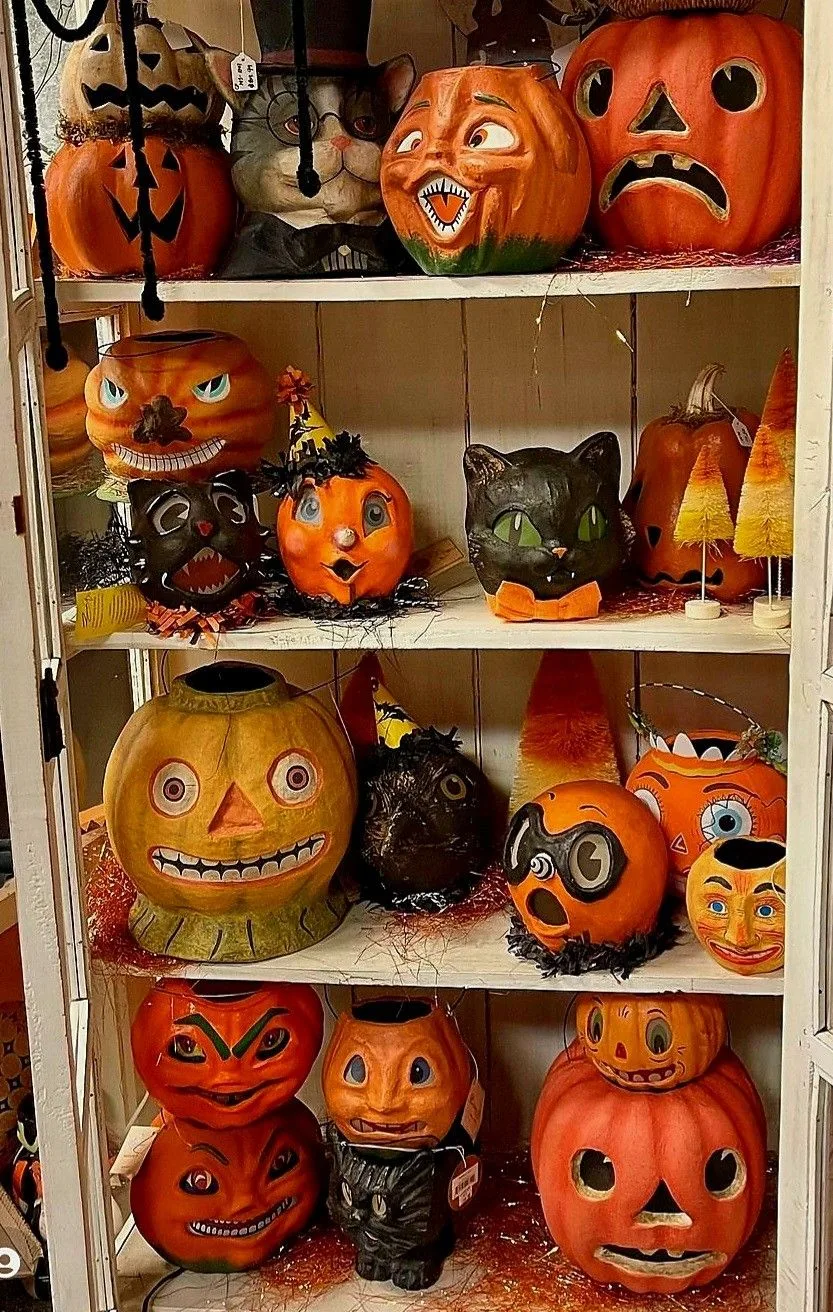
Every vintage pumpkin bucket has its own face, and a hutch full of them is pure October. These shelves hold dozens of grinning, leering, and laughing jack-o-lantern pails, each one a little different. Together they read like a choir of Halloween past.
The trick to a face collection is variety. Alternate happy faces with spooky ones, round pumpkins with tall ones, and let a few black pieces break up the orange. White shelves keep it bright enough to see every expression, which matters when the faces are the whole show.
Collectors hunt these at flea markets all year. Reproductions in the same style fill the gaps just fine, since the charm is in the crowd, not the pedigree of any single bucket.
🎃 WHY THIS WORKS
Repetition is the collection. One pumpkin bucket is a decoration; forty of them is a museum. The faces do the decorating, so the styling can stay simple: shelves, light, done.
8. Style Dark Wood Shelves With Retro Jack-o’-Lanterns
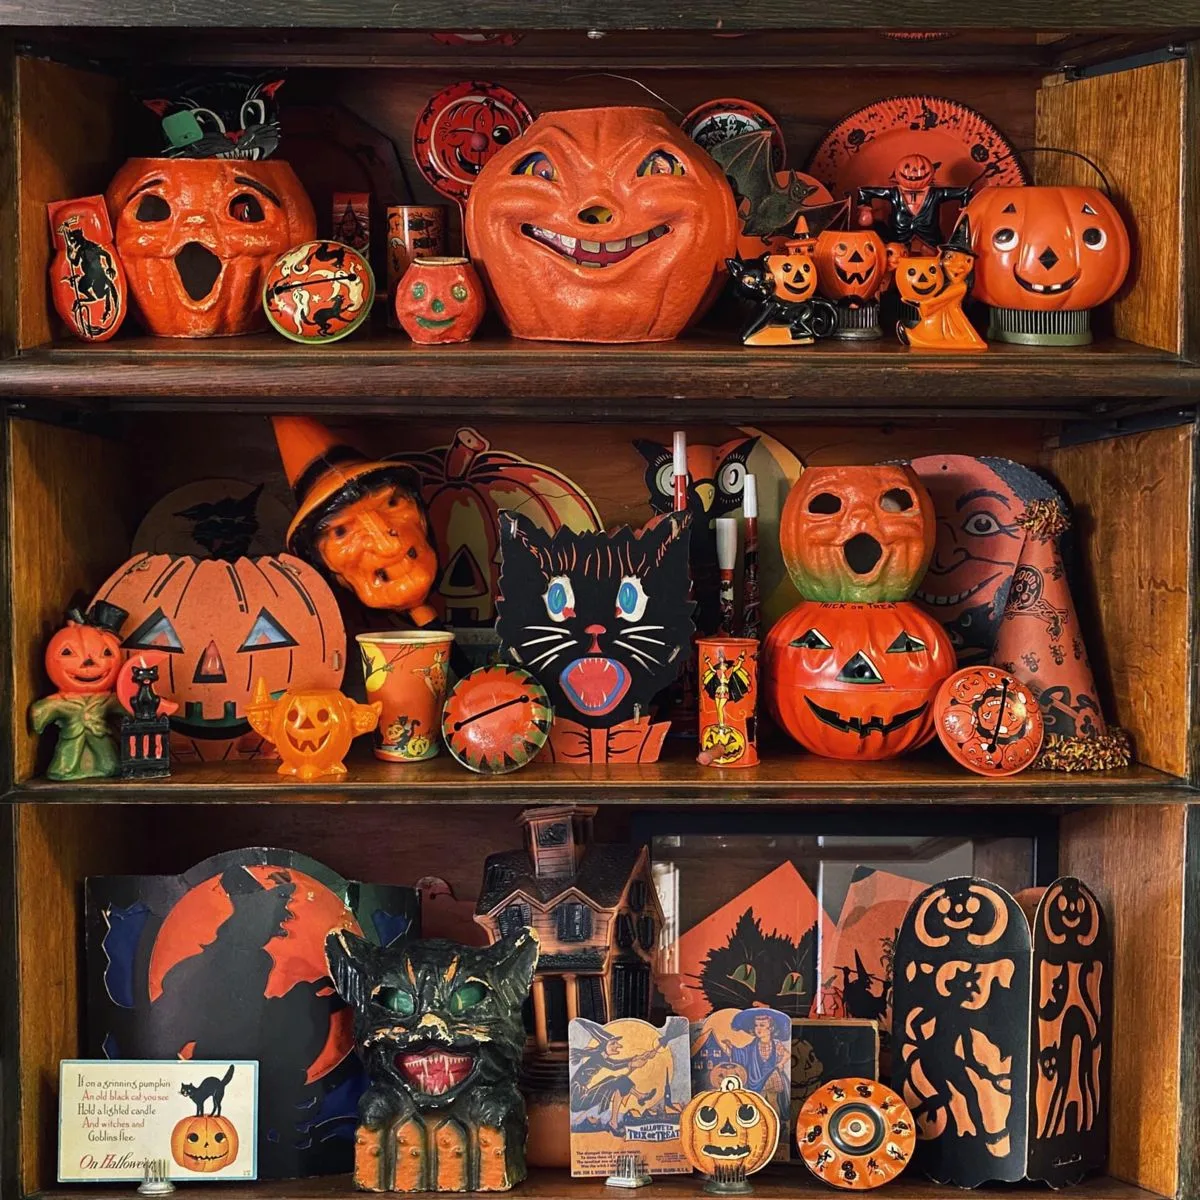
Dark wood and orange pumpkins are a combination that never misses. These shelves layer retro jack-o-lanterns with black cat figures and a little Halloween village, and the deep wood tone behind them makes every orange piece glow like it is lit from inside.
On dark shelves, space things out more than you would on white. Dark backgrounds swallow small pieces, so give each pumpkin room to breathe and keep the smallest figures toward the front edge where the light catches them.
Do this, skip that:
✅ Do this
Space pieces out on dark wood and pull small figures to the front edge. Light each shelf so the orange glows.
❌ Skip this
Cramming small dark pieces into the back of a deep shelf. On dark wood they vanish and the shelf just looks empty.
9. Line Up Jack-o’-Lantern Mugs Like a Diner Counter
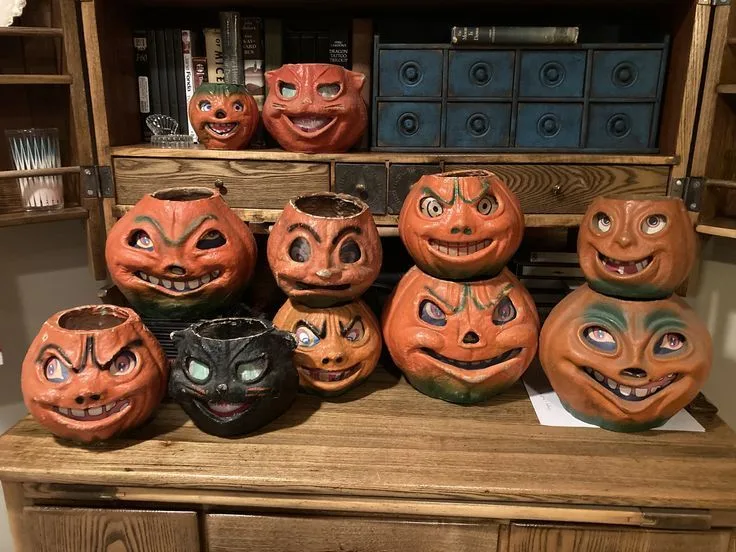
Pumpkin-face mugs lined up in a row have the charm of a 1950s diner counter. Each mug wears a different expression, and the wooden counter and cabinet behind them make the whole scene feel like a country store display you could walk into.
Rows work best with a rhythm: big face, small face, mini pumpkin, repeat. Keep the line slightly uneven so it feels collected rather than stocked. These mugs are practical too, so pull a few down for actual cider on party night and the display becomes the serving station.
Mug row checklist:
☕ Mug row checklist
- Five to nine mugs for a proper row
- Alternate faces: happy, spooky, silly
- Tuck a mini pumpkin between every third mug
- Wooden or dark counter behind for contrast
- Keep two mugs empty for serving cider
10. Stack Vintage-Look Pumpkins Into a Totem
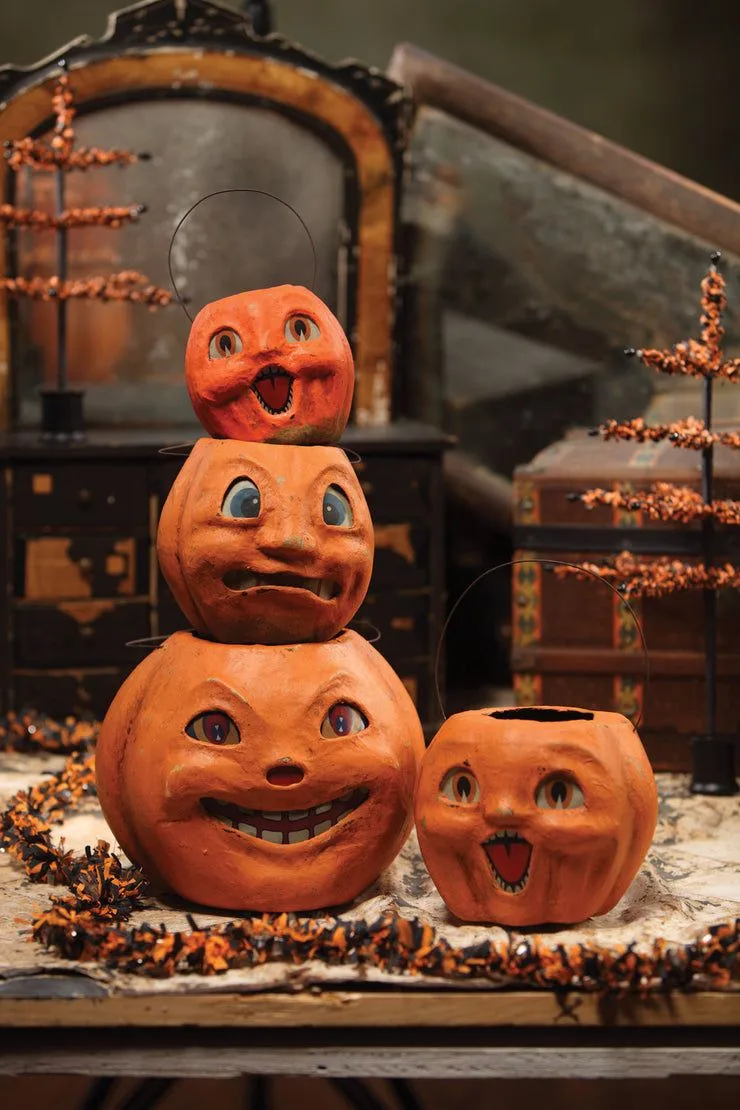
Stacking pumpkins into a totem is the oldest trick in the vintage book, and it still stops people. These three painted pumpkins rise beside a framed mirror with amber bottles, and the whole corner glows like a still life painting.
Balance is everything in a stack. Put the widest pumpkin on the bottom, the tallest face in the middle, and the smallest on top, then step back and check the lean. A tiny wobble reads charming; a real lean reads accident waiting to happen, so use museum putty between the layers.
💡 Quick Tip
Museum putty between stacked pumpkins is invisible and holds through the whole season. It peels off clean in November and saves you from the midnight crash.
11. Lean Into 1950s Blow Molds and Paper Masks
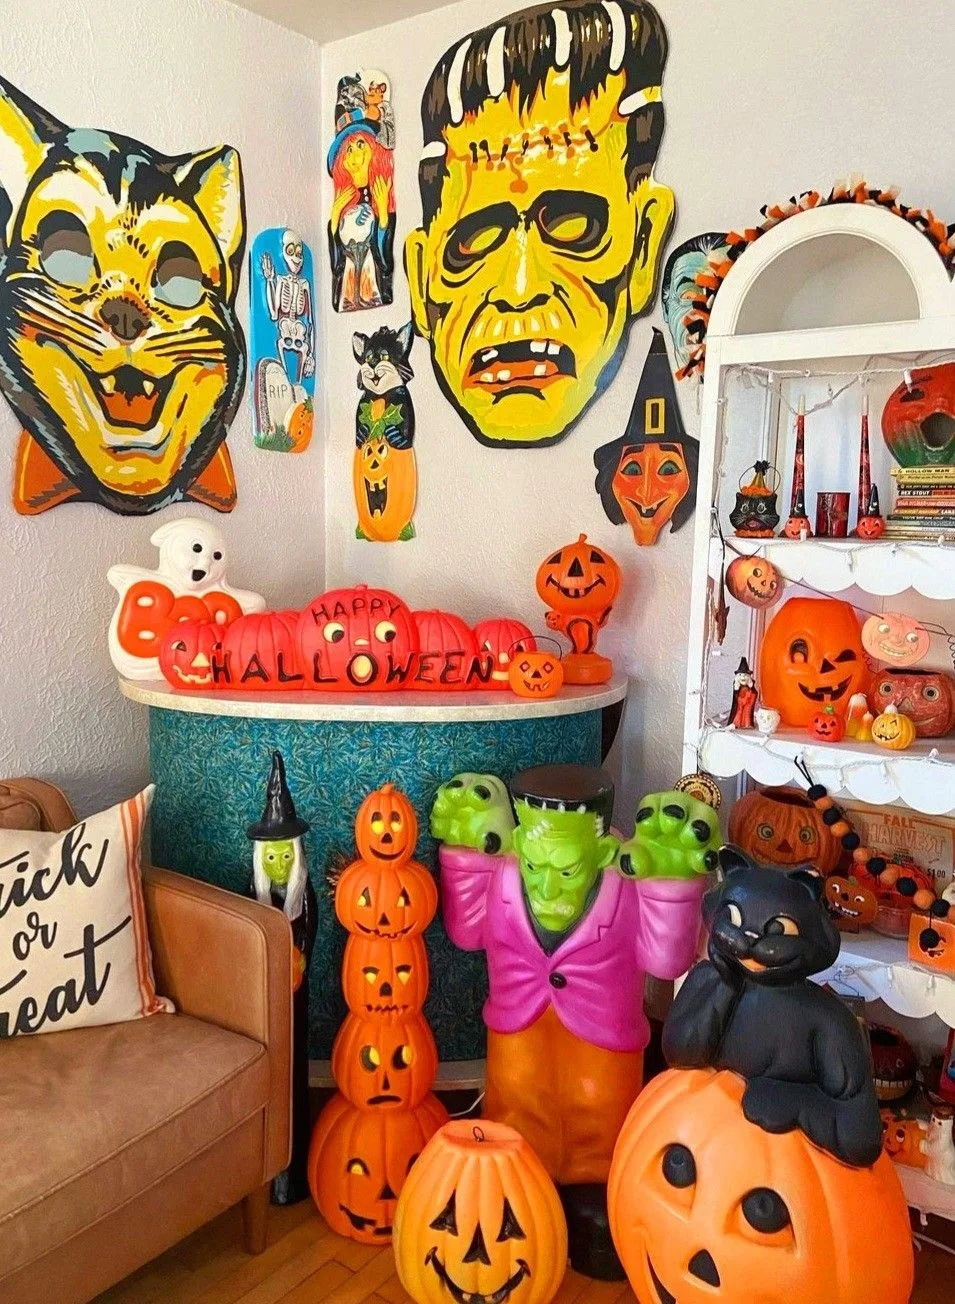
The 1950s gave Halloween its most joyful look, and this corner is a time machine. Paper masks of Frankenstein and a grinning cat hang on the wall, blow-mold pumpkins crowd the floor, and a Frankenstein figure stands guard. It is loud, it is cheerful, and it is unmistakably vintage.
Paper masks are the star here, so hang them where eyes land first, at face height on the wall. Blow molds go below on the floor or a low bench, since they read best from a little distance. The letter banner across the top ties wall to floor in one swoop.
🎭 Wall
Paper masks at face height, the first thing eyes find.
🎃 Floor
Blow molds and figures low, best read from a few steps back.
🔤 Bridge
A letter banner across the top joins wall to floor.
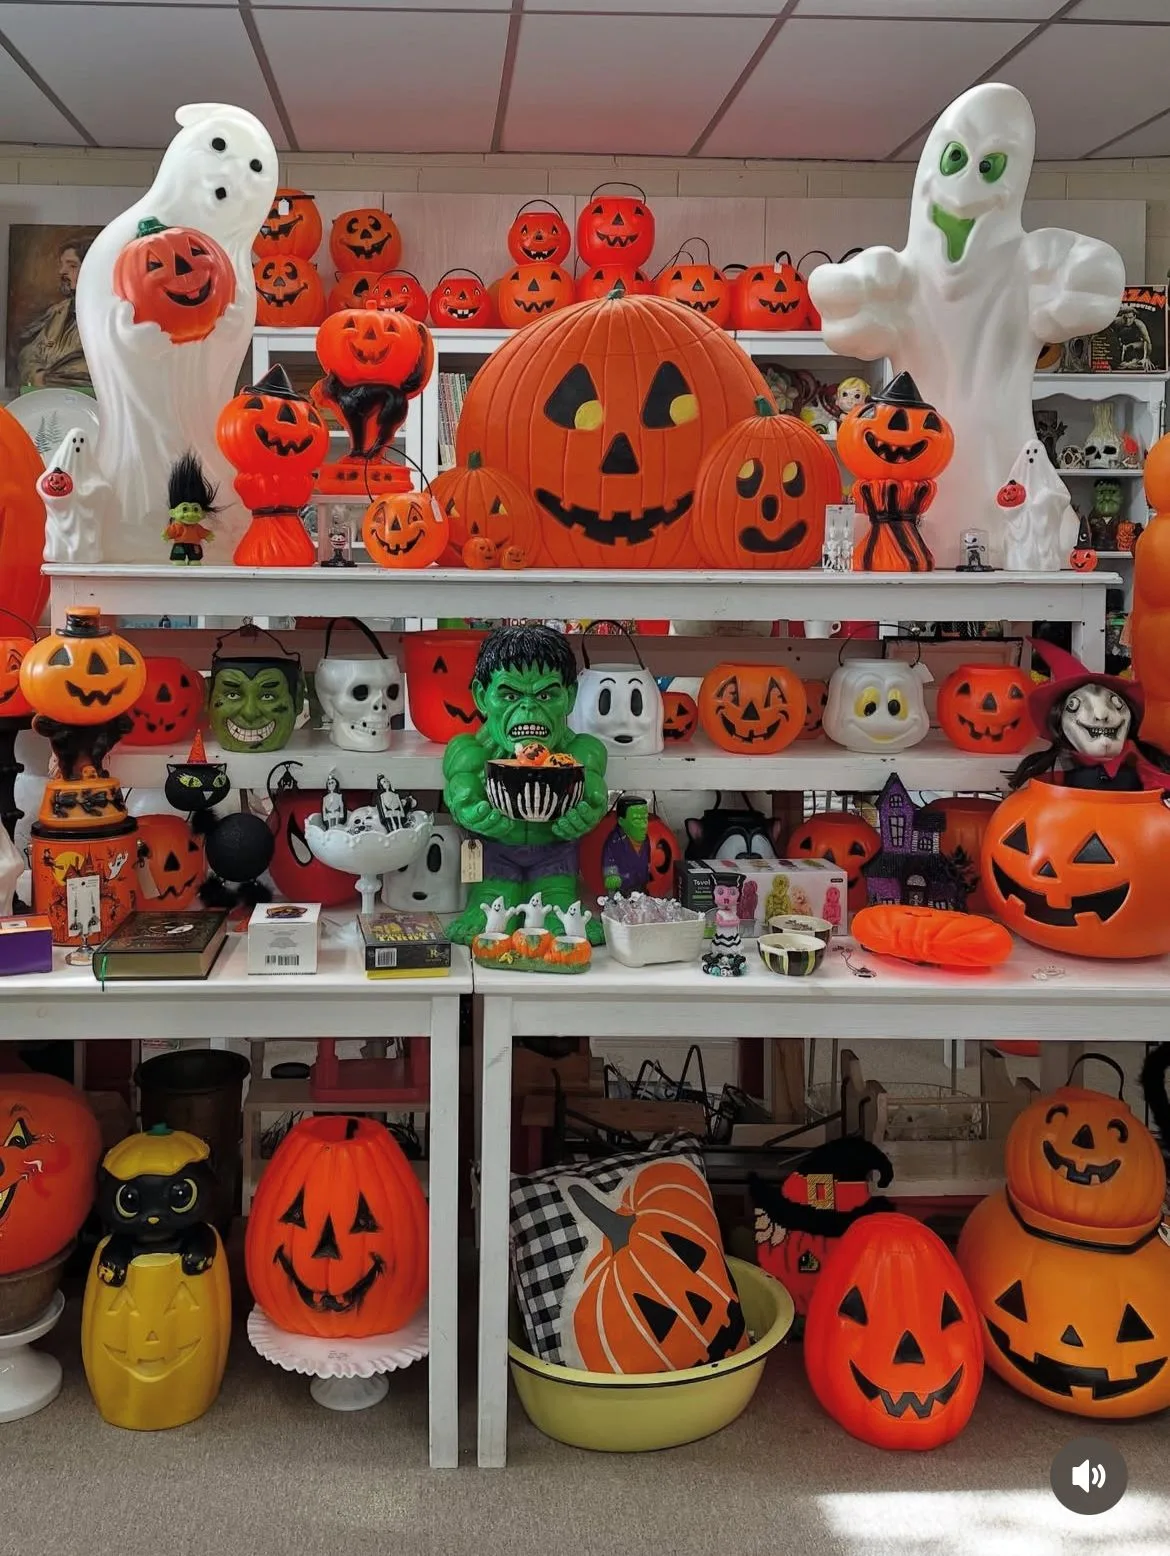
12. Let Blow Molds Glow on White Shelves
Blow molds were made to glow, and white shelves are the perfect stage. These rows of light-up pumpkins, ghosts, and one green Frankenstein shine against the pale shelving like a toy store window at dusk. It is nostalgia with a plug.
Light every piece. A shelf of unlit blow molds is just plastic, but the same shelf glowing is pure 1975. Run the cords behind the shelves and use a single power strip with a timer, so the whole display switches on at dusk without a thought.
BEFORE
Unlit blow molds on a shelf in daylight. Fine shapes, zero magic.
AFTER
Every piece lit at dusk on a timer. The shelf glows like a memory.
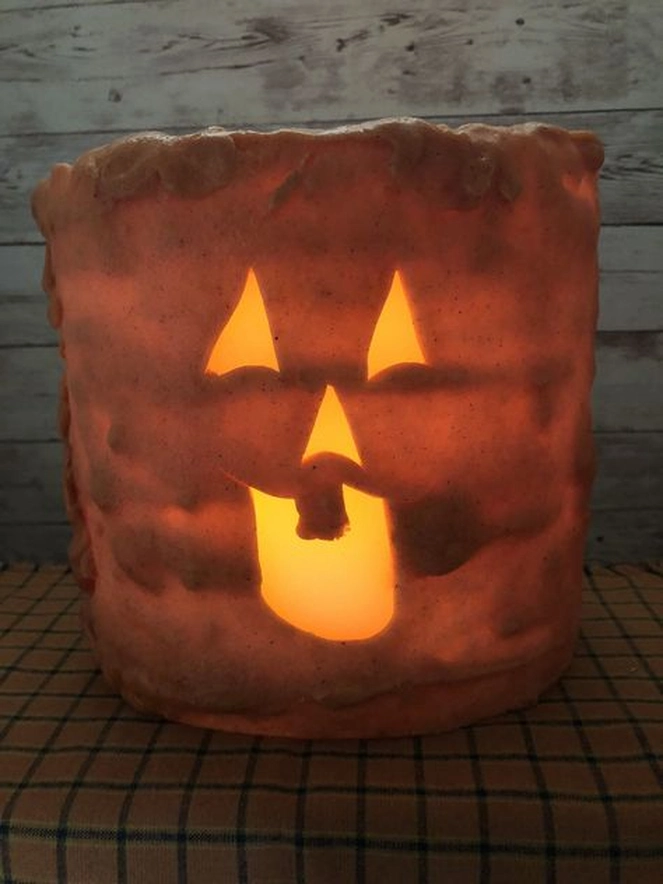
13. Light Paper-Bag Jack-o’-Lantern Luminarias
The humblest vintage light is a paper bag with a face. This luminaria glows from within, the painted jack-o-lantern face softened by the paper into something warm and handmade. It is the kind of craft that costs almost nothing and gets remembered.
Safety first with real flames, so use battery tea lights inside every bag. Cut the classic triangle eyes and jagged grin with a craft knife, then fold the bag tops down twice for a finished cuff. Line a walkway with a dozen and the whole path feels like a 1960s block party.
Make them in an afternoon:
🕯️ Luminaria steps
- 1Draw the face in pencil on a brown paper bag
- 2Cut eyes and grin with a craft knife
- 3Fold the top down twice for a cuff
- 4Drop in a battery tea light, never a real flame
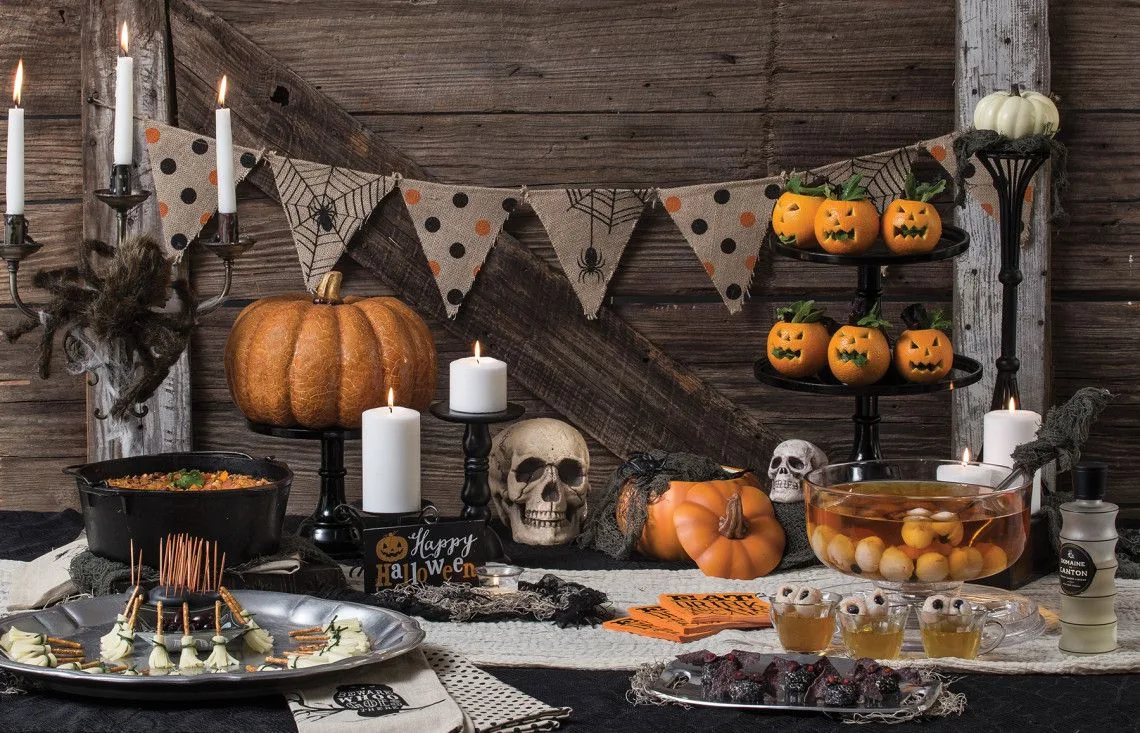
14. Set a Candlelit Vintage Table With Skulls and Bunting
Vintage Halloween tables are dark, flickering, and a little bit grand. This one layers skulls, tall pillar candles, a candelabra, and pumpkins down the center, with a paper bunting strung above. It looks like a dinner party in a very fun haunted house.
Candlelight is doing most of the decorating, so commit to it. Turn off the overheads, light every candle, and let the skulls cast shadows. The bunting above keeps the vintage theme clear, since candles and skulls alone could read any era. Together they say old-school October.
Vintage tables work because the pieces are honest. Real wax, real paper, real shadows. Nothing blinks, nothing inflates, and nothing needs batteries except the smoke alarm.
🕯️ WHY THIS WORKS
Candlelight plus paper equals instant era. The bunting says vintage, the flames say atmosphere, and the skulls say Halloween. Three ingredients, one unforgettable table.
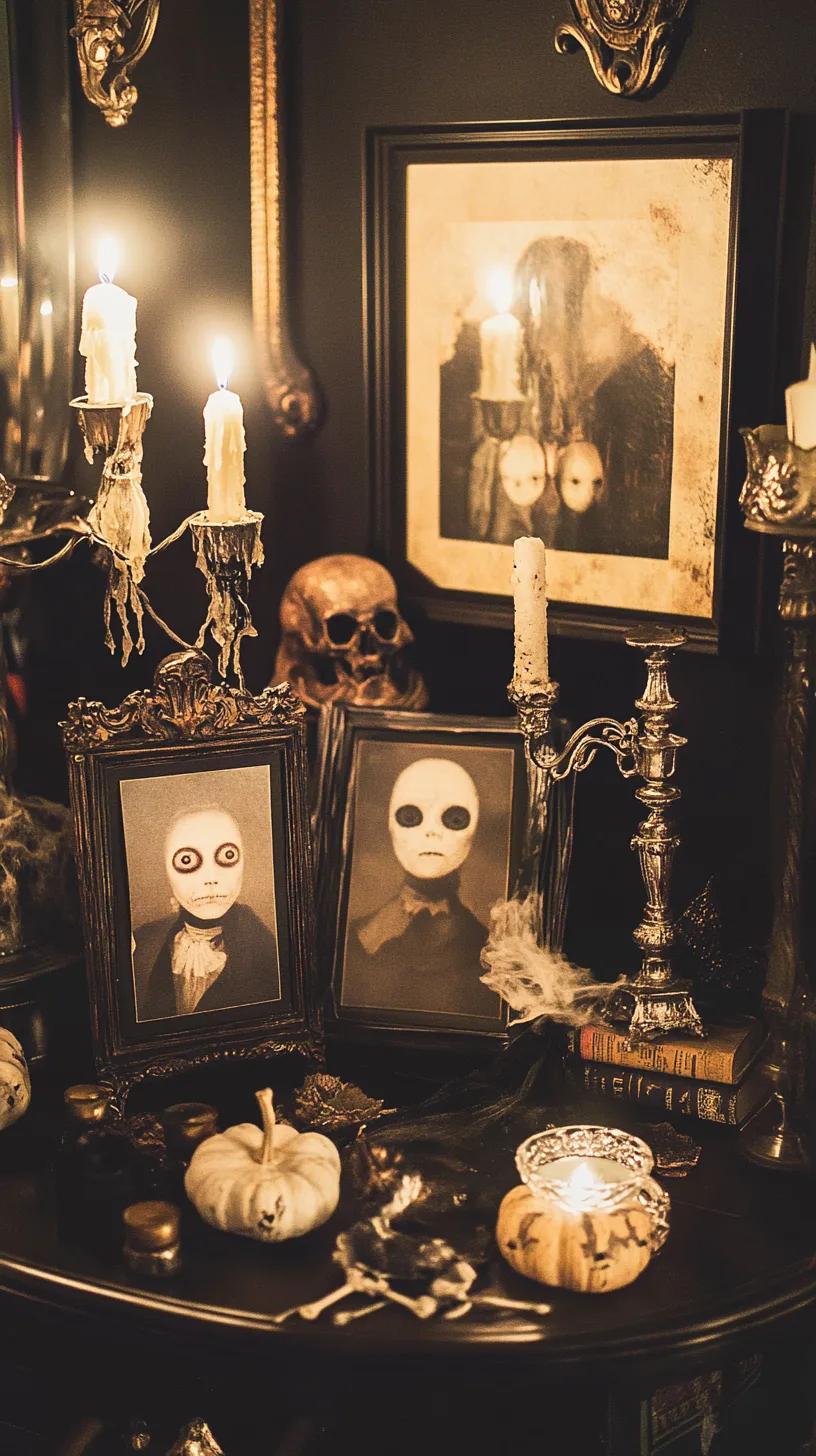
15. Build a Dark Mantel With Antique Portraits and Skulls
Old portraits make Halloween feel haunted in the truest sense. This dark mantel pairs stern antique-style faces with candelabras, skulls, and small pumpkins, and the candlelight makes the painted eyes seem to follow you. It is the vintage look at its most atmospheric.
Framed portraits are easy to find at thrift stores, and any stern face in a dark frame works. Hang them tight above the mantel, gallery style, then let the candles below throw moving light across the glass. Skulls and pumpkins on the shelf keep it firmly in October instead of just old.
🖼️ Portraits vs prints
| Thrifted portraits | Real age, real patina, one of a kind |
| Repro prints | Cheap, matching sets, zero hunting |
Mix both: real frames around repro faces look convincingly old in candlelight.
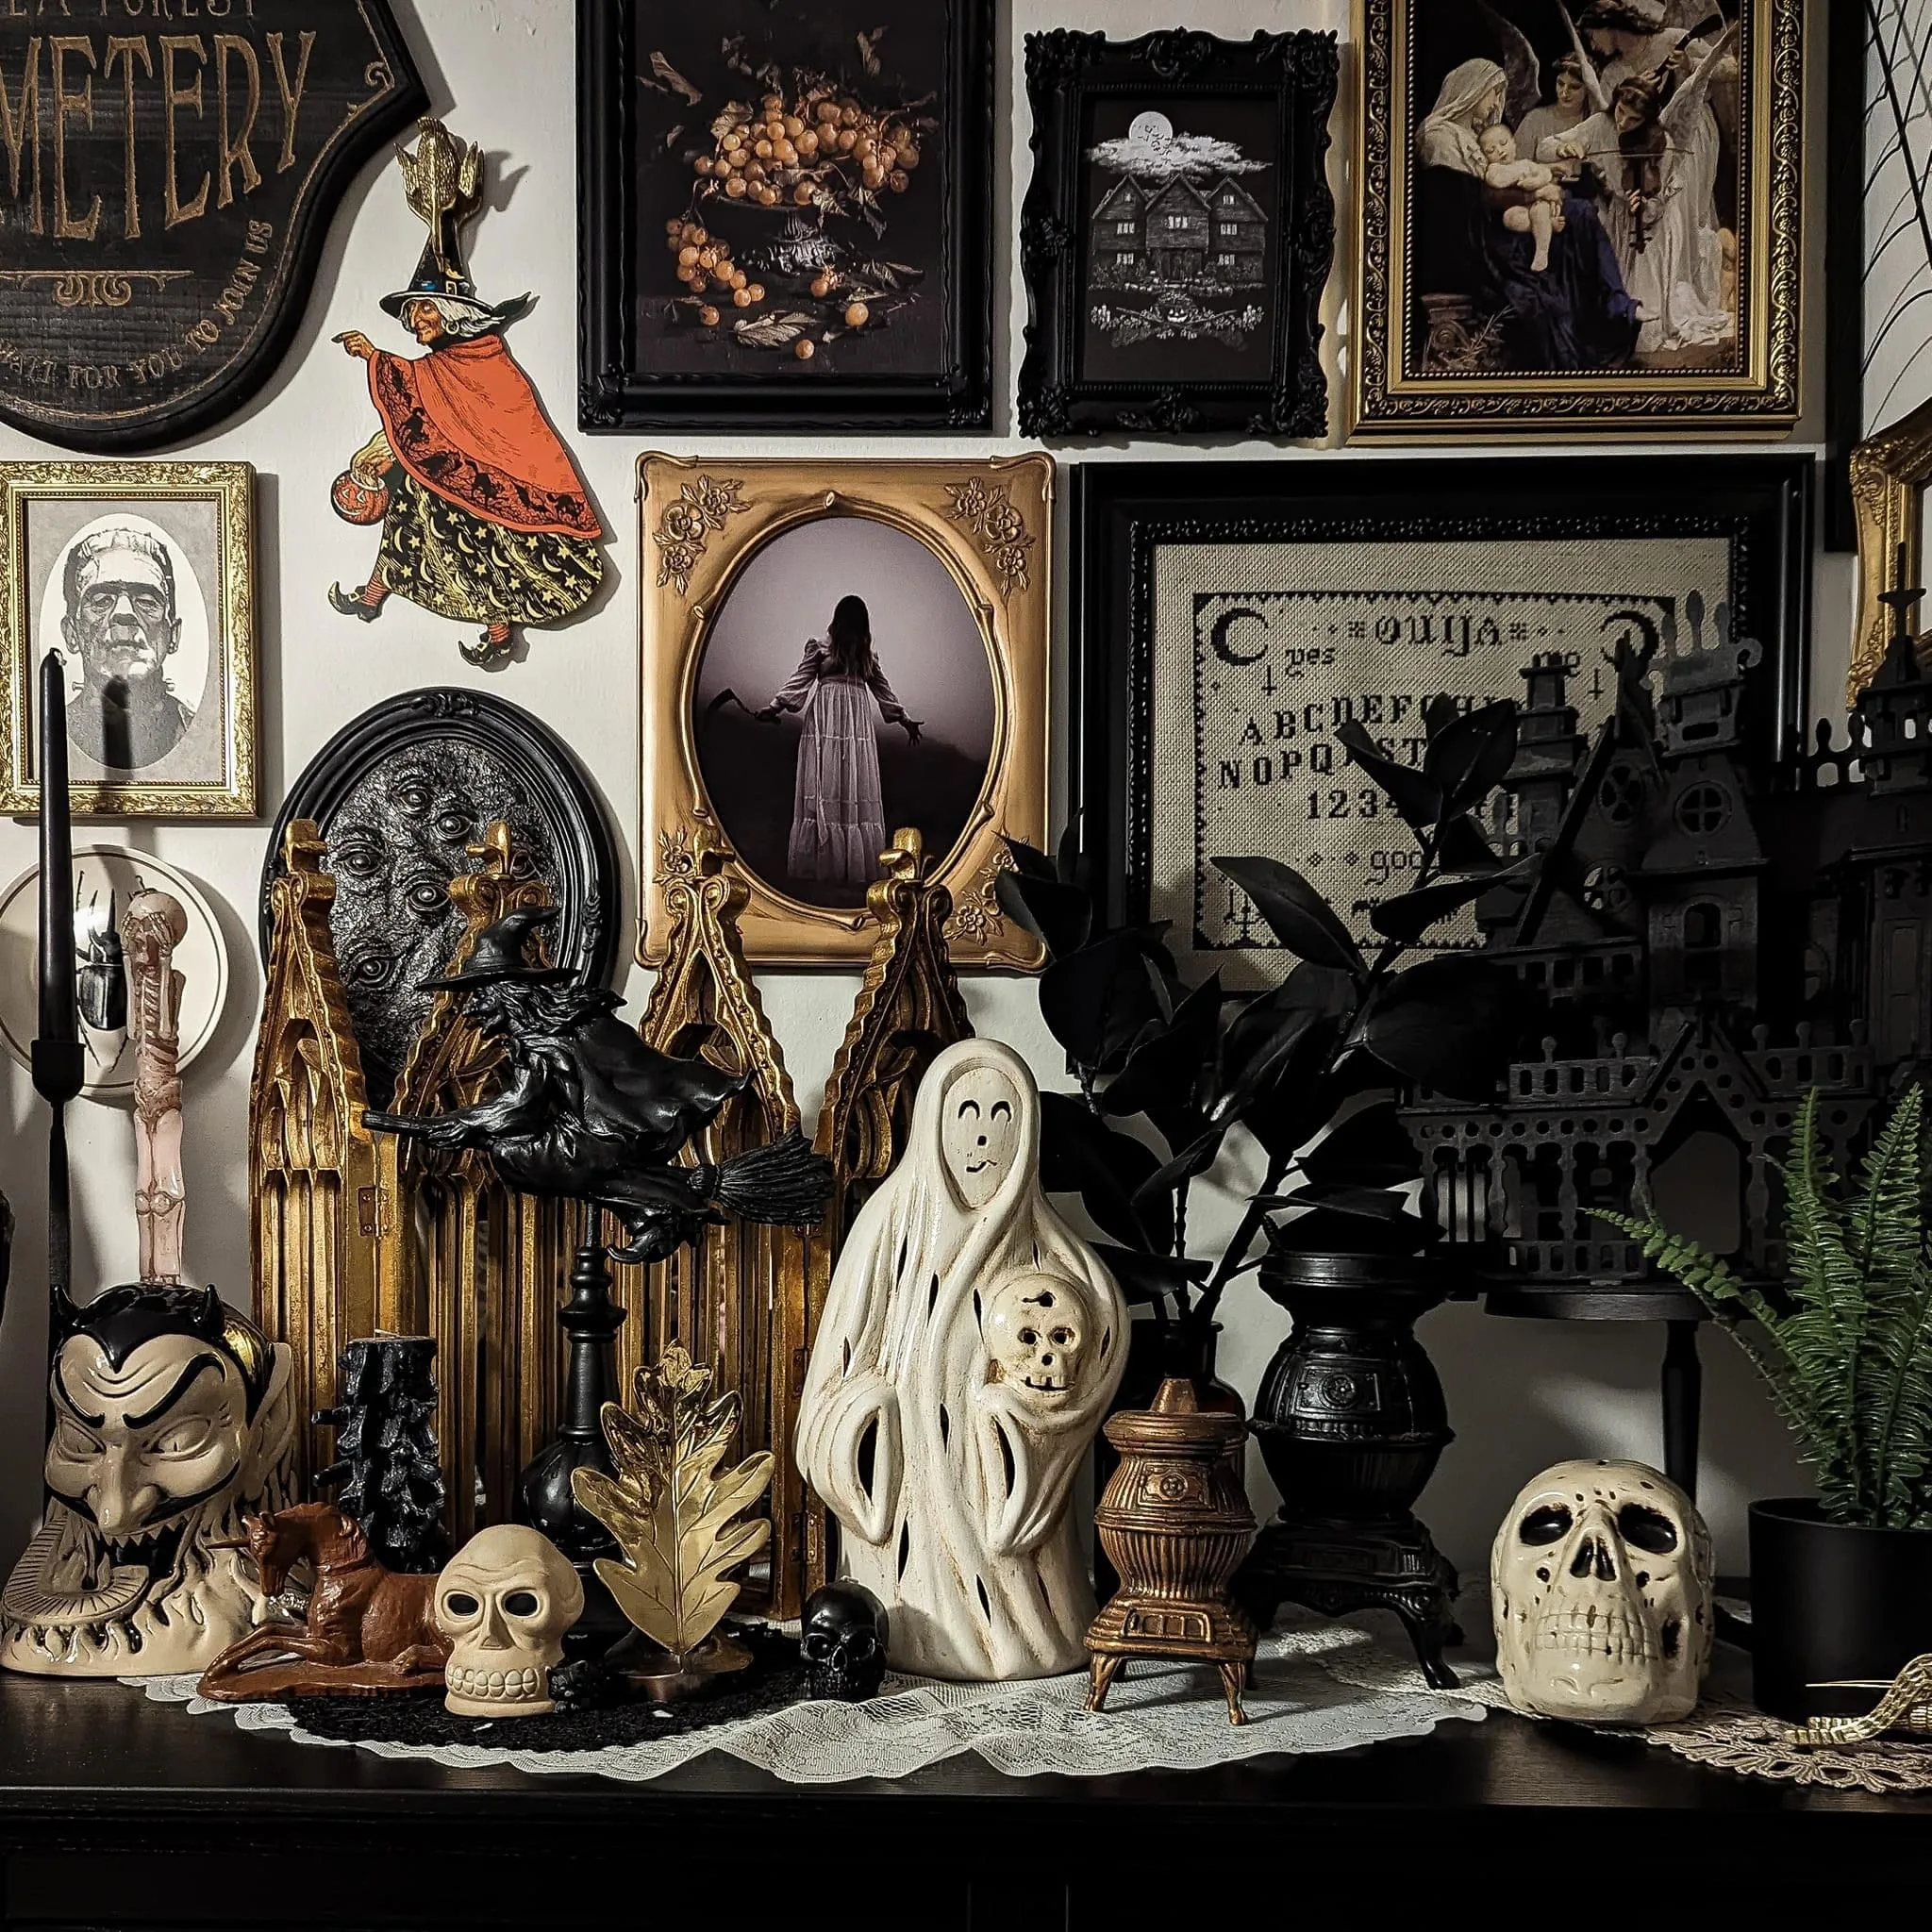
16. Hang a Spooky Gallery Wall of Vintage Prints
A gallery wall is the fastest way to make a room feel collected over decades. This one mixes witch illustrations, a cemetery sign, oval portraits, and bat silhouettes in dark frames, with skulls and candlesticks on the shelf below. Every piece whispers instead of shouts.
The frames matter as much as the art. Stick to black, dark wood, and aged gold, and vary the sizes so the wall feels grown rather than planned. Start with the biggest piece slightly off-center, then fill outward like a puzzle.
Gallery wall kit:
🖼️ Gallery wall checklist
- One large anchor print, hung slightly off-center
- Dark frames only: black, dark wood, aged gold
- Mix art types: witches, portraits, signs, silhouettes
- Skulls and candlesticks on the shelf below
- Two-inch gaps between frames for a collected feel
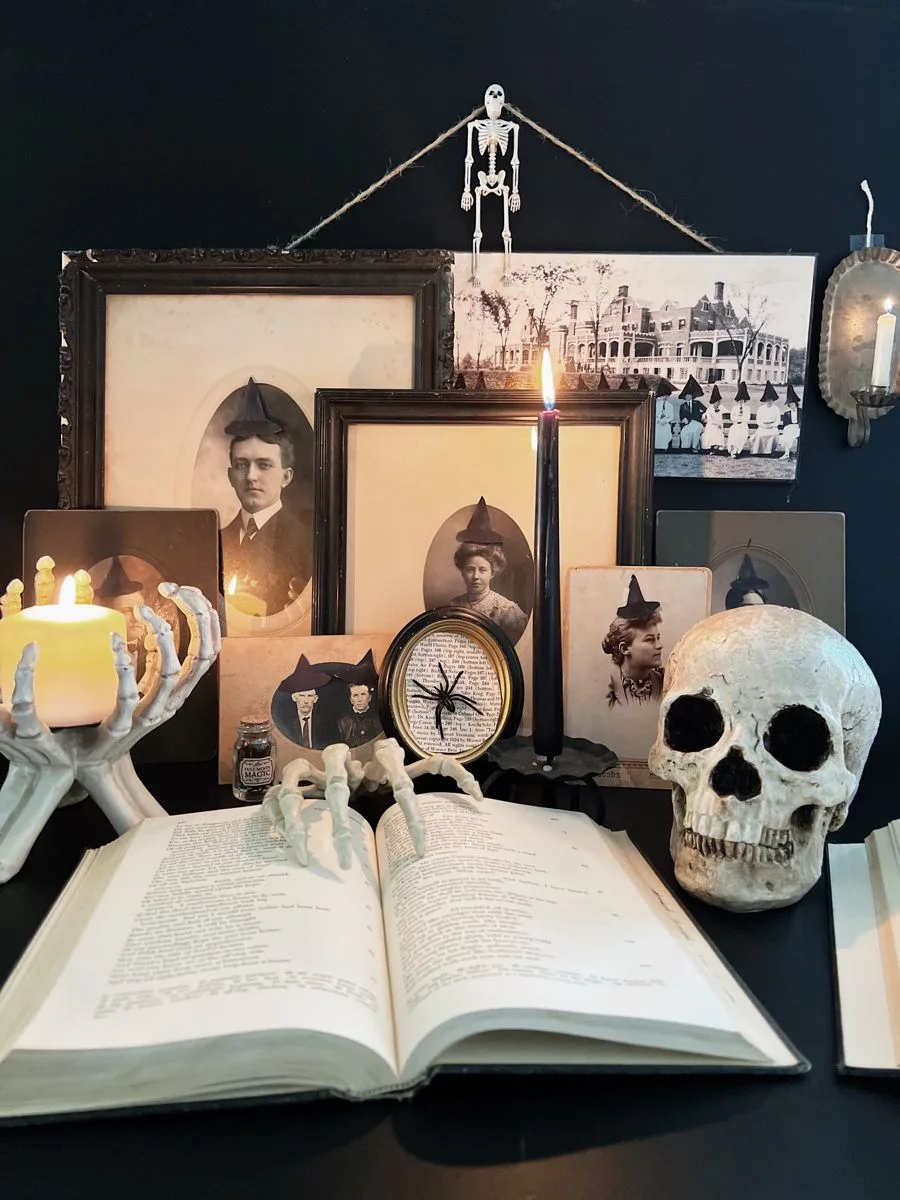
17. Style a Haunted Study Vignette With a Skull and Old Books
Every old house has one corner that looks like a scholar left mid-spell, and Halloween is the excuse to build it on purpose. This desk holds an open book, a skull, a skeleton hand gripping a candle, and framed vintage photos, all in near darkness. It is small, but it tells a whole story.
The open book is the anchor. Choose a thick old volume, open it to the middle, and build everything else around it at different heights. One real flame, the candle in the skeleton hand, gives the whole vignette its pulse. Everything else just needs to be old-looking and close together.
📖 Anchor
One thick old book, opened to the middle.
💀 Story
Skull, framed photos, and odd objects crowded close.
🕯️ Pulse
One real flame for moving light and shadows.
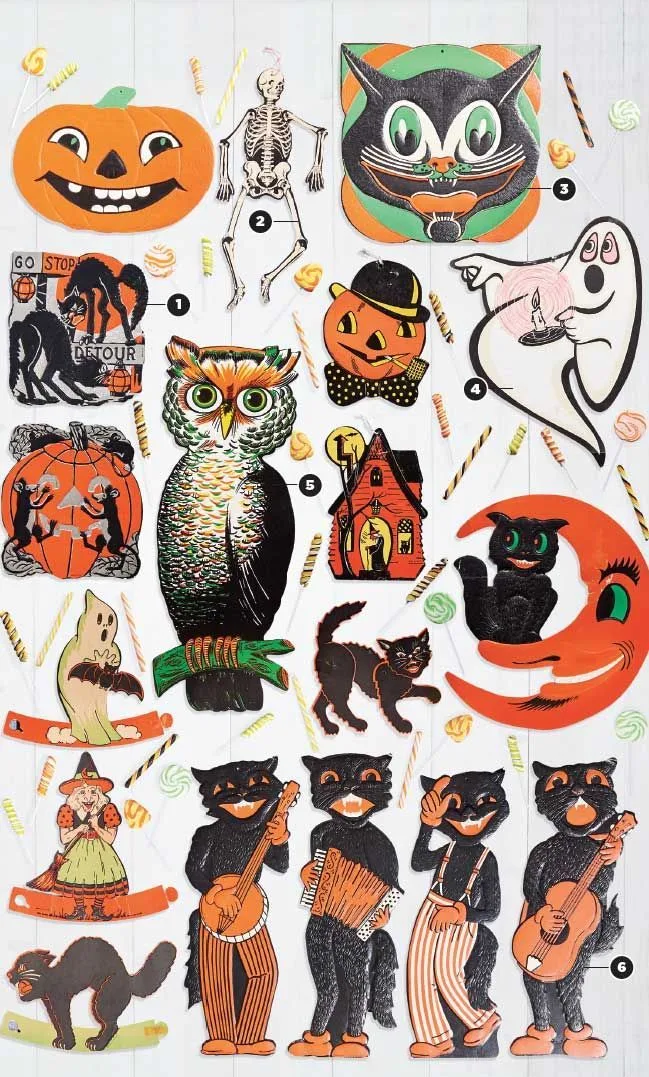
18. Frame Vintage Halloween Die-Cut Sheets as Art
Before you punch out a single shape, stop and frame the sheet. Vintage-style die-cut sheets, with their rows of owls, cats, pumpkins, and moons, are graphic art in their own right. Behind glass they look like a page from a 1950s scrapbook, preserved.
This is the best use for reproductions. Buy two sheets: frame one whole, and punch the other for the table, the windows, and the treat bags. The framed sheet becomes the art, the punched shapes become the party, and nobody has to choose.
Framing notes:
🖼️ Sheet framing notes
- ▸ Float-mount on dark backing so the shapes pop
- ▸ Simple black frame, nothing ornate, the art is busy enough
- ▸ Hang at eye level in a hallway for a gallery moment
- ▸ Buy two sheets: one to frame, one to punch and scatter
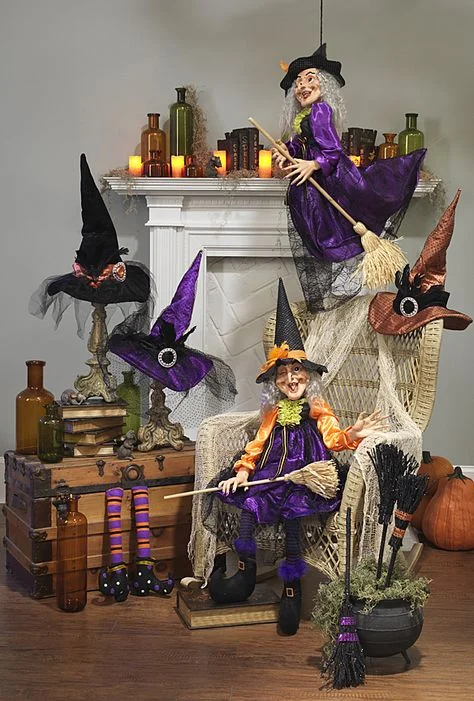
19. Stage Vintage Witch Figures by the Fireplace
Vintage witch figures have a theatrical streak that modern ones lost. These are posed mid-scene by a white fireplace, one perched above the mantel, one seated below with a cauldron and broom, striped stockings and all. It looks like a stage set, and that is exactly the charm.
Pose them like actors, not statues. Give each witch a job: one flying, one stirring, one watching. The fireplace gives you natural levels, mantel top, hearth, floor, so the scene builds itself upward. A few pumpkins at the base ground the whole production.
Stage it, do not just set it:
✅ Do this
Pose each witch with a role and use the mantel, hearth, and floor as three stage levels. Scenes beat shelves.
❌ Skip this
Lining the witches up in a straight row on the mantel. Soldiers are for Christmas nutcrackers, not Halloween witches.
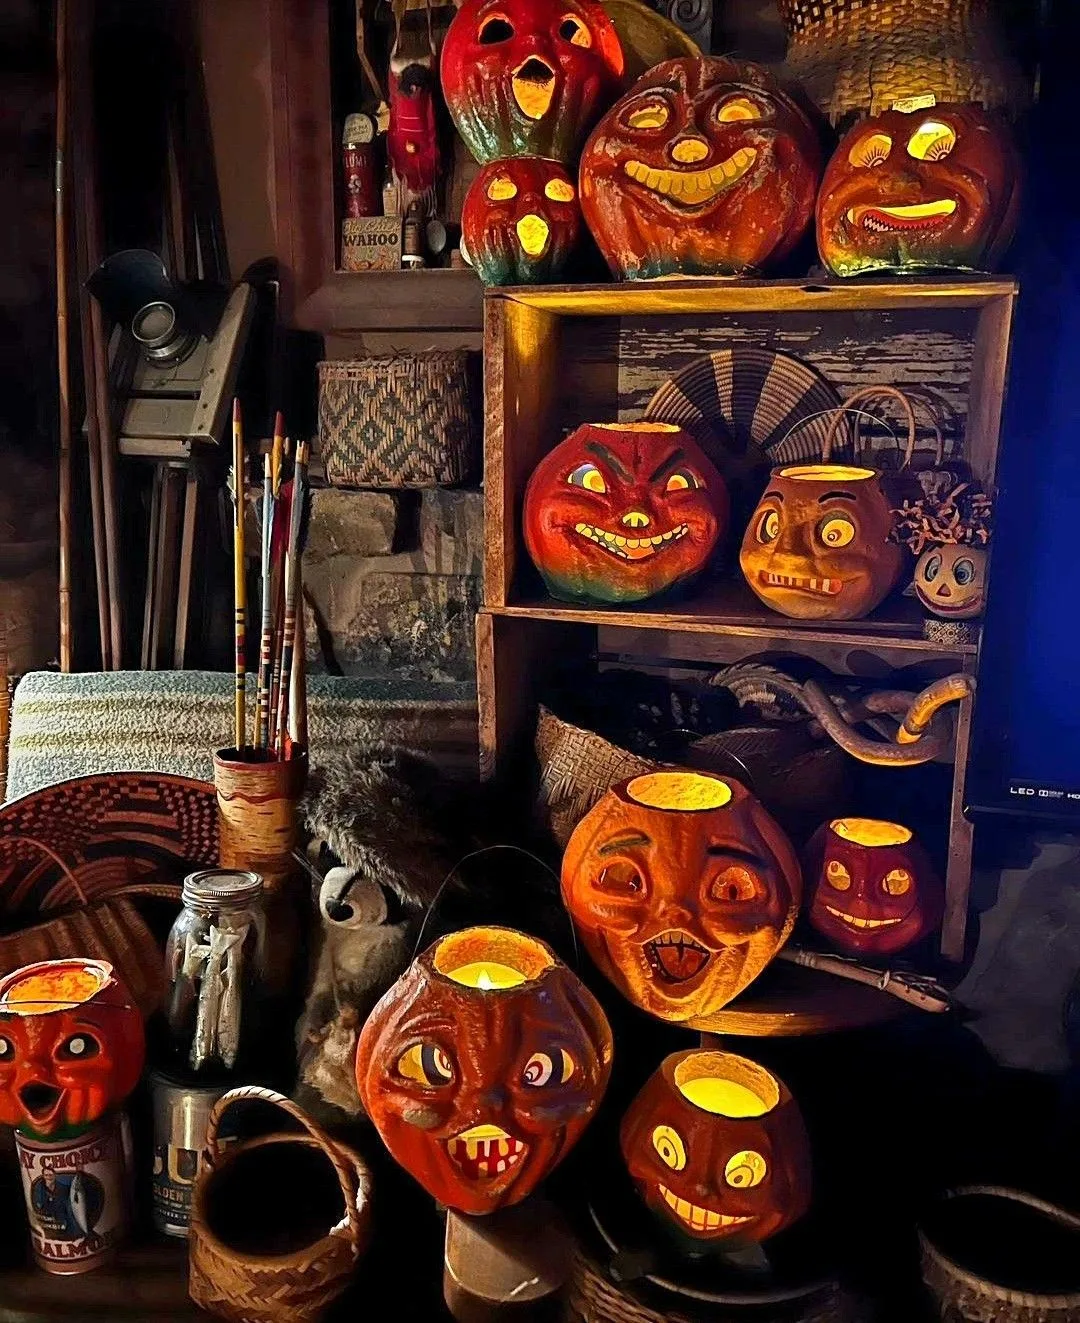
20. Let Paper-Mache Pumpkins Glow After Dark
Paper-mache pumpkins are the glow that built vintage Halloween. These shelves of lit jack-o-lanterns, photographed at night, show why: the paper softens the light into a warm orange haze that no plastic pumpkin has ever matched.
Cluster them for maximum effect. One glowing pumpkin is a nightlight; a dozen on stepped shelves is a landmark. Use warm battery candles inside, never real flames near paper, and switch them all on at dusk. From the street, your windows will look like 1968.
💡 Quick Tip
Warm-white battery candles, not cool white. Cool light turns paper-mache ghostly blue; warm light gives the honeyed orange glow that made these famous.
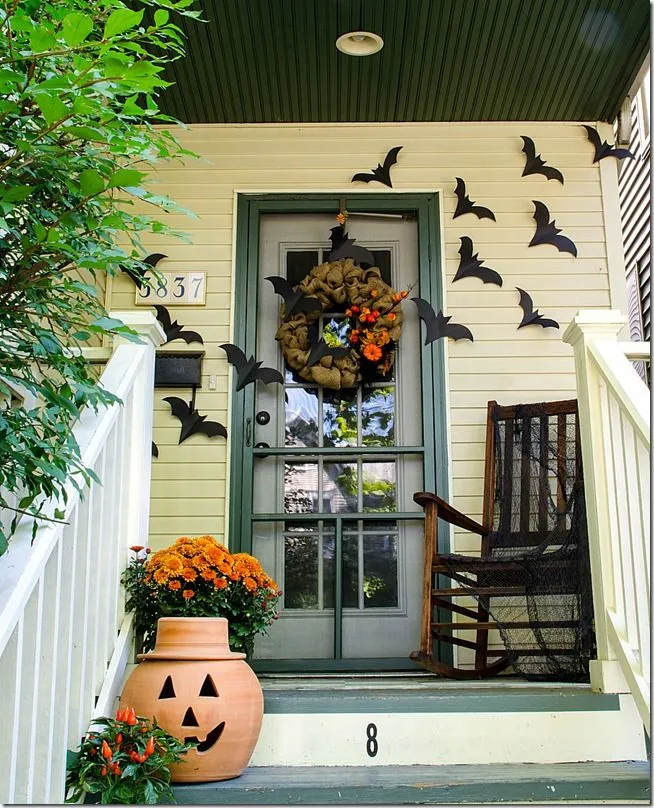
21. Hang Paper Bats Flying Up the Porch Wall
Paper bats are the cheapest porch transformation in Halloween. These fly up the wall toward the front door in a loose swarm, past a wreath and a jack-o-lantern planter, and the whole porch suddenly has motion. Guests will photograph the door before they knock.
The swarm needs a direction. Start the bats low and scattered near the steps, then tighten and lift them as they rise toward the door, like they are all heading somewhere. Vary the sizes, big bats up high, small ones down low, for real depth.
Swarm the porch in order:
🦇 Bat swarm steps
- 1Cut bats in three sizes from black cardstock
- 2Start low near the steps, bats far apart
- 3Tighten and lift toward the door as they rise
- 4Stick with removable putty, never nails
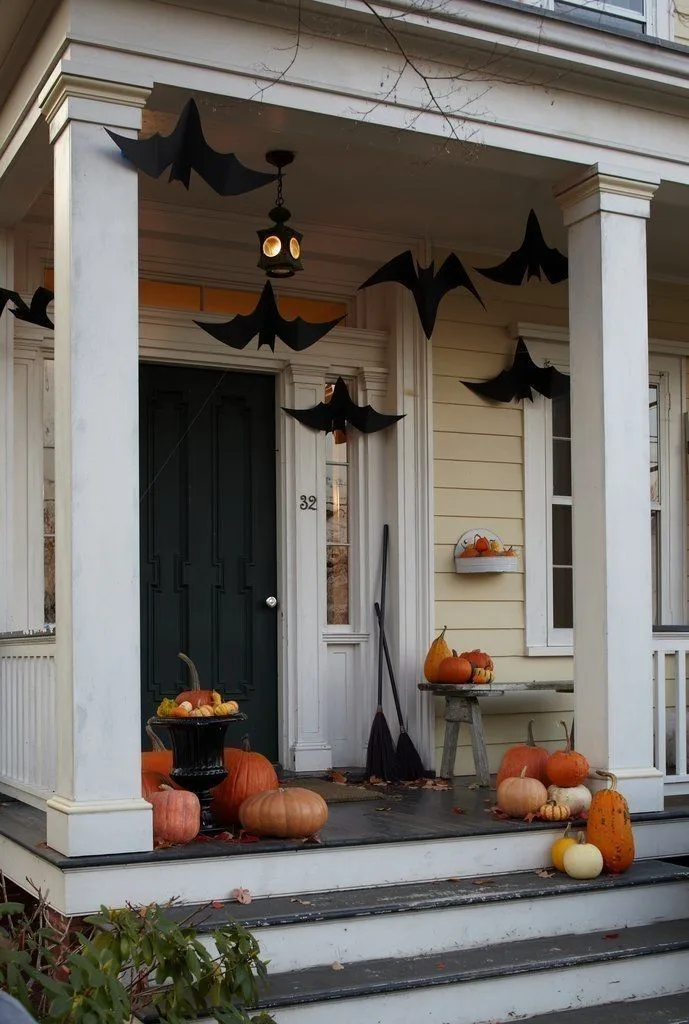
22. Build a Vintage Porch With Brooms, Bats, and Pumpkins
The vintage porch is a recipe, and this one follows it perfectly. Bats hang from the porch roof, pumpkins line the steps, a rocking chair waits by the door, and a broom leans against the wall like the witch just stepped inside. Every piece is ordinary; together they are October.
The broom is the detail most people skip, and it is the one that sells the story. A plain straw broom by the door says someone lives here, and that someone might be a witch. Add the rocking chair and the porch stops being a display and starts being a place.
Overhead
Hanging bats from the porch roof for motion
Steps
Pumpkins in mixed sizes climbing each step
Door
Rocking chair and a straw broom for the story
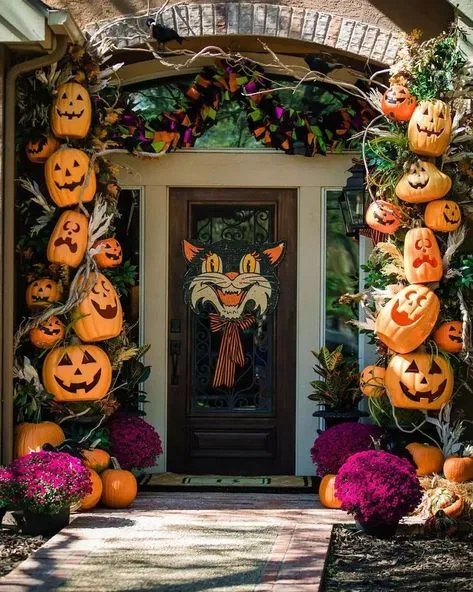
23. Arch Vintage Pumpkins Over the Front Door
End with the grandest gesture: a doorway framed in pumpkins. These tall columns of stacked vintage-style jack-o-lanterns rise on both sides of the door, with a grinning cat face over the top. It is the kind of entrance neighbors slow down to stare at.
Columns need a frame to hold the stack. Use two tall planters or wooden boxes as the base, then stack pumpkins inside them so the container carries the weight. Alternate faces as you go up, and top each column with the smallest, happiest pumpkin you have.
Pumpkin column checklist:
🎃 Pumpkin column checklist
- Tall planter or box as the hidden frame
- Biggest pumpkin on the bottom for stability
- Alternate faces going up for variety
- Smallest, happiest face on top
- Museum putty between layers against the wind
Final Thoughts
Vintage Halloween decor works because it is honest. Paper, paint, and candlelight age beautifully, while plastic fades. A hutch of painted pumpkins or a porch strung with paper bats will still charm you in ten years, which is more than you can say for most holiday decor.
Start with one shelf and one era, then let the collection grow year by year. Flea markets, estate sales, and good reproductions will fill the gaps. October has looked good in orange and black for a century. Keep the tradition going.
📌 Save this list for later
Pin it to your Halloween board on Pinterest so every vintage idea is waiting when the decorating boxes come out.